
How to Setup RSS.com Podcast Automation on Nuelink
Connect your RSS.com podcast to Nuelink, and every new episode can be turned into social media posts automatically. This guide shows you how to set it up so your podcast reaches your followers the moment it goes live. It takes about 3 minutes.
Note: To follow this guide, you'll need a Nuelink account, at least one connected social channel, and your RSS.com podcast link ready.
Table of Contents
Video Tutorial
Step-by-Step Guide
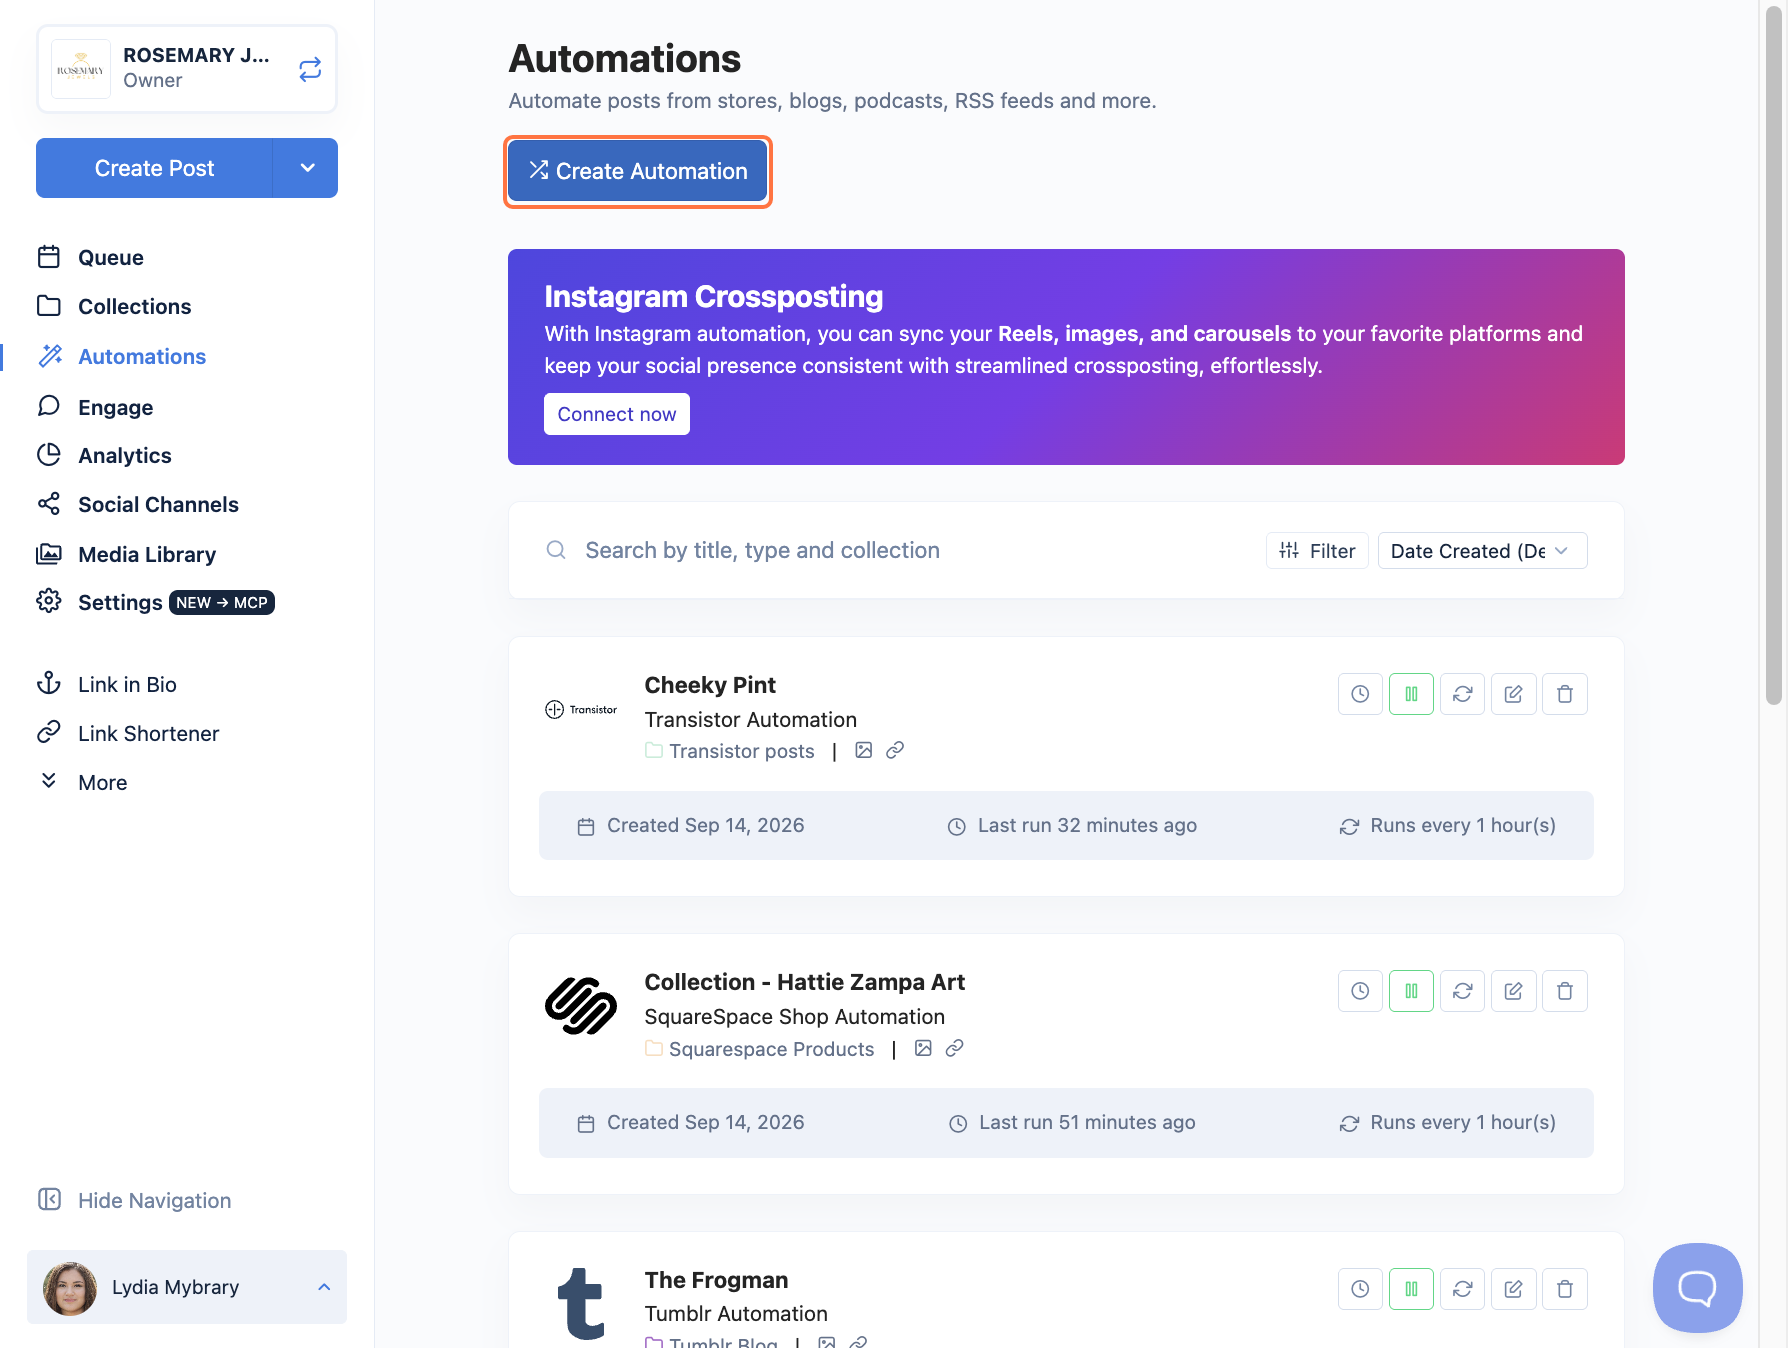
- Go to Automations in the left sidebar. Click Create Automation.
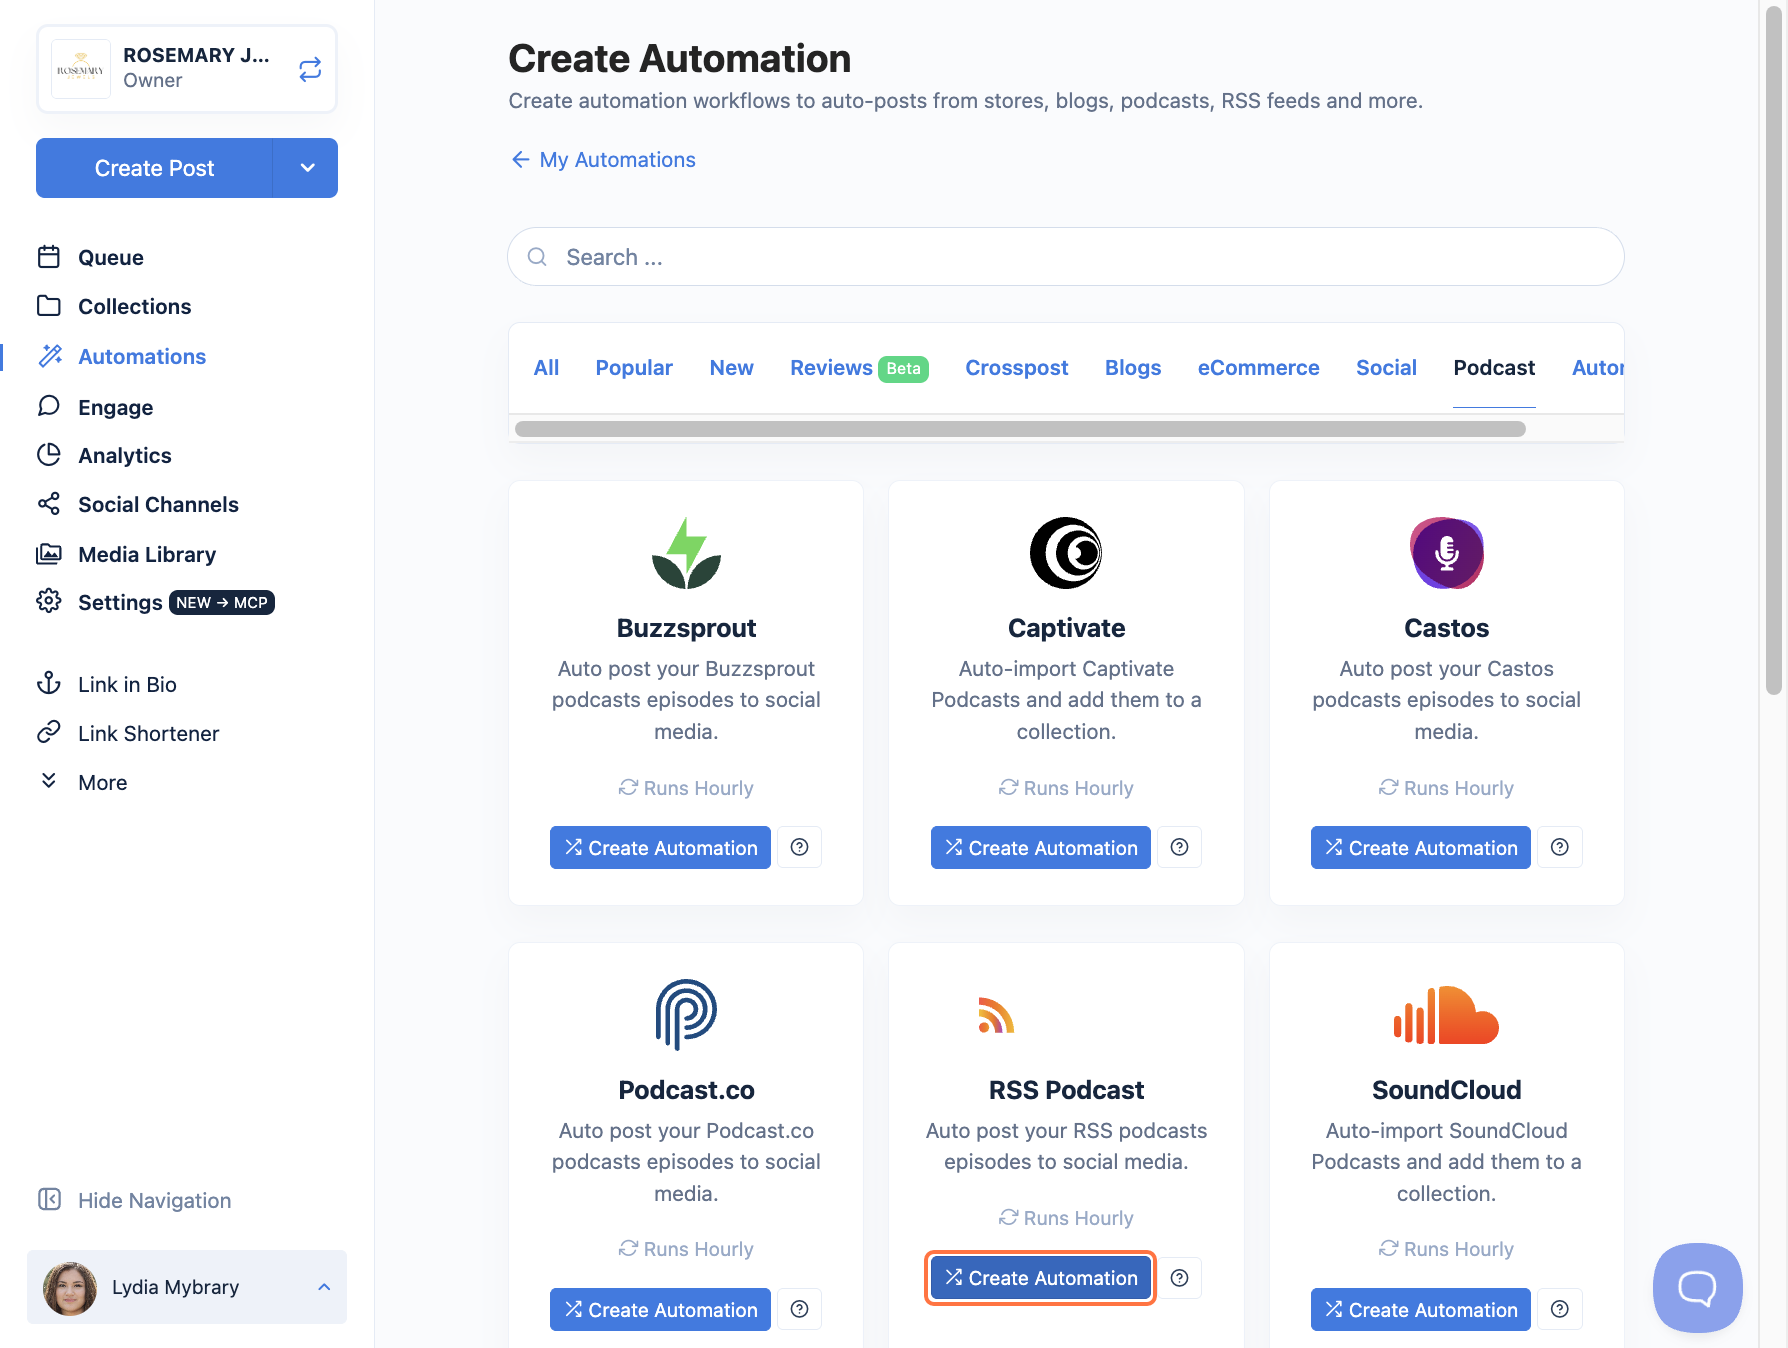
- Find RSS.com in the list of content sources. It's under the Podcasts category. You can also use the search box to find it faster.
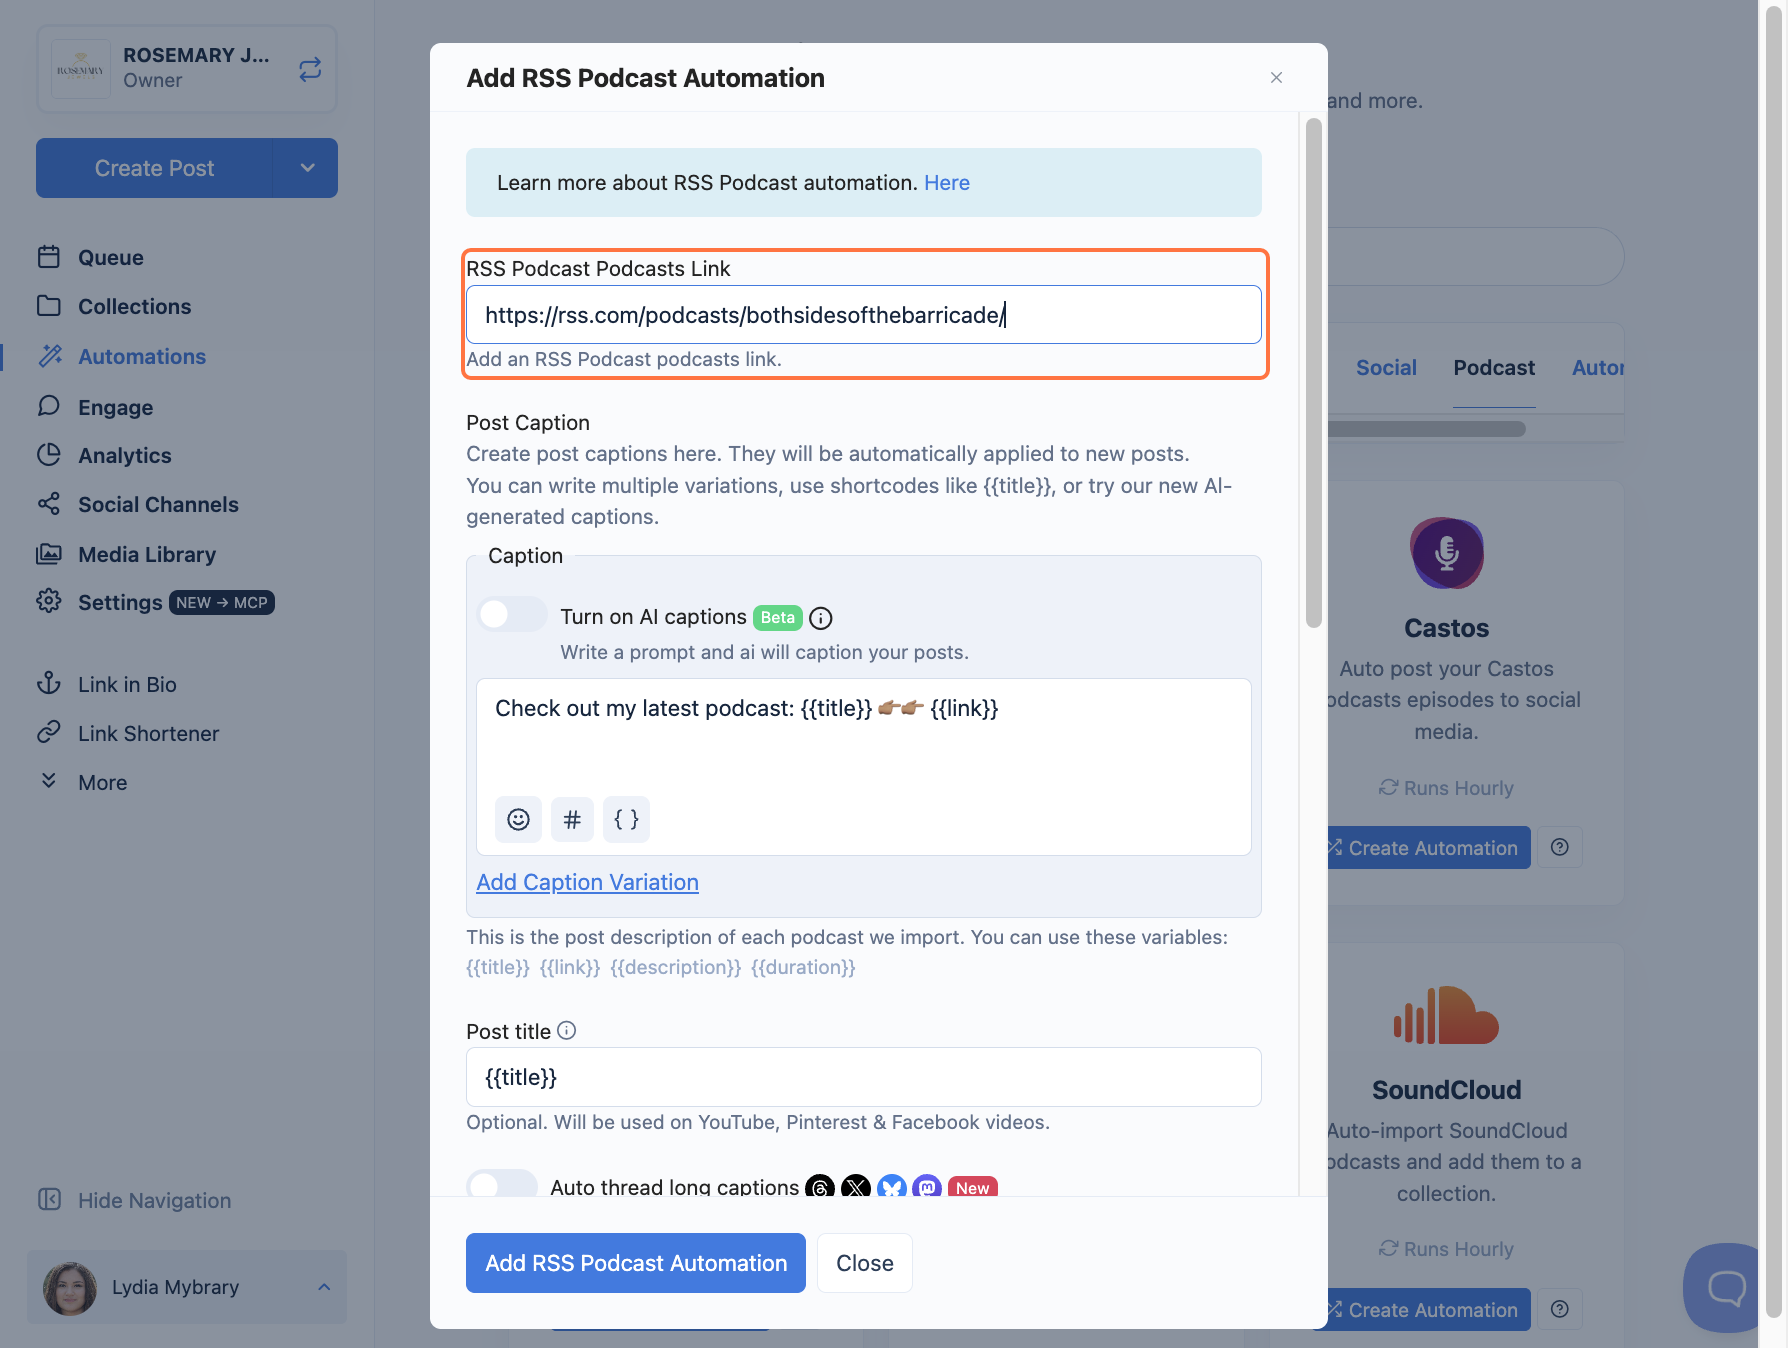
- Paste your podcast link into the RSS.com Podcast Link box.
-
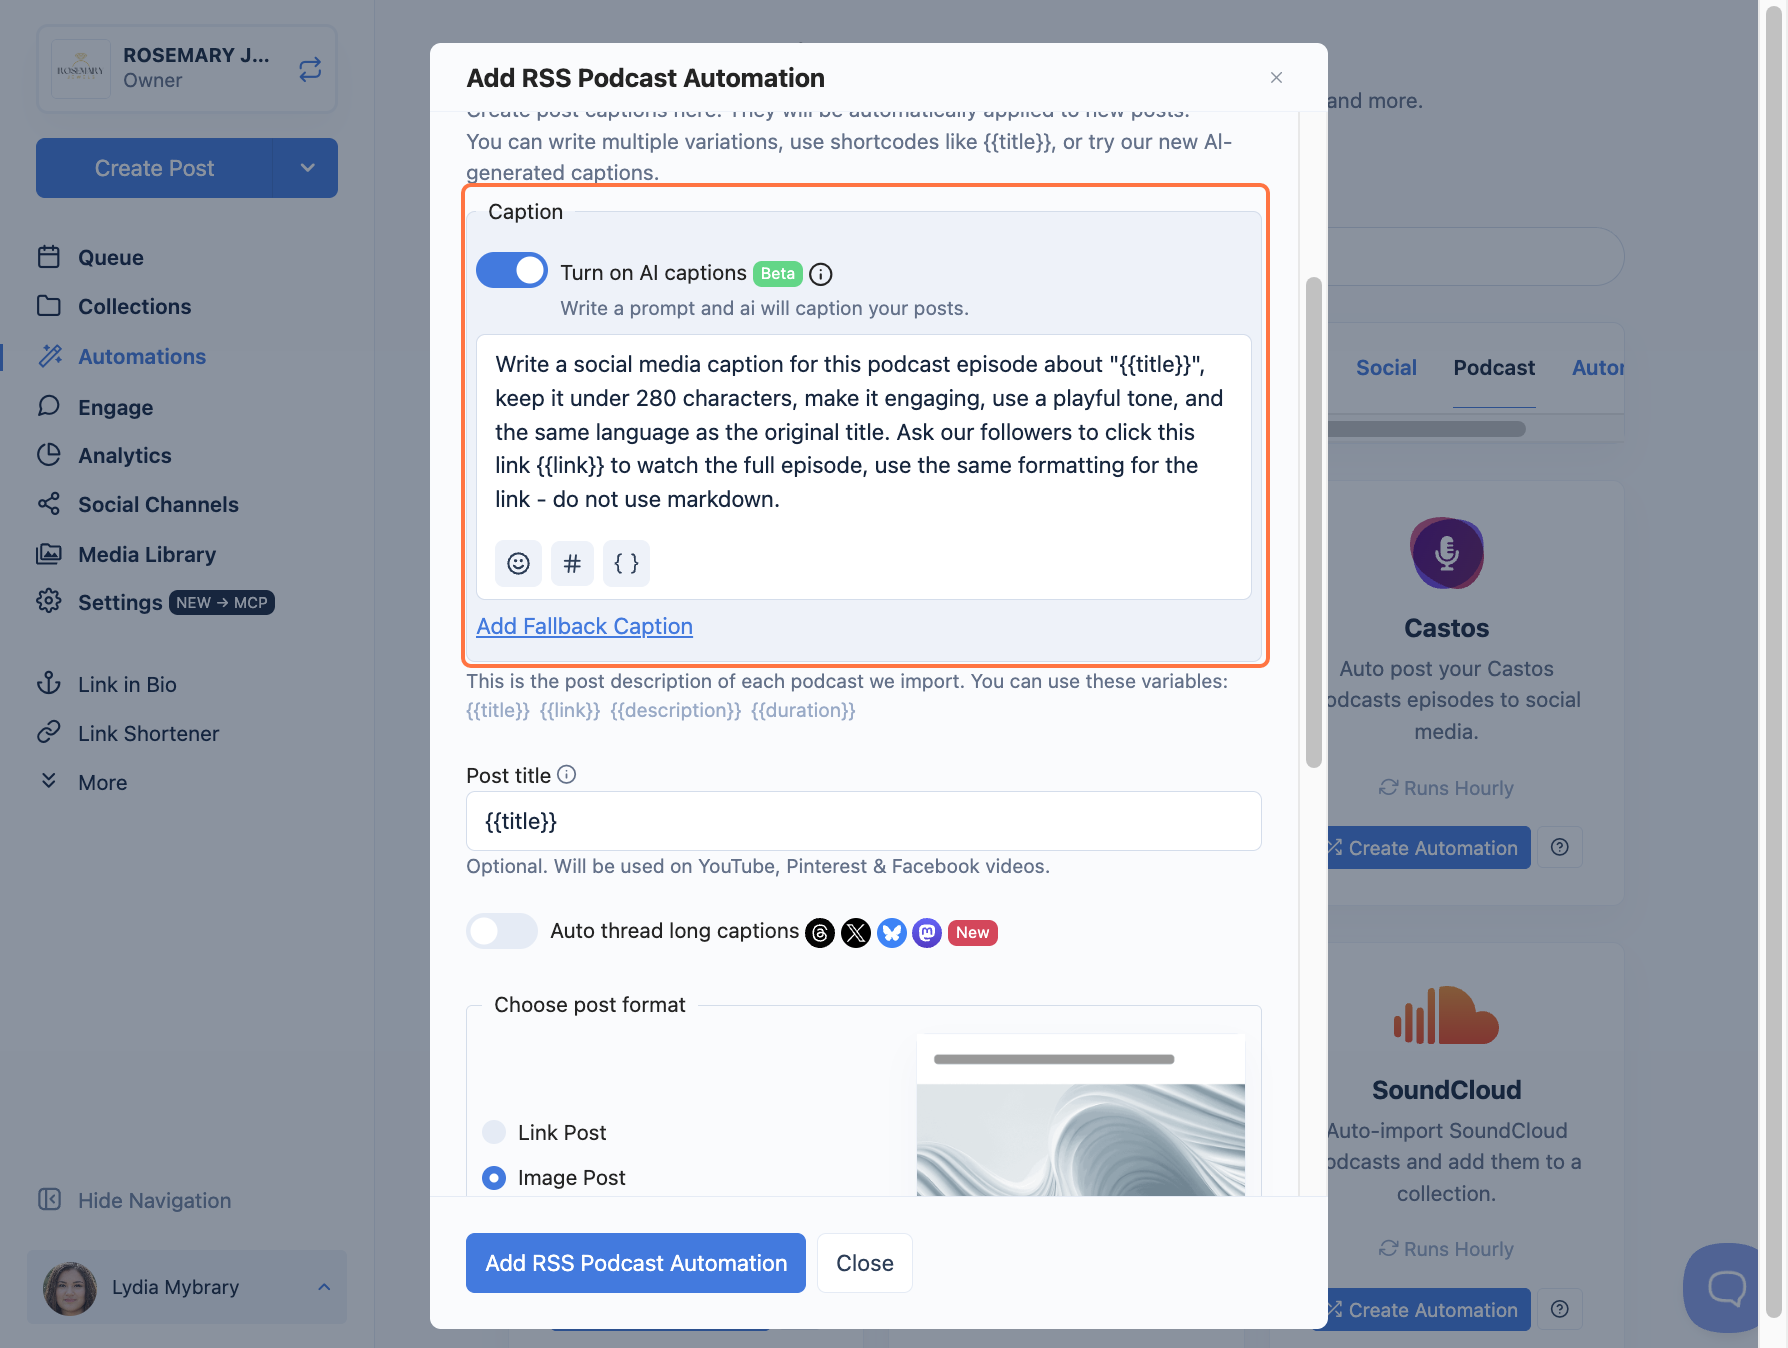
Set up your Post Caption. Write your own caption, or turn on AI captions to let Nuelink write it for you. You can edit the AI prompt to match your show's tone, voice, and audience.
💡 You can insert variables like {{title}}, {{link}}, {{website}}, {{website_title}}, {{website_description}}, and {{author}} into your caption. Add a Fallback Caption to cover posts where a variable is empty.
- (Optional) Add a Post title. This is used on YouTube, Pinterest, and Facebook videos.
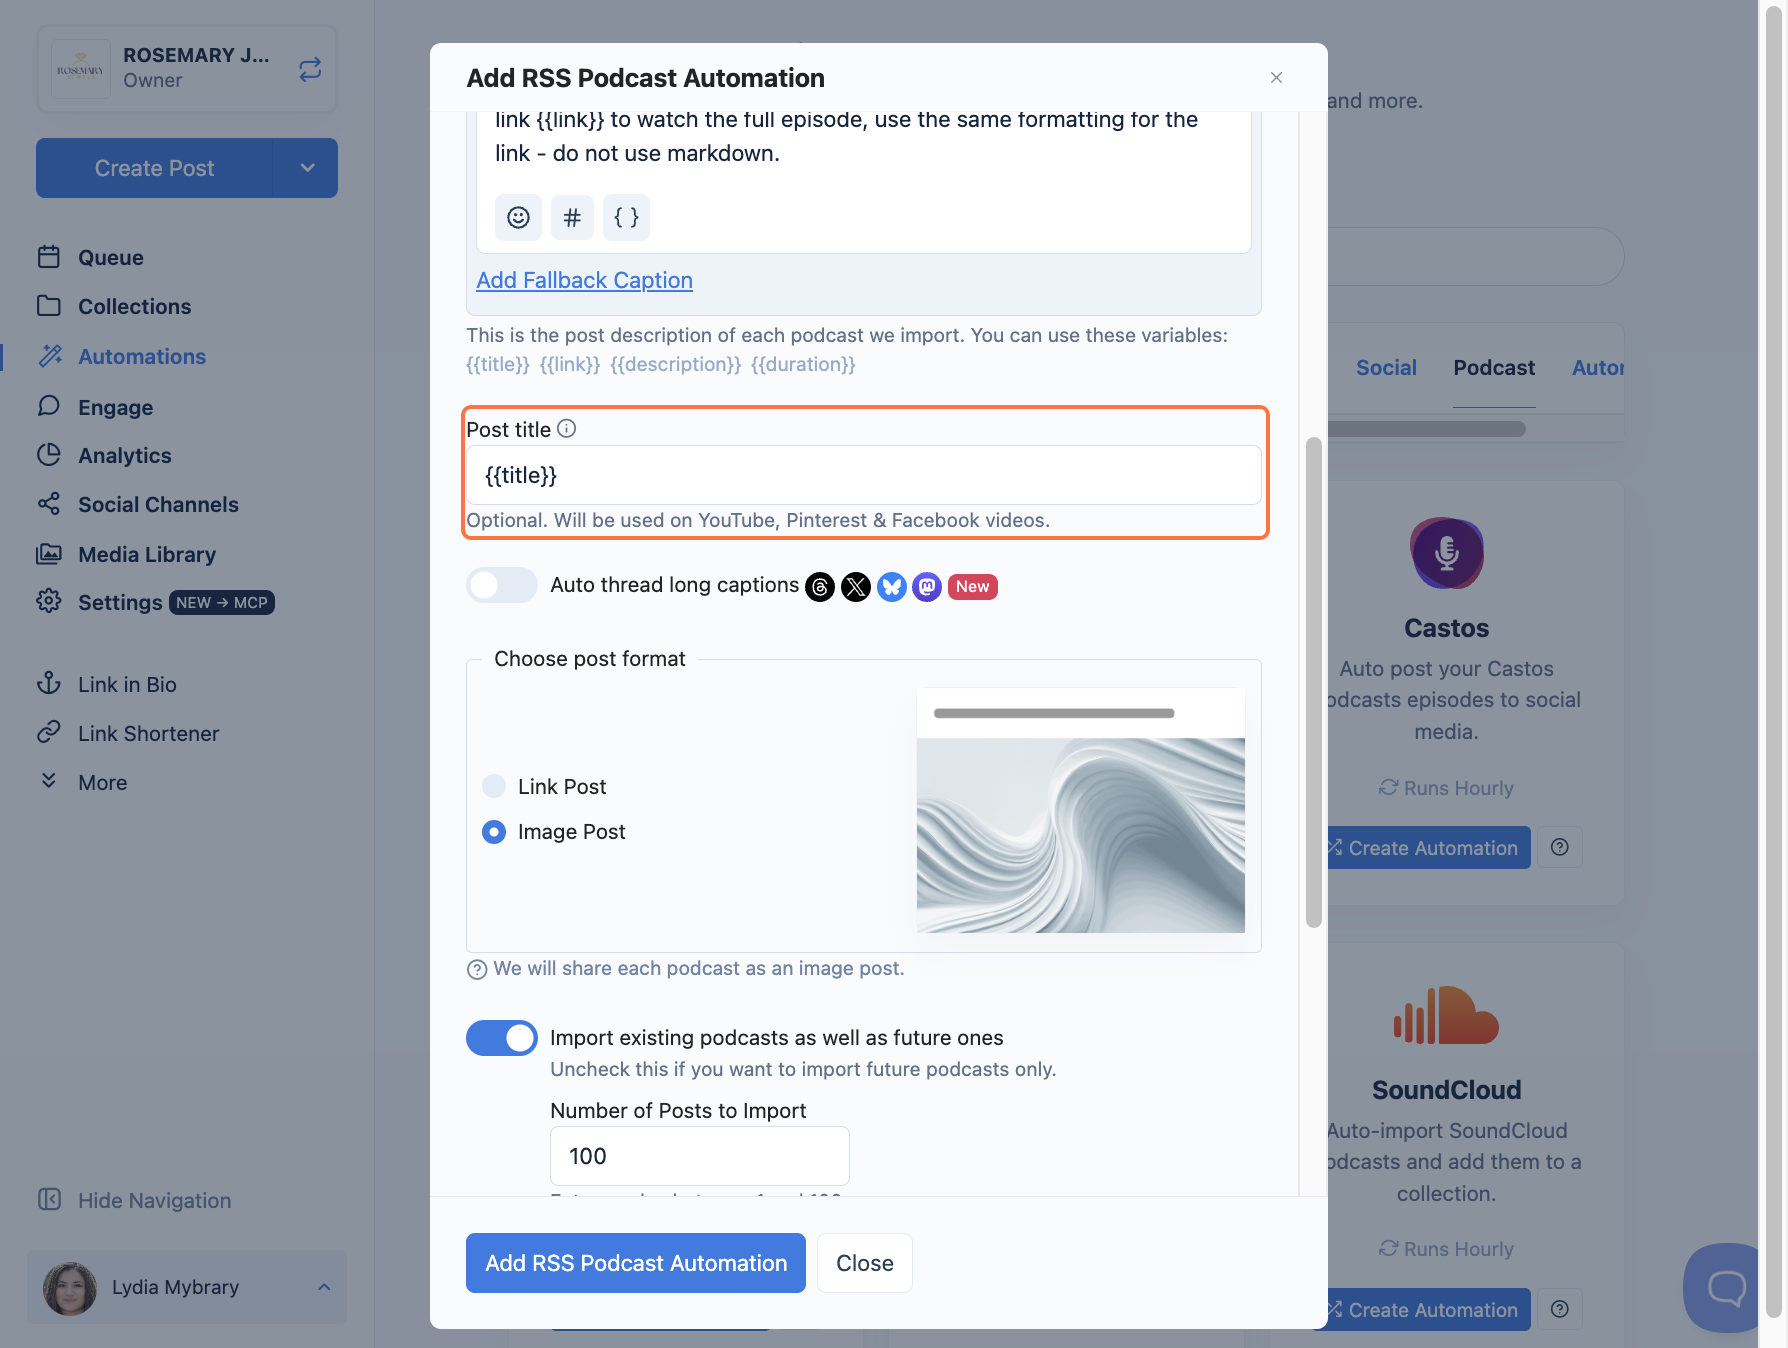
- Choose your post format. Pick a Link Post to share the episode link, or an Image Post to share it as a picture.
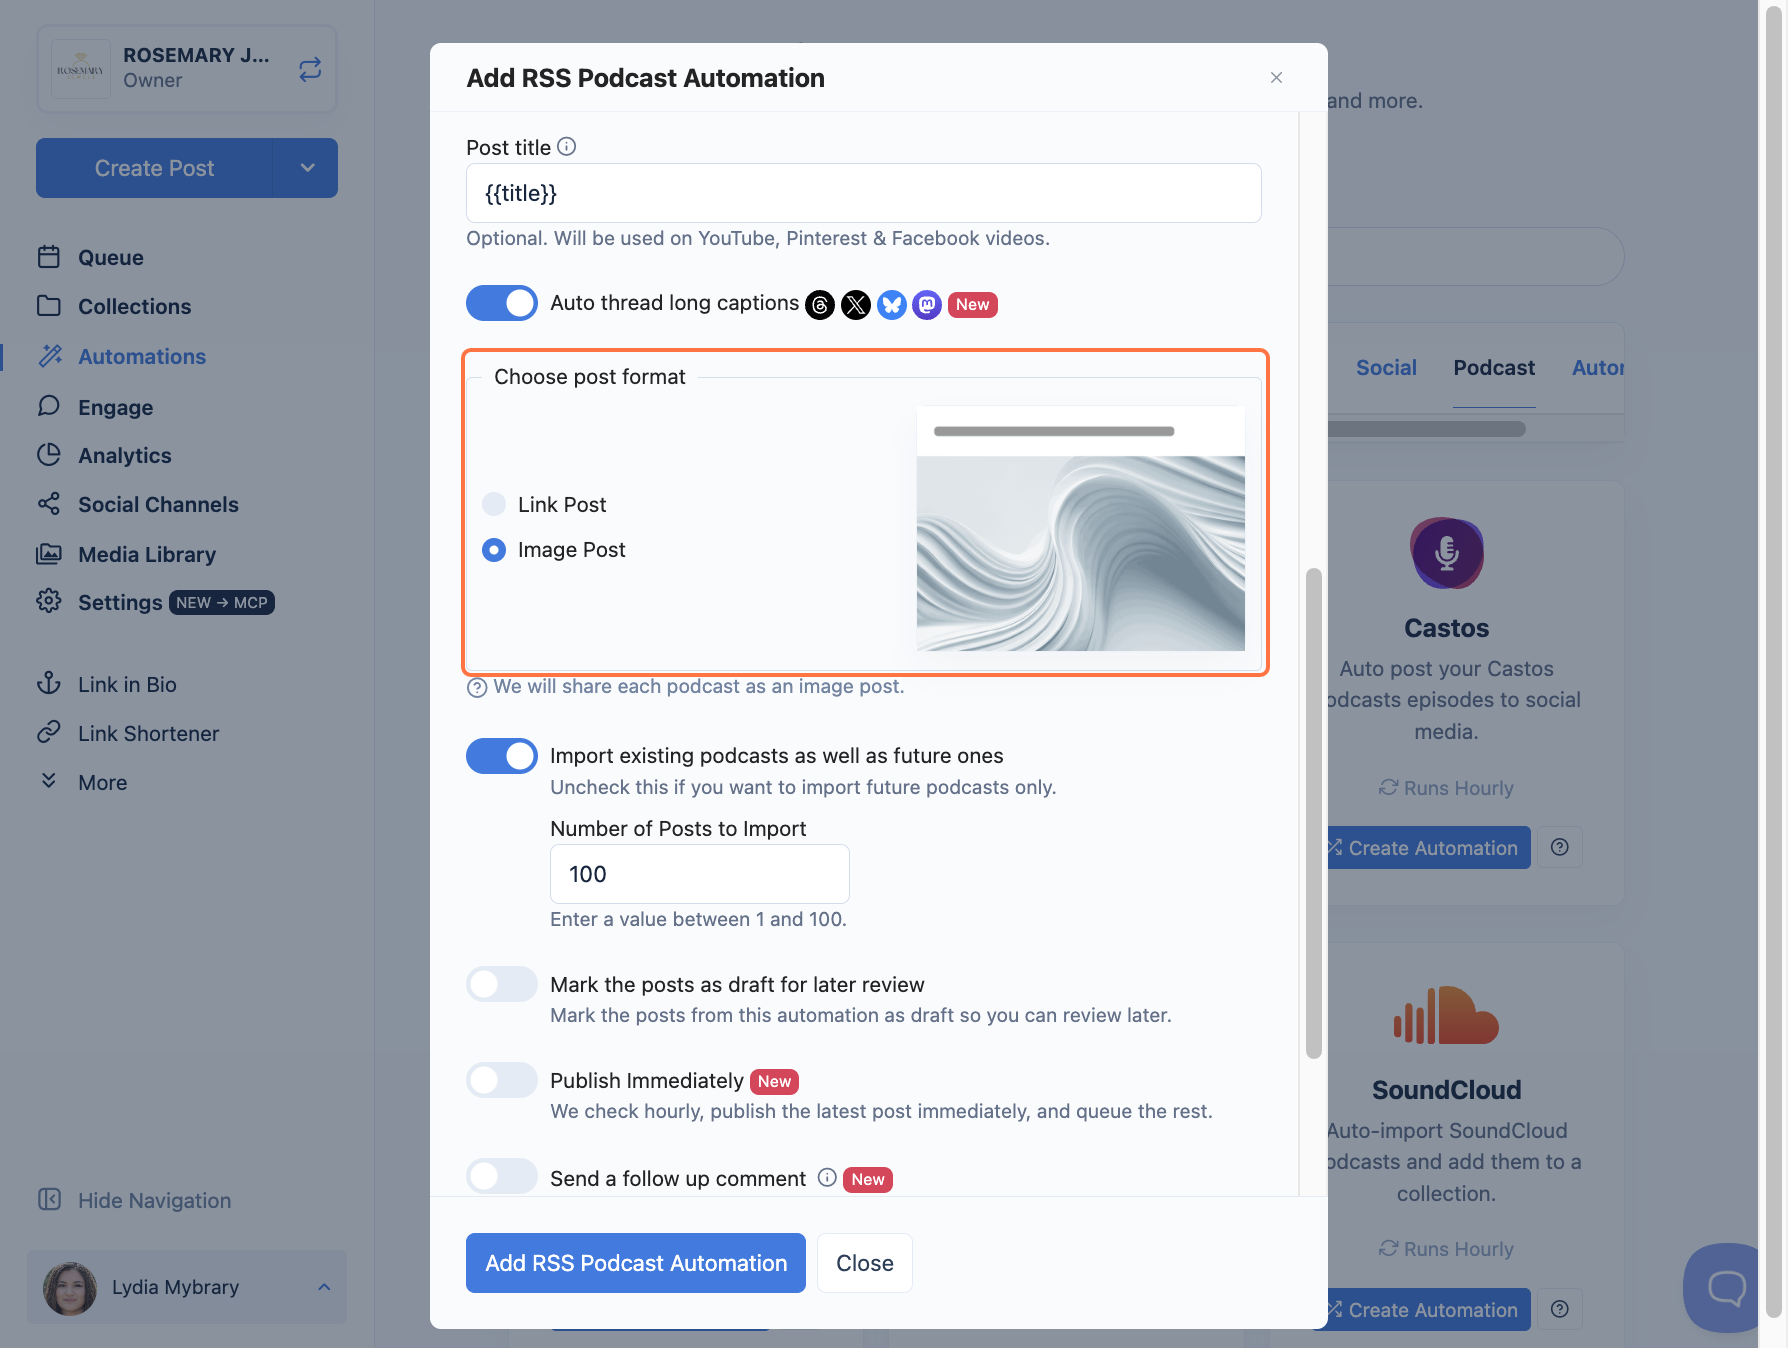
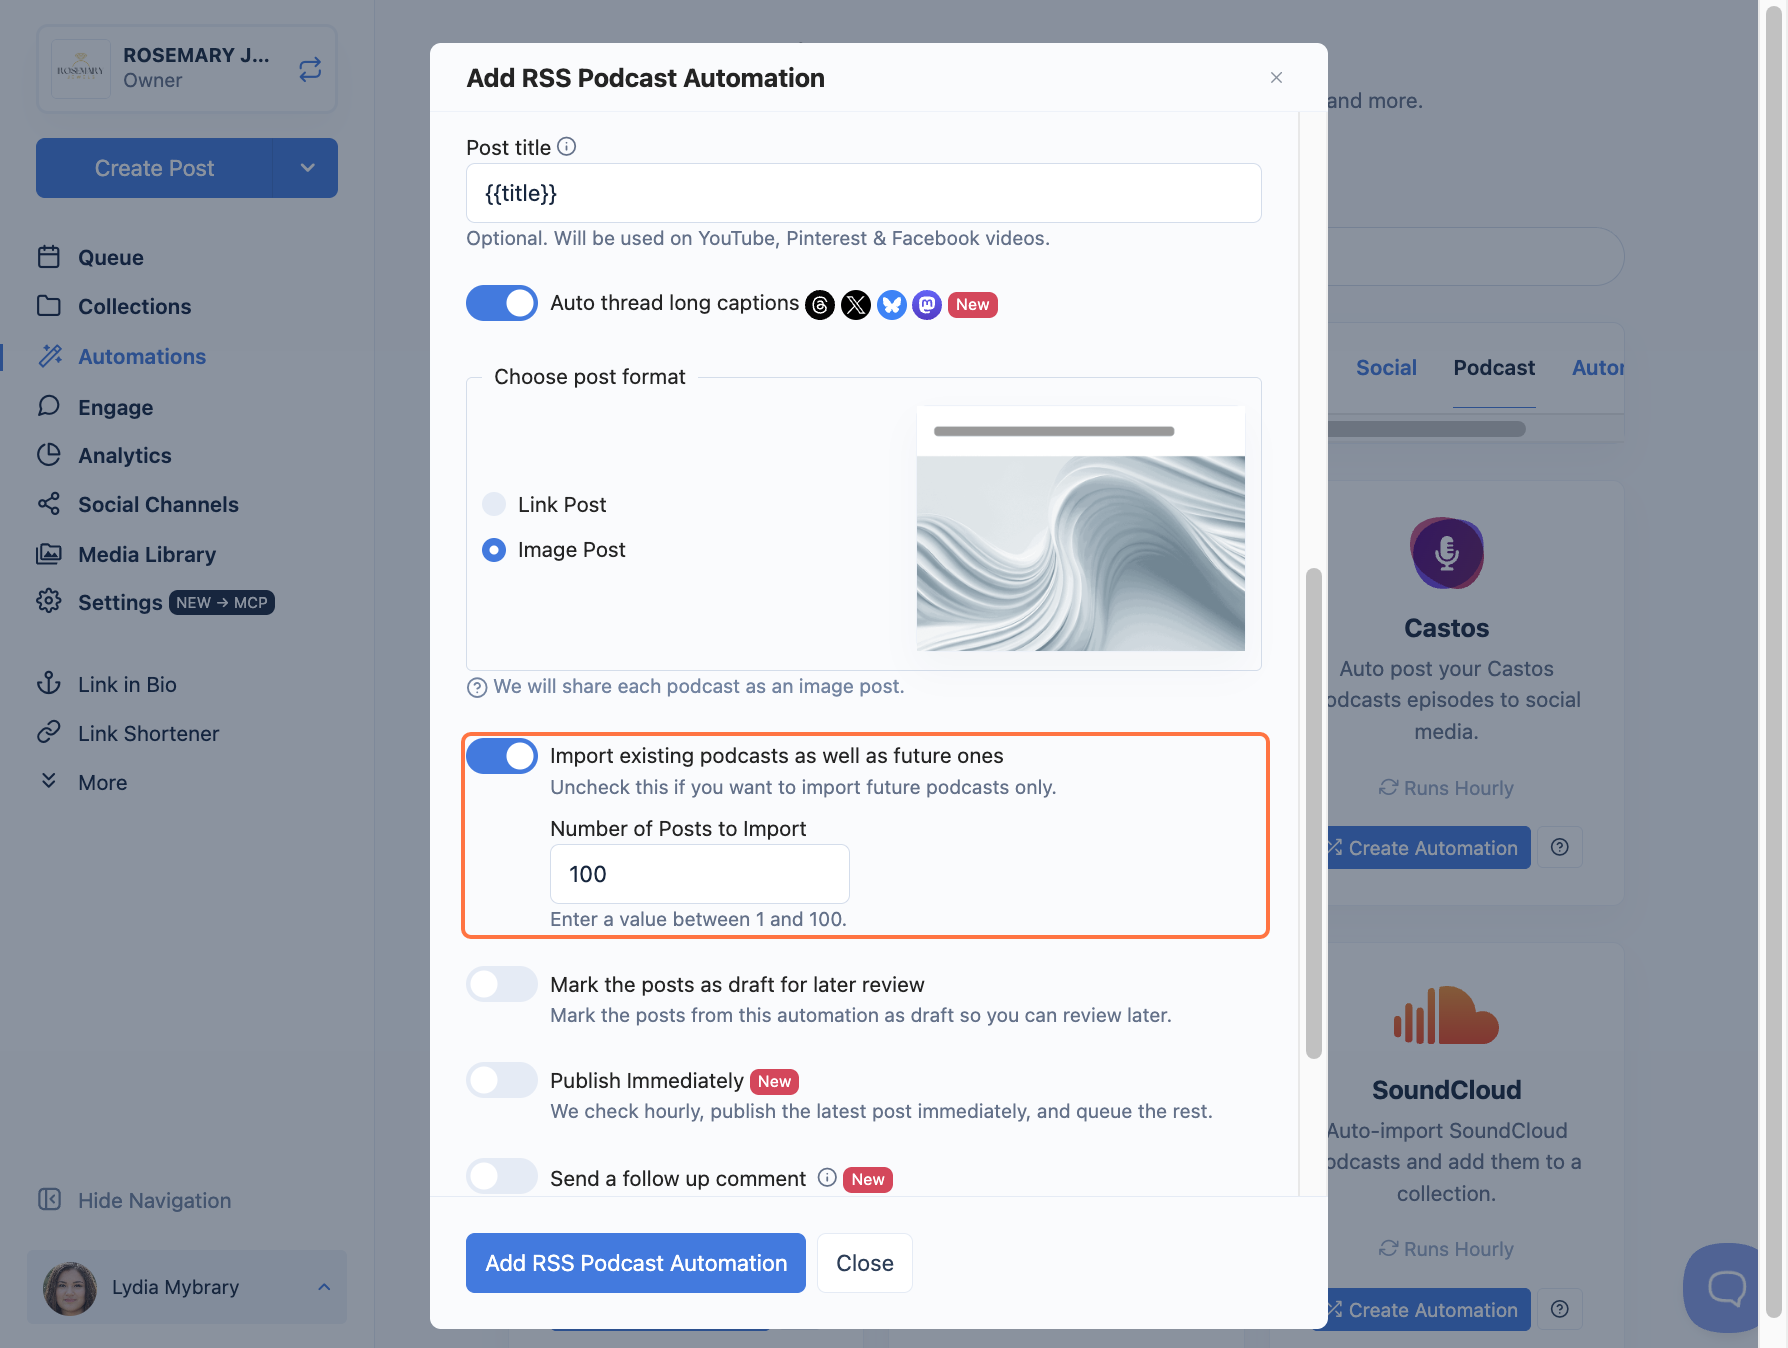
- Decide which episodes to bring in. Turn on Import existing episodes as well as the future ones to include past episodes, or leave it off to import only new ones. Then set Number of Posts to Import (any value from 1 to 100).
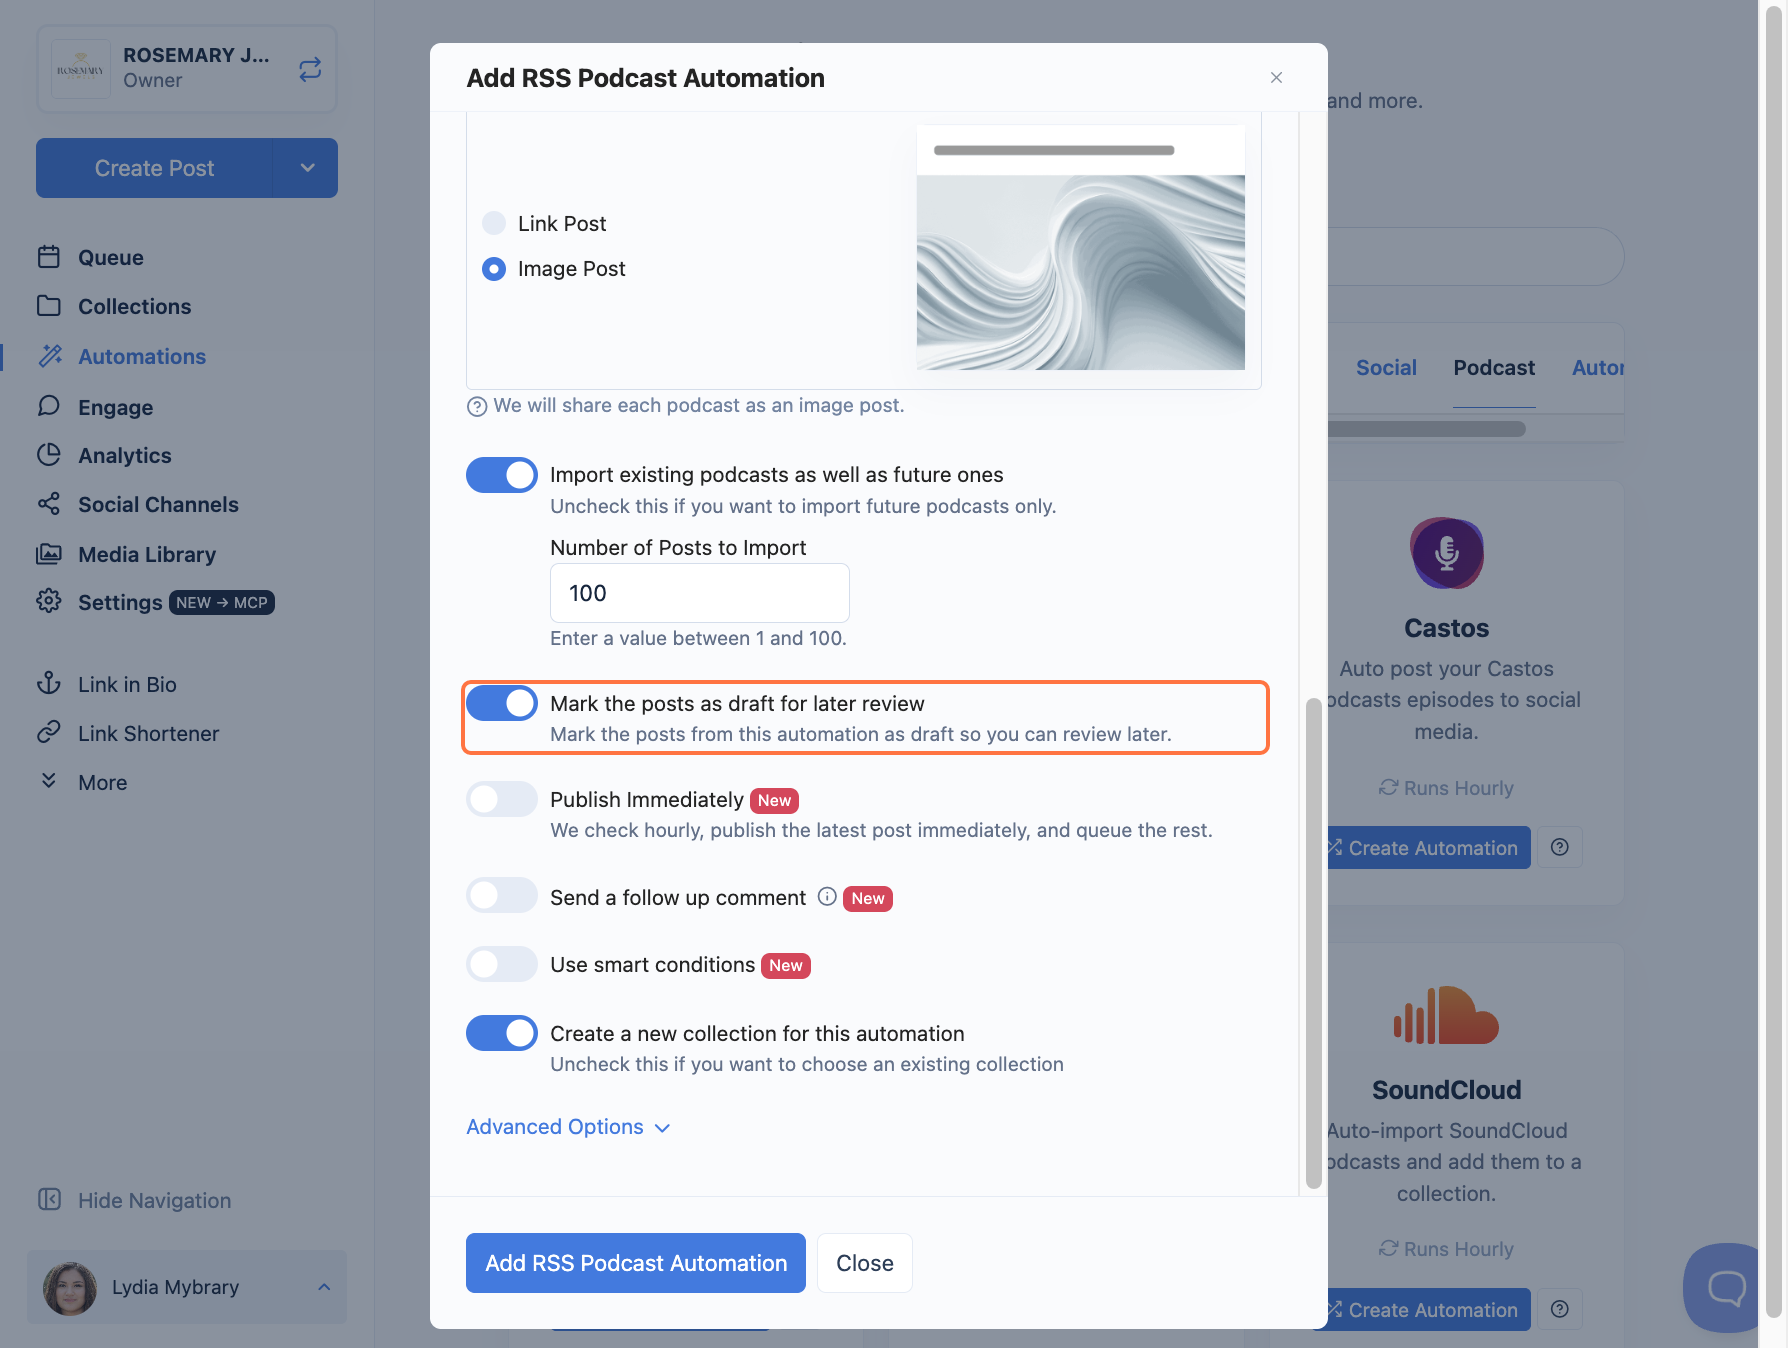
- (Optional) Turn on Mark the posts as draft for later review if you want to check each post before it publishes.
- (Optional) Turn on Publish Immediately. Nuelink checks hourly, publishes the latest episode right away, and queues the rest.
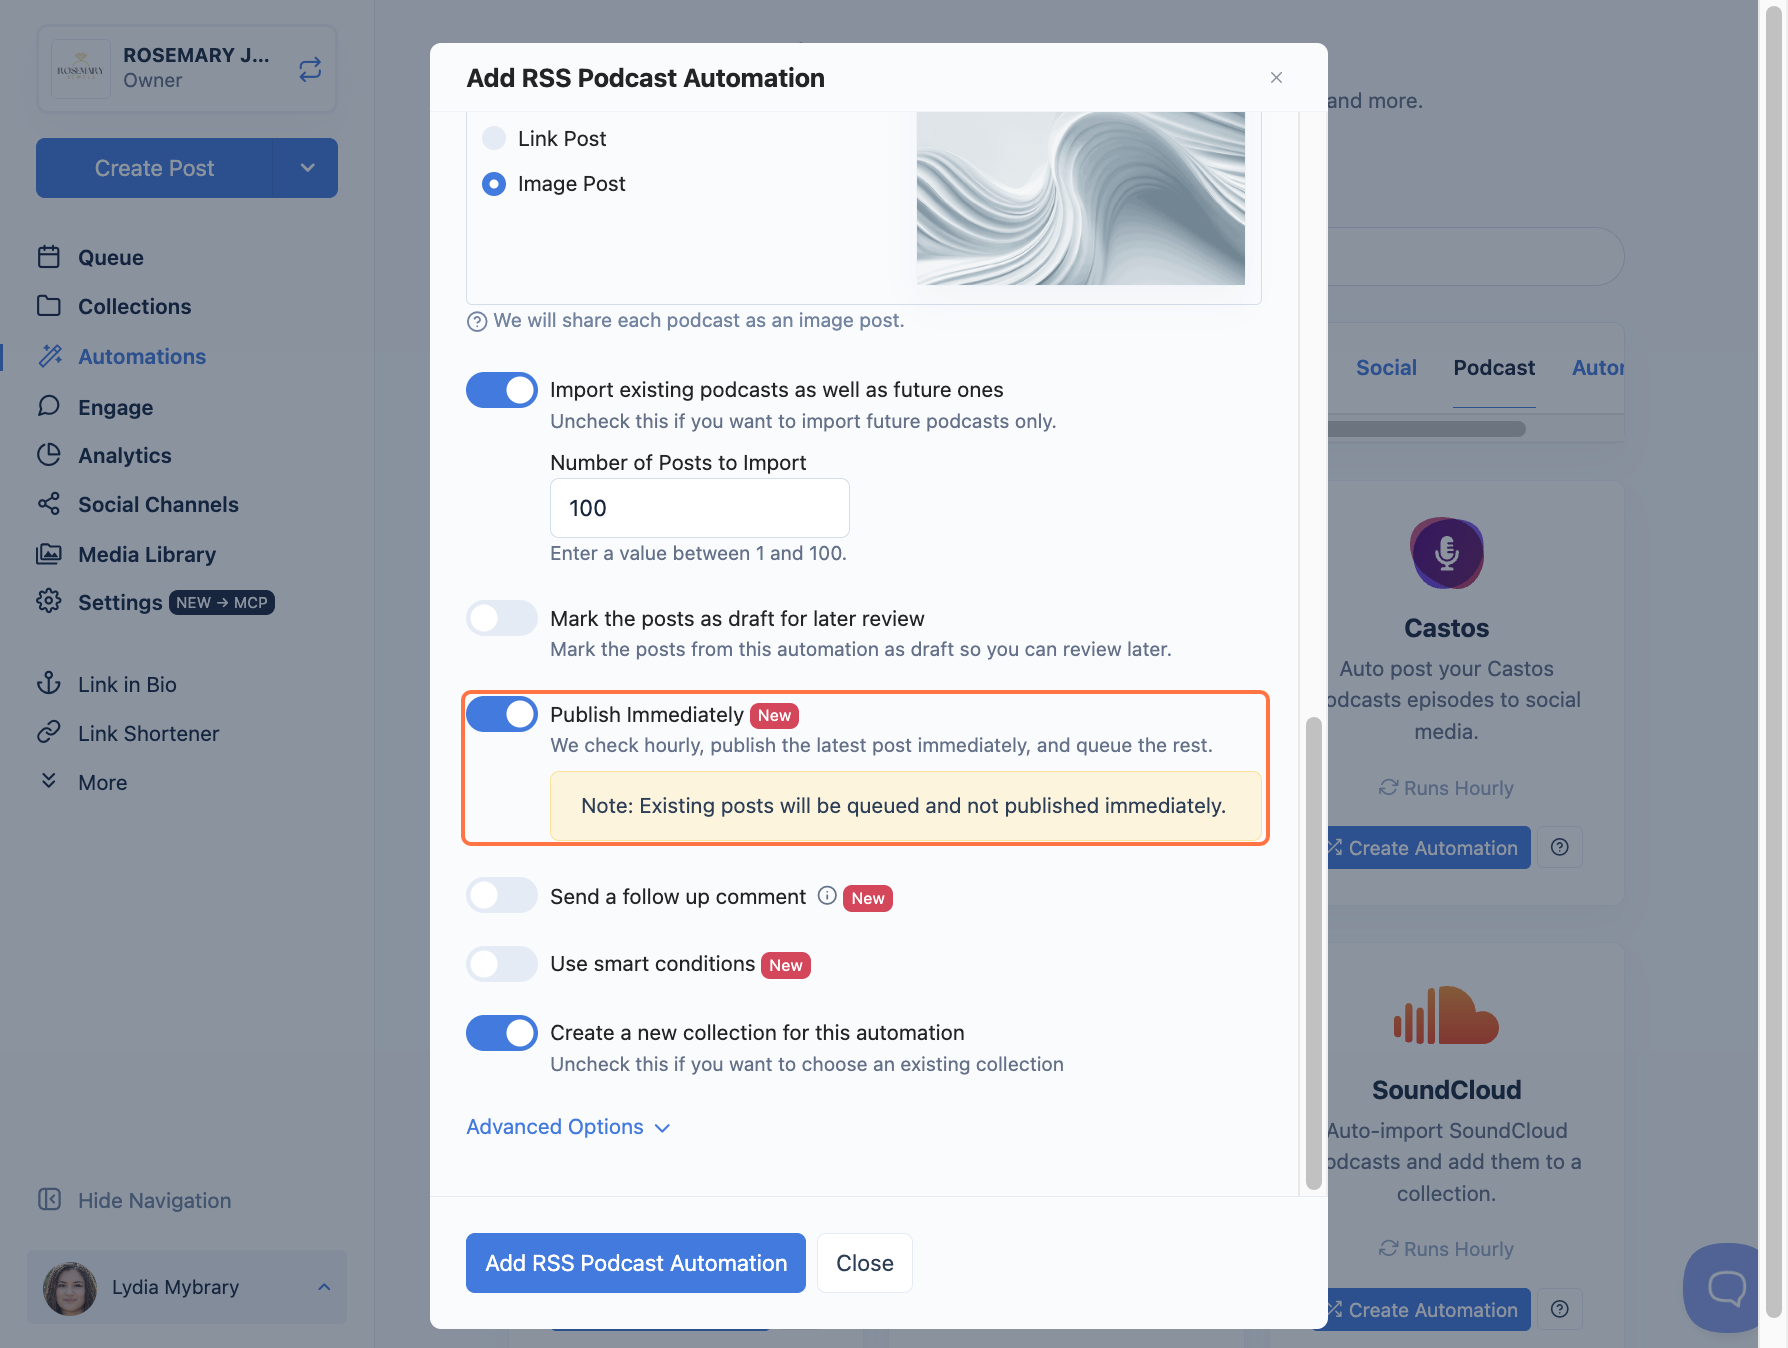
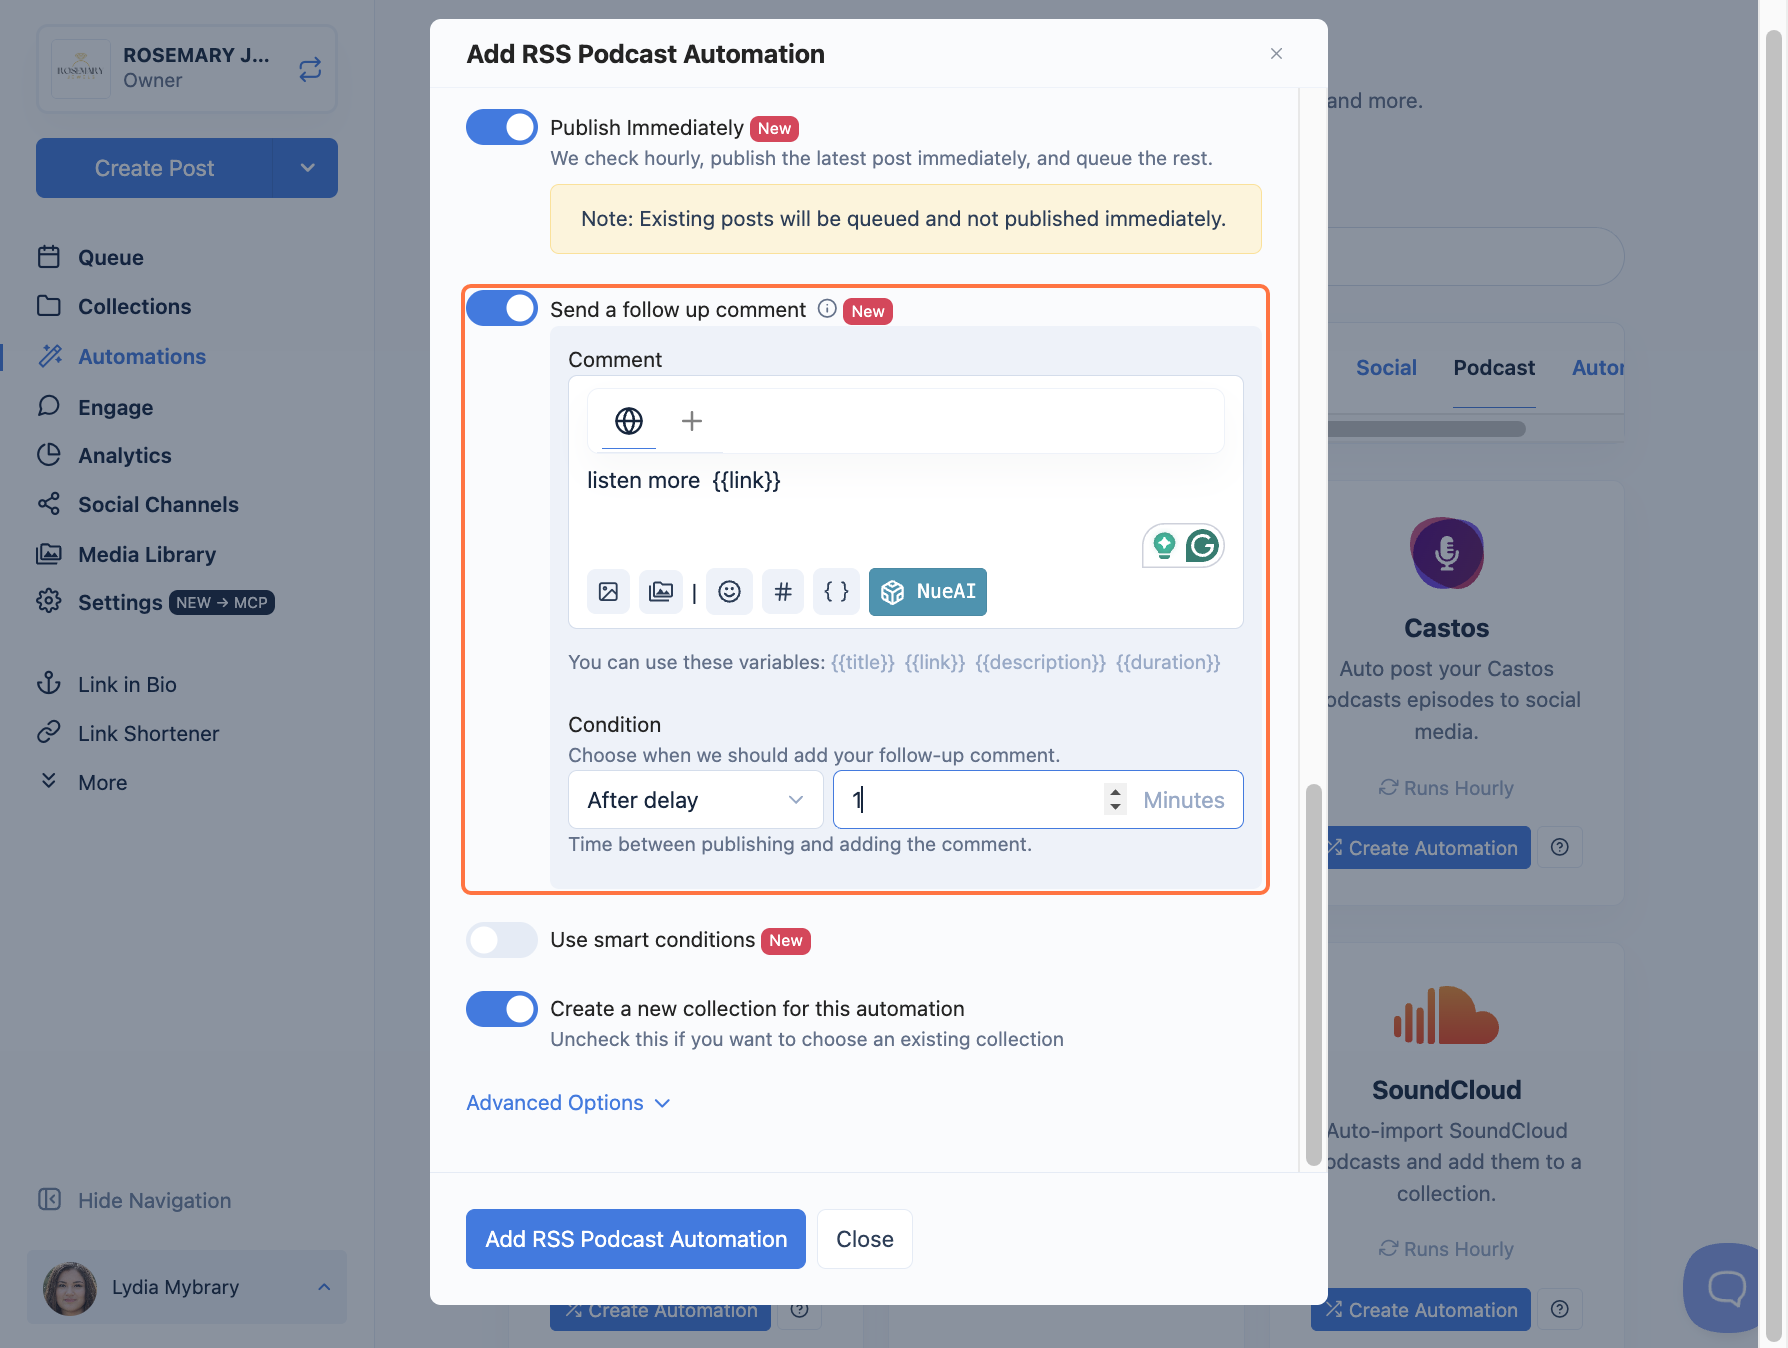
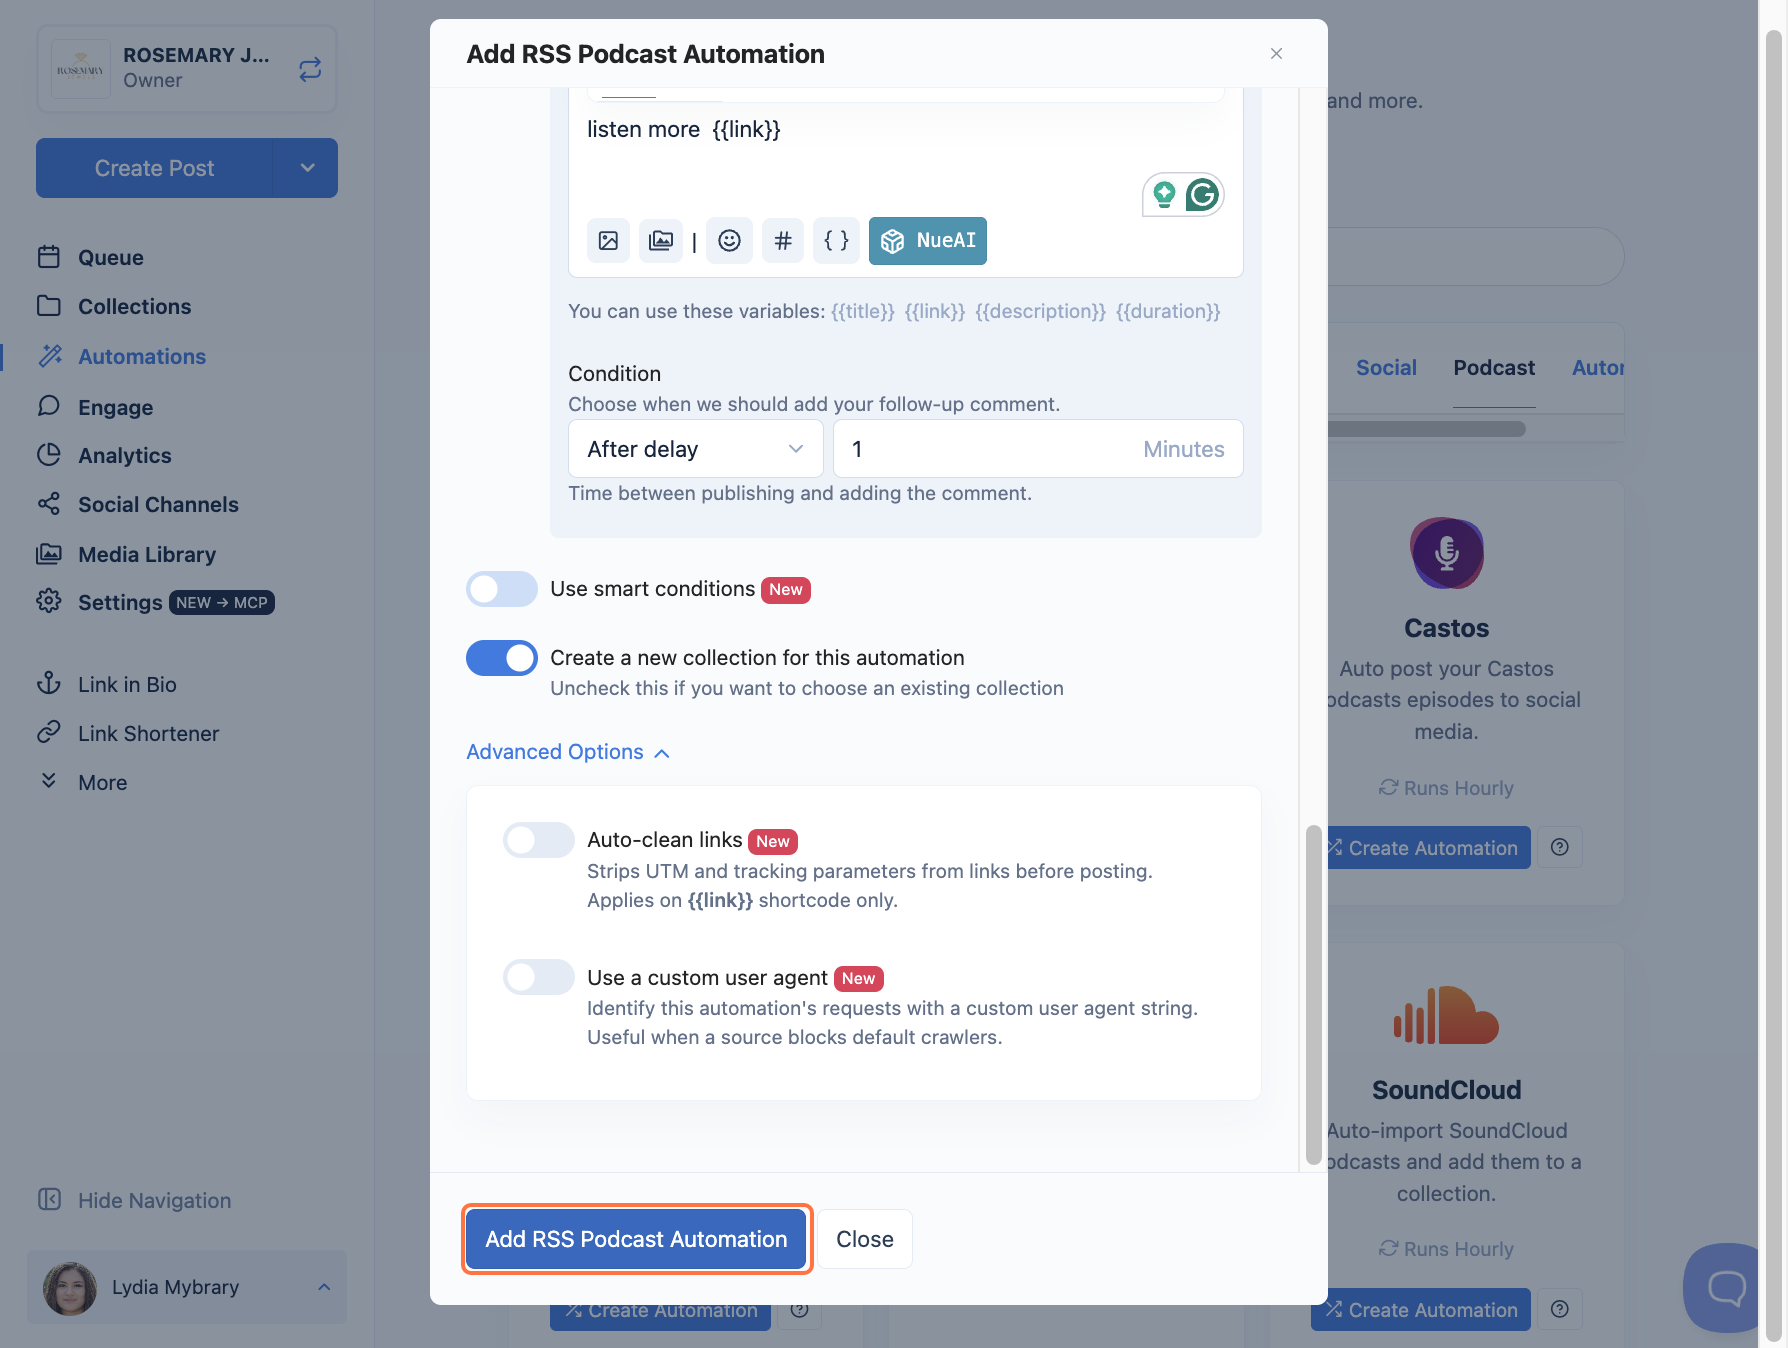
- (Optional) Turn on Send a follow-up comment to auto-post a first comment after each post. Write your comment (or use NueAI), then set the condition, for example, after a delay and the number of minutes to wait.
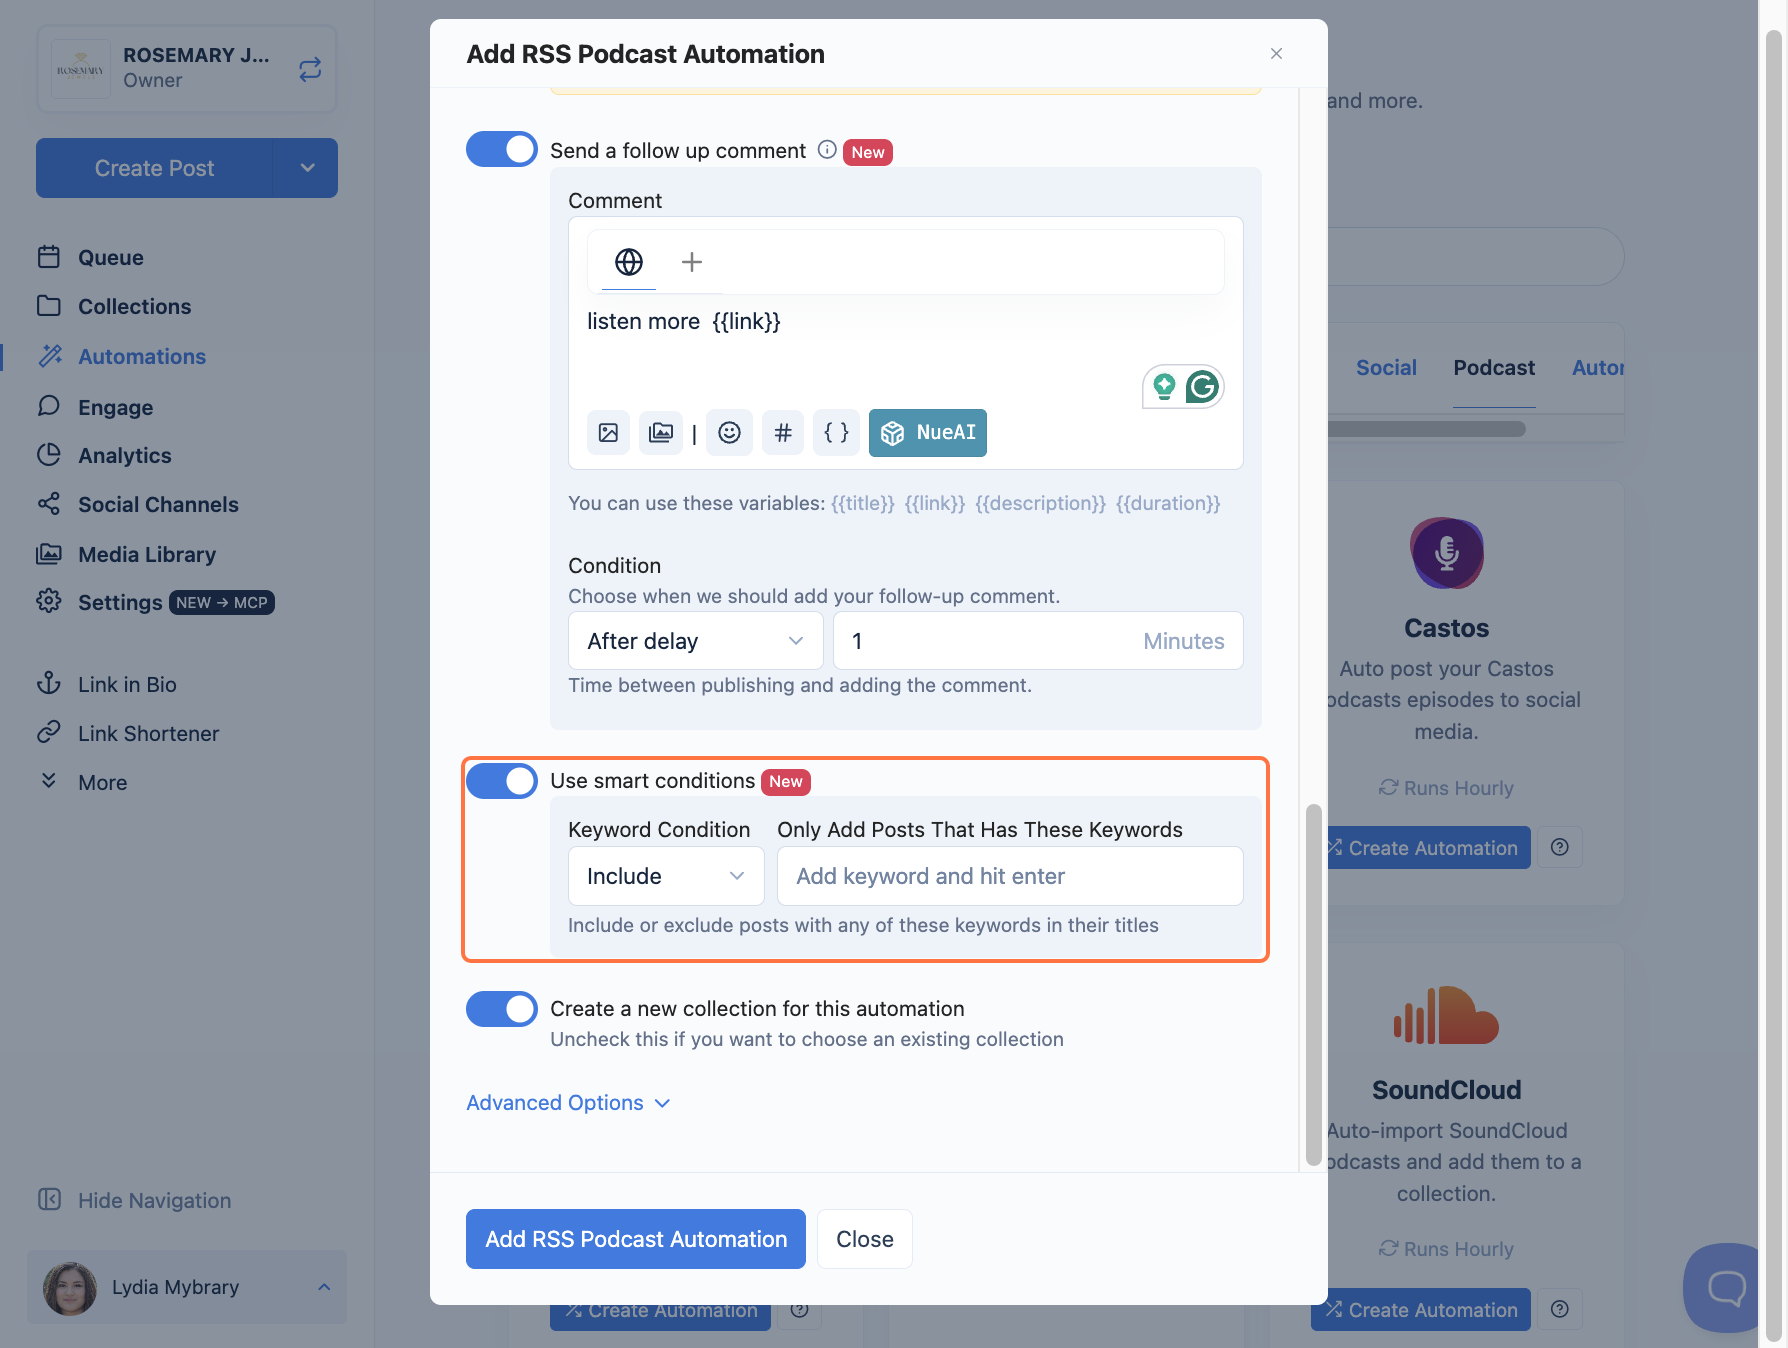
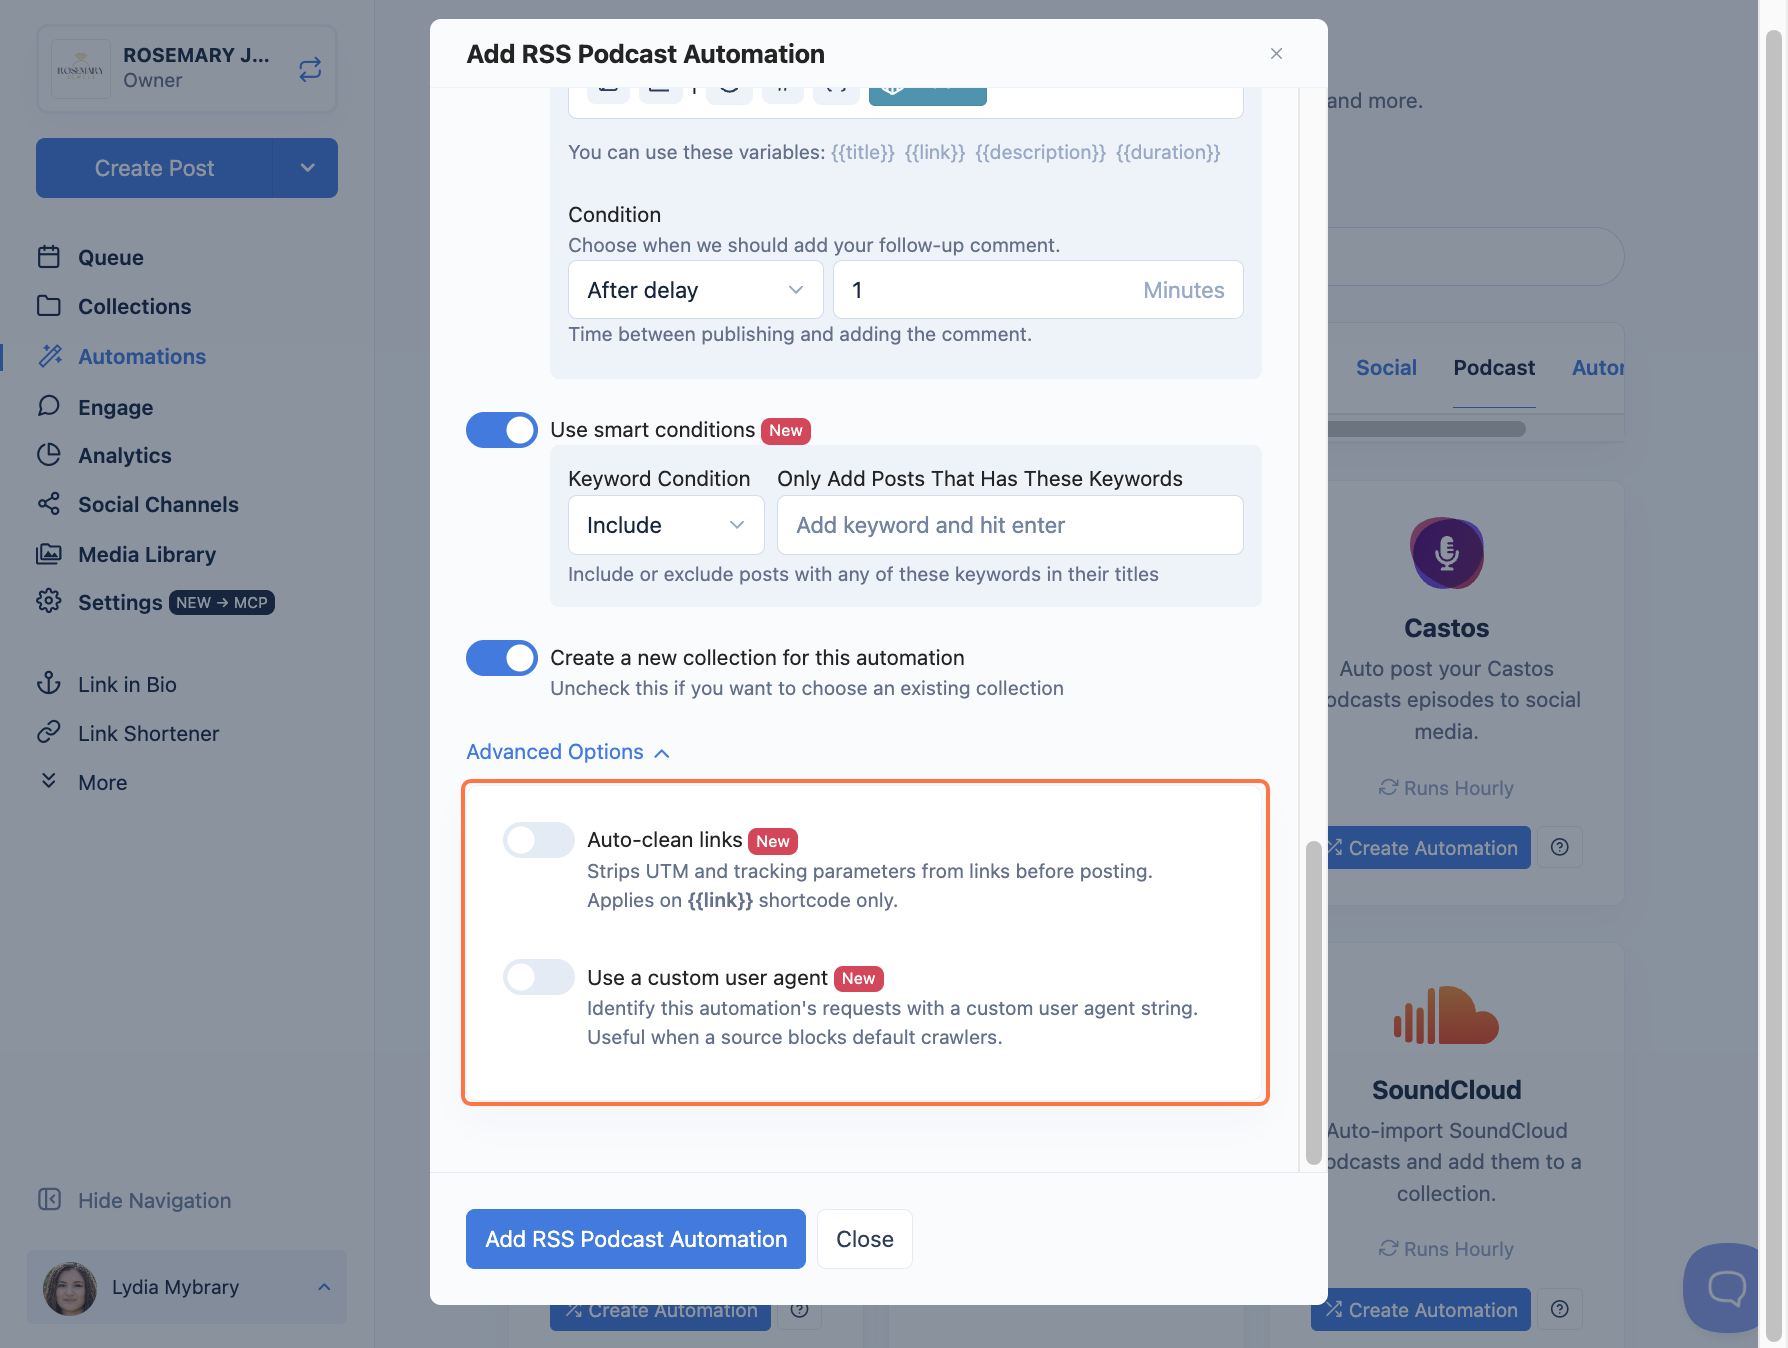
- (Optional) Turn on Use smart conditions to only share episodes that match rules you choose, like specific keywords in their titles.
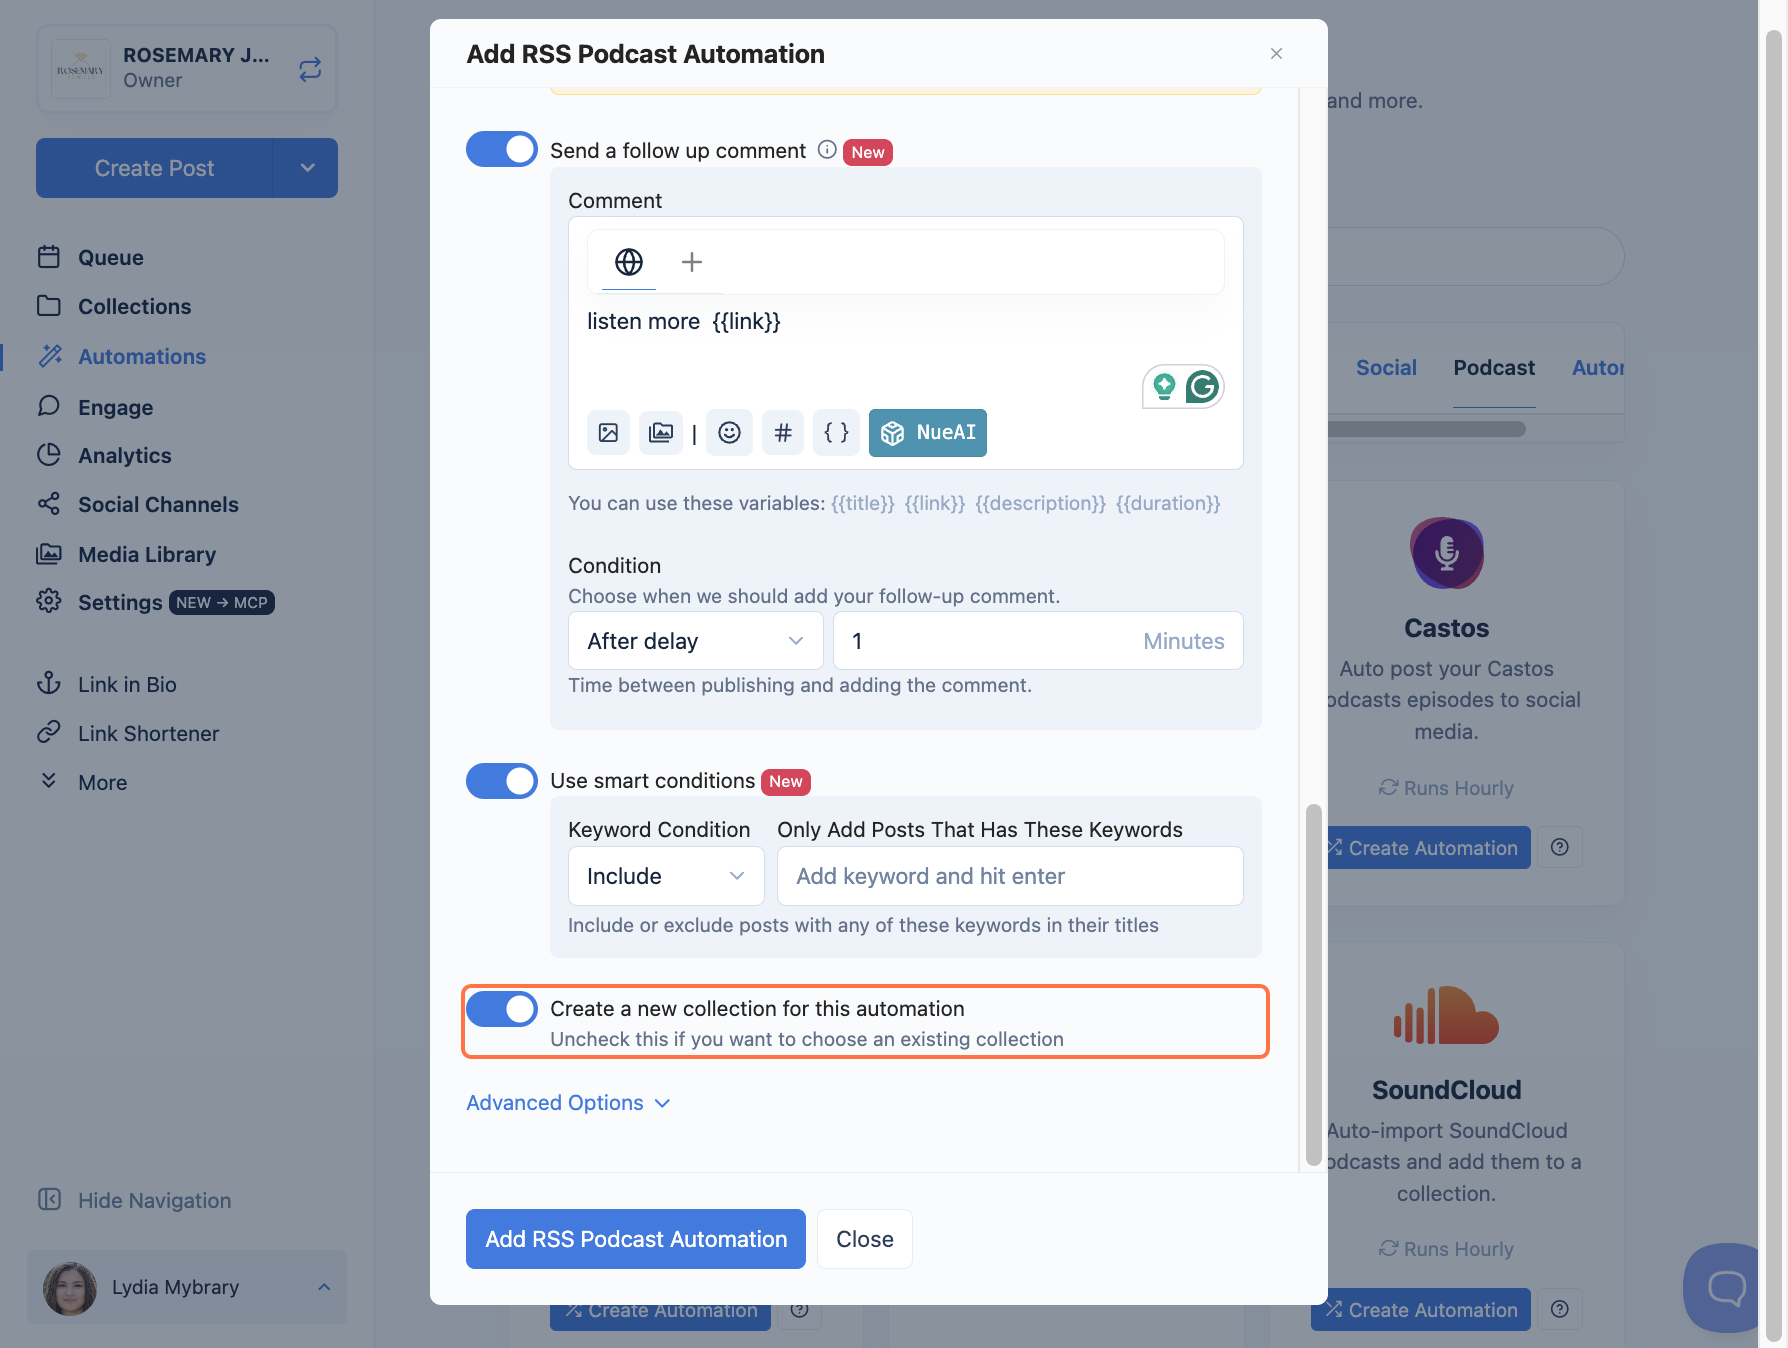
- Choose your collection. Create a new collection for this automation is on by default. Uncheck it if you'd rather add these posts to a collection you already use. (You'll set the channels and schedule inside the collection; see the next section.)
- (Optional) Open Advanced Options to fine-tune your automation:
- Check frequency: how often Nuelink checks your feed for new episodes (for example, every 24 hours).
- Auto-clean links: removes tracking parameters from your links before posting.
- Use a custom user agent: helpful if your source blocks default crawlers.
- Click Add RSS.com Automation to finish, then review your imported episodes in the Posts section.
You're all set! Next, open your collection to choose where and when your episodes go out.
Set Up Your Collection
Your channels and schedule live in the collection, so this is where you decide where your episodes go and when. Follow these steps from start to finish.
💡 If you see a Processing, we're importing your posts banner, that's normal. Your imported episodes will appear under the Posts tab in a few moments.
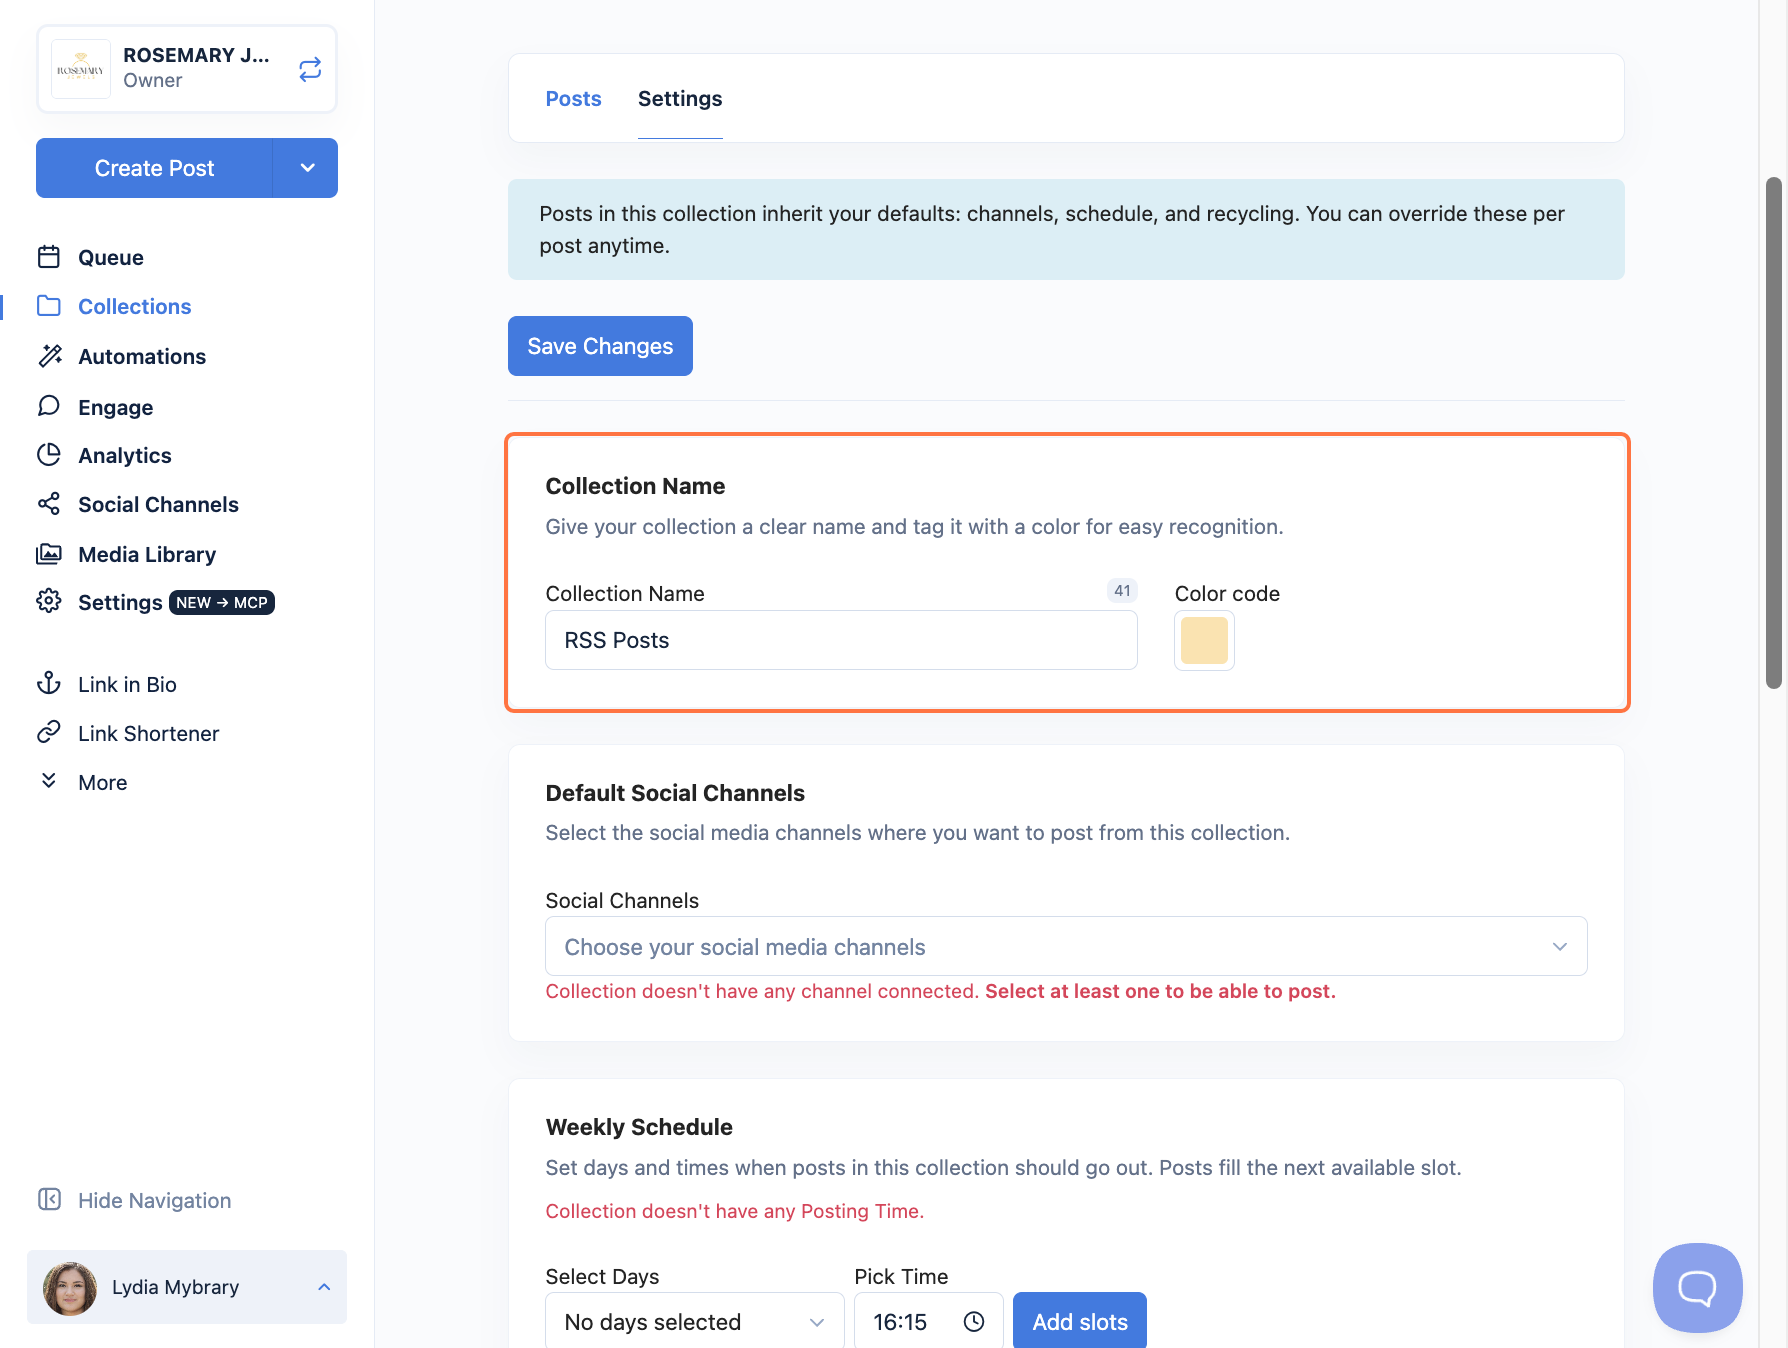
- Under Collection Name, type a clear, recognizable name for your collection. Click the Color code swatch next to the name and pick a color. This tags the collection so it's easy to spot later.
-
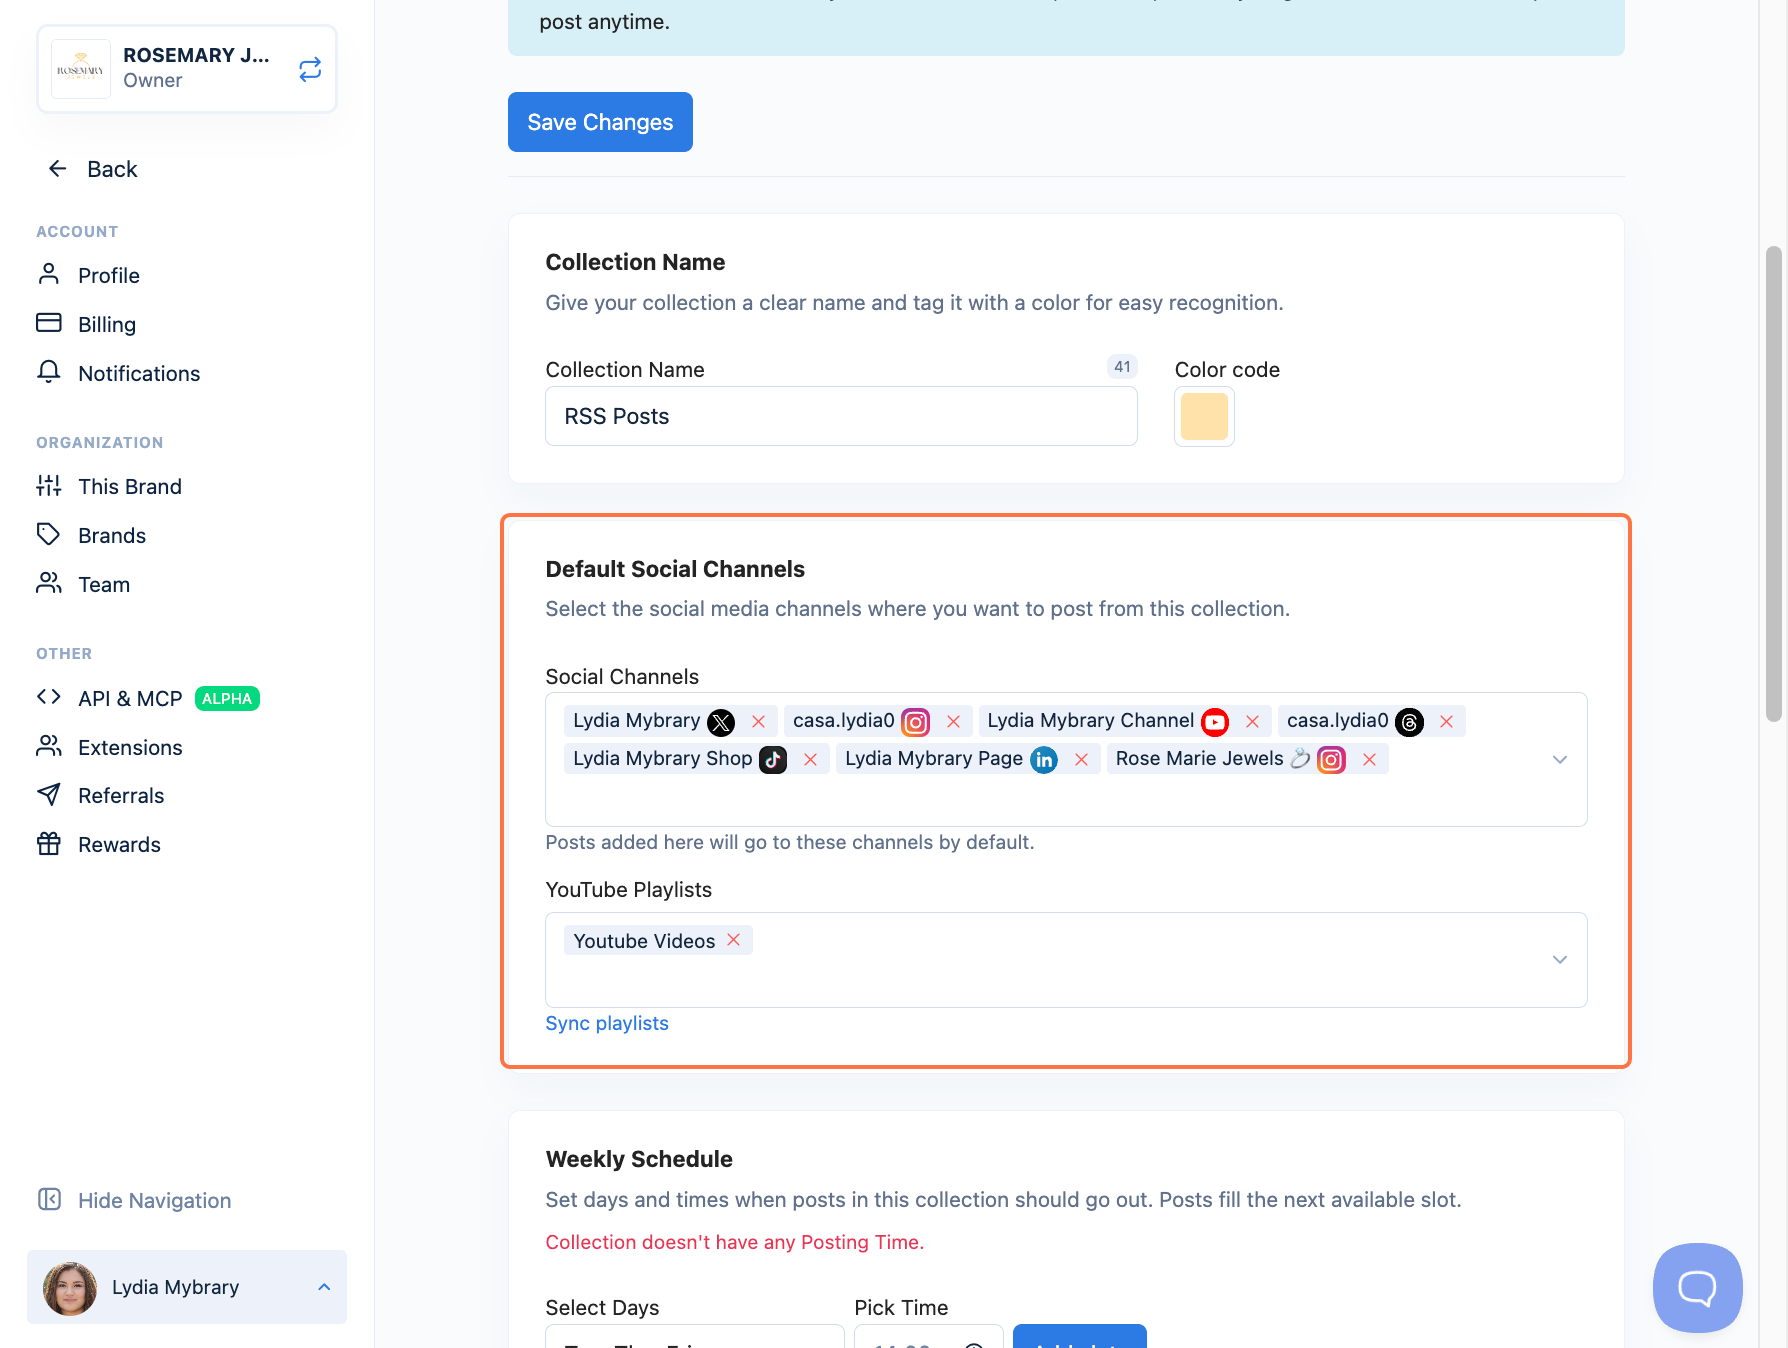
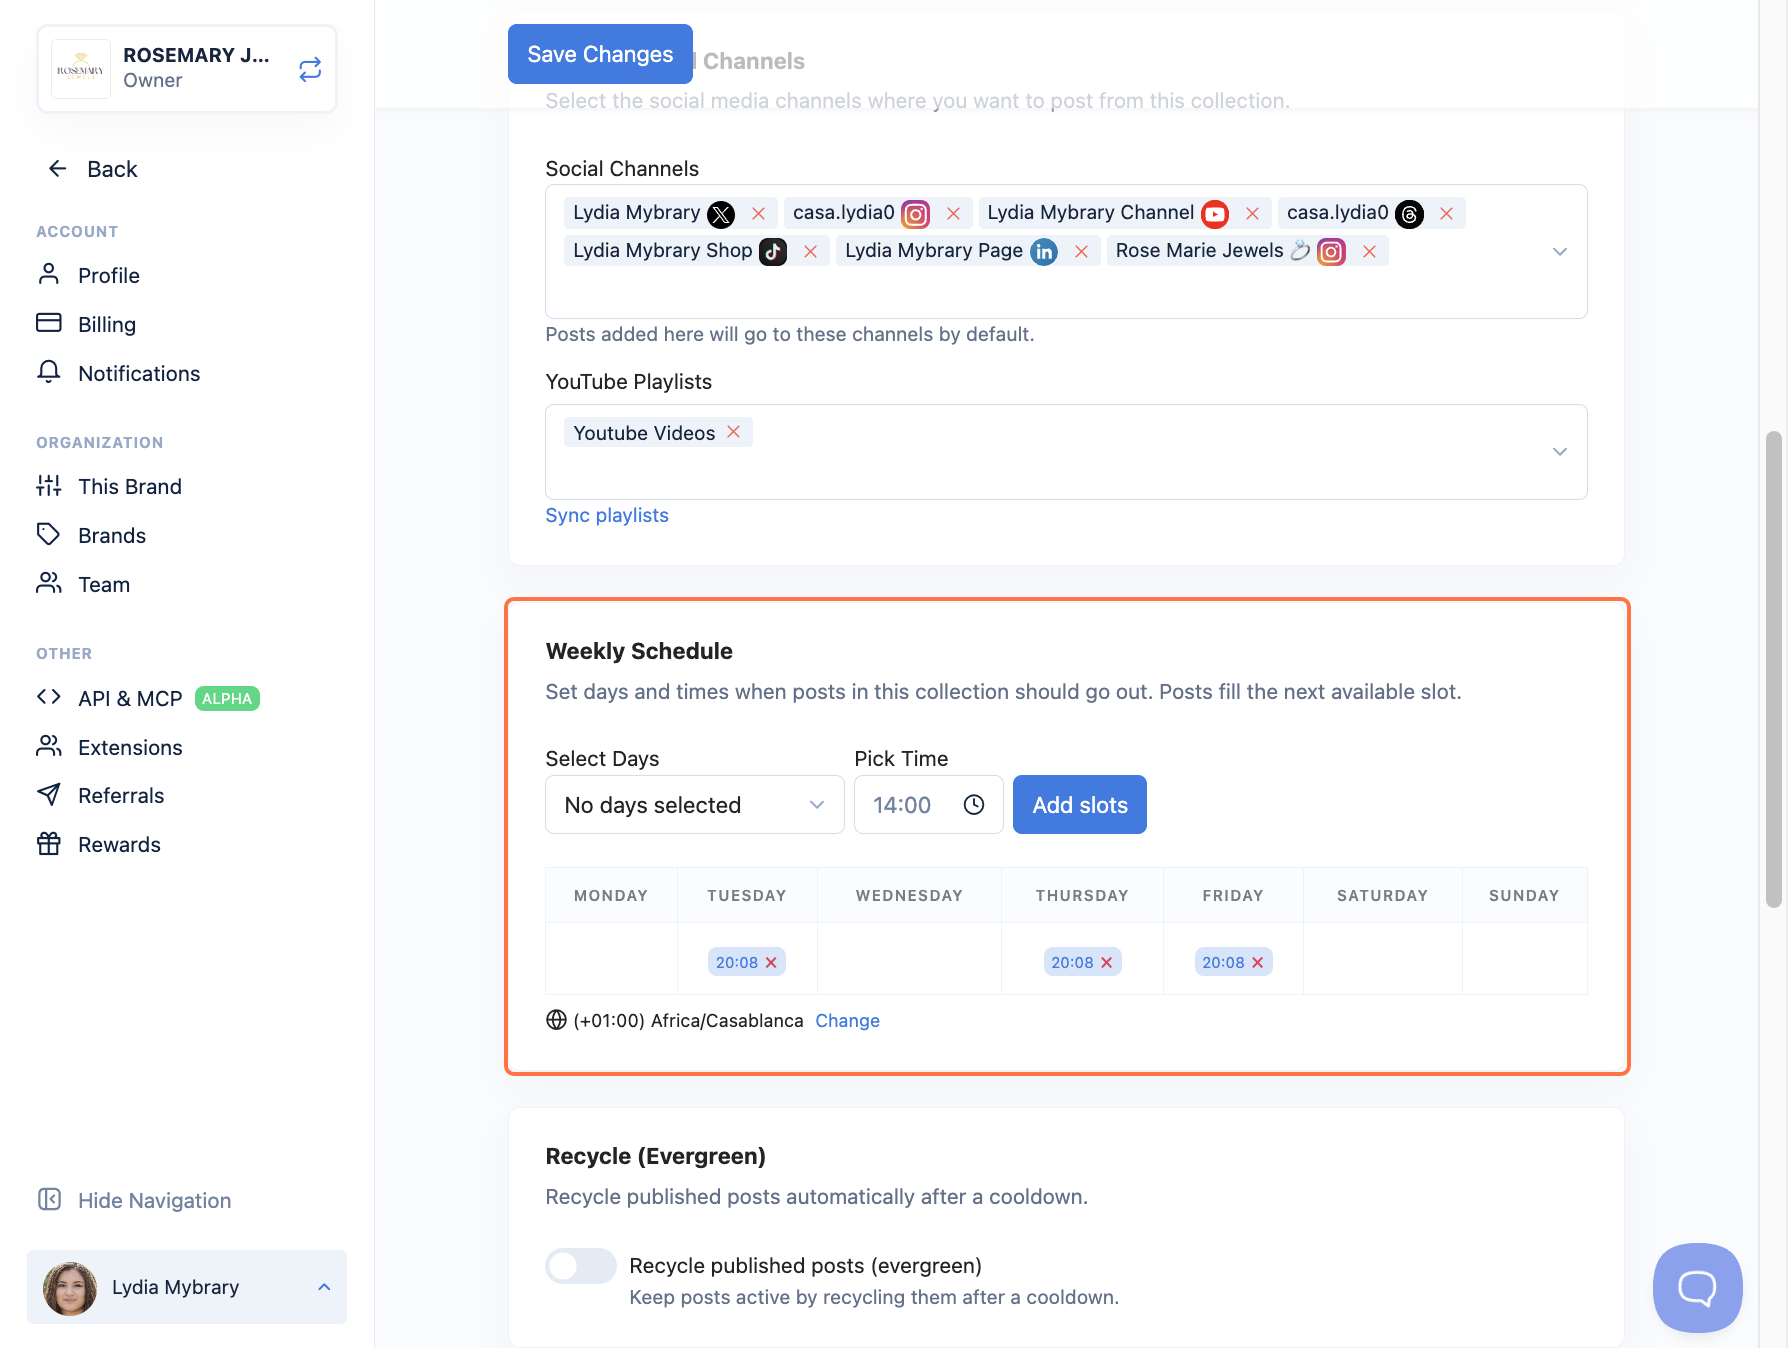
Under Default Social Channels, click the Choose your social media channels dropdown and select each account you want to post to. Pick at least one; a collection with no channels can't publish.
💡 A red note reading "Collection doesn't have any channel connected" means you still need to add at least one channel here.
- Go to Weekly Schedule. Click Select Days and choose the days you'd like your episodes to go out.
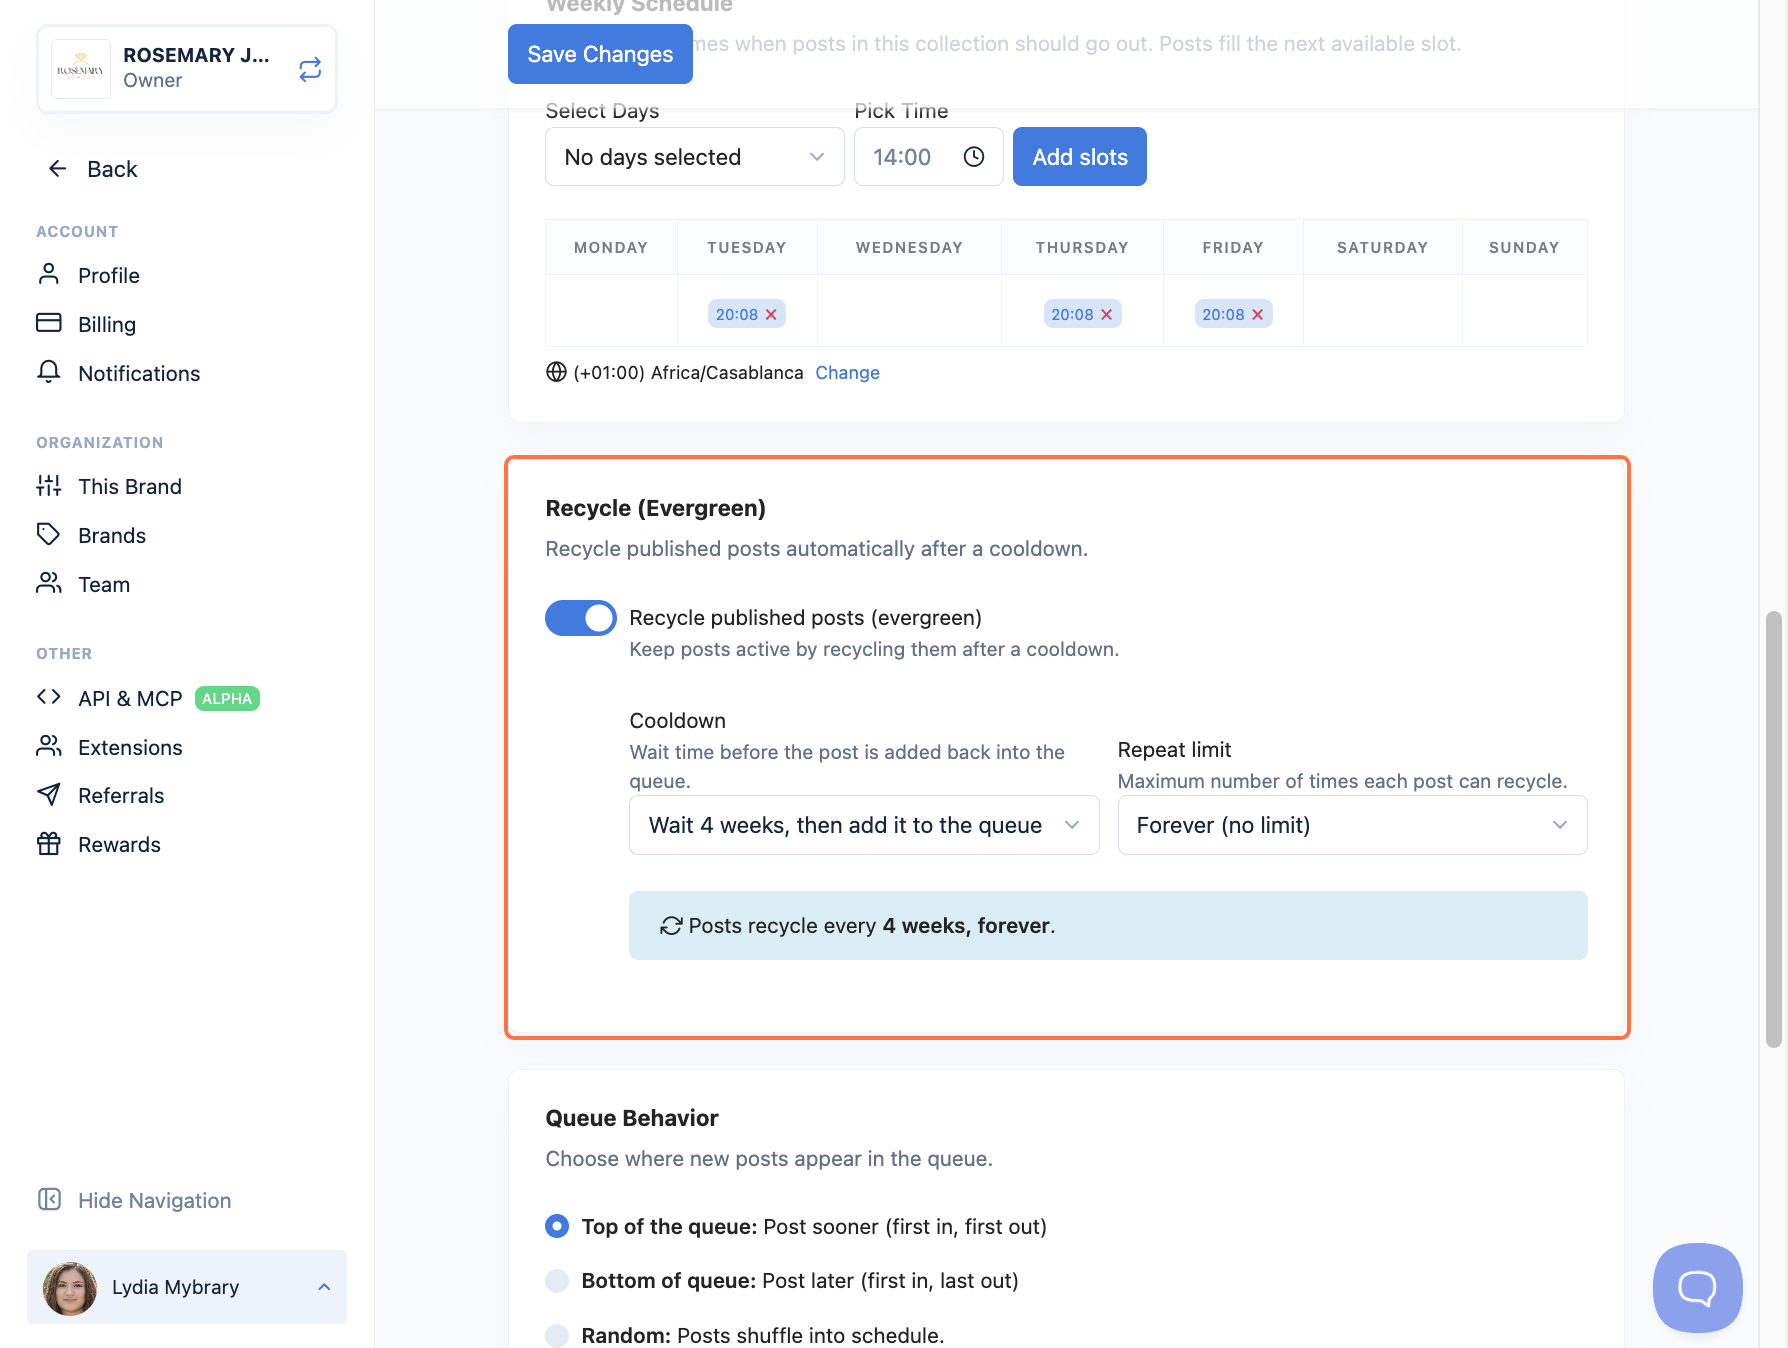
- (Optional) Under Recycle (Evergreen), turn on Recycle published posts (evergreen) to automatically re-share your episodes after a cooldown. This keeps your best content active over time.
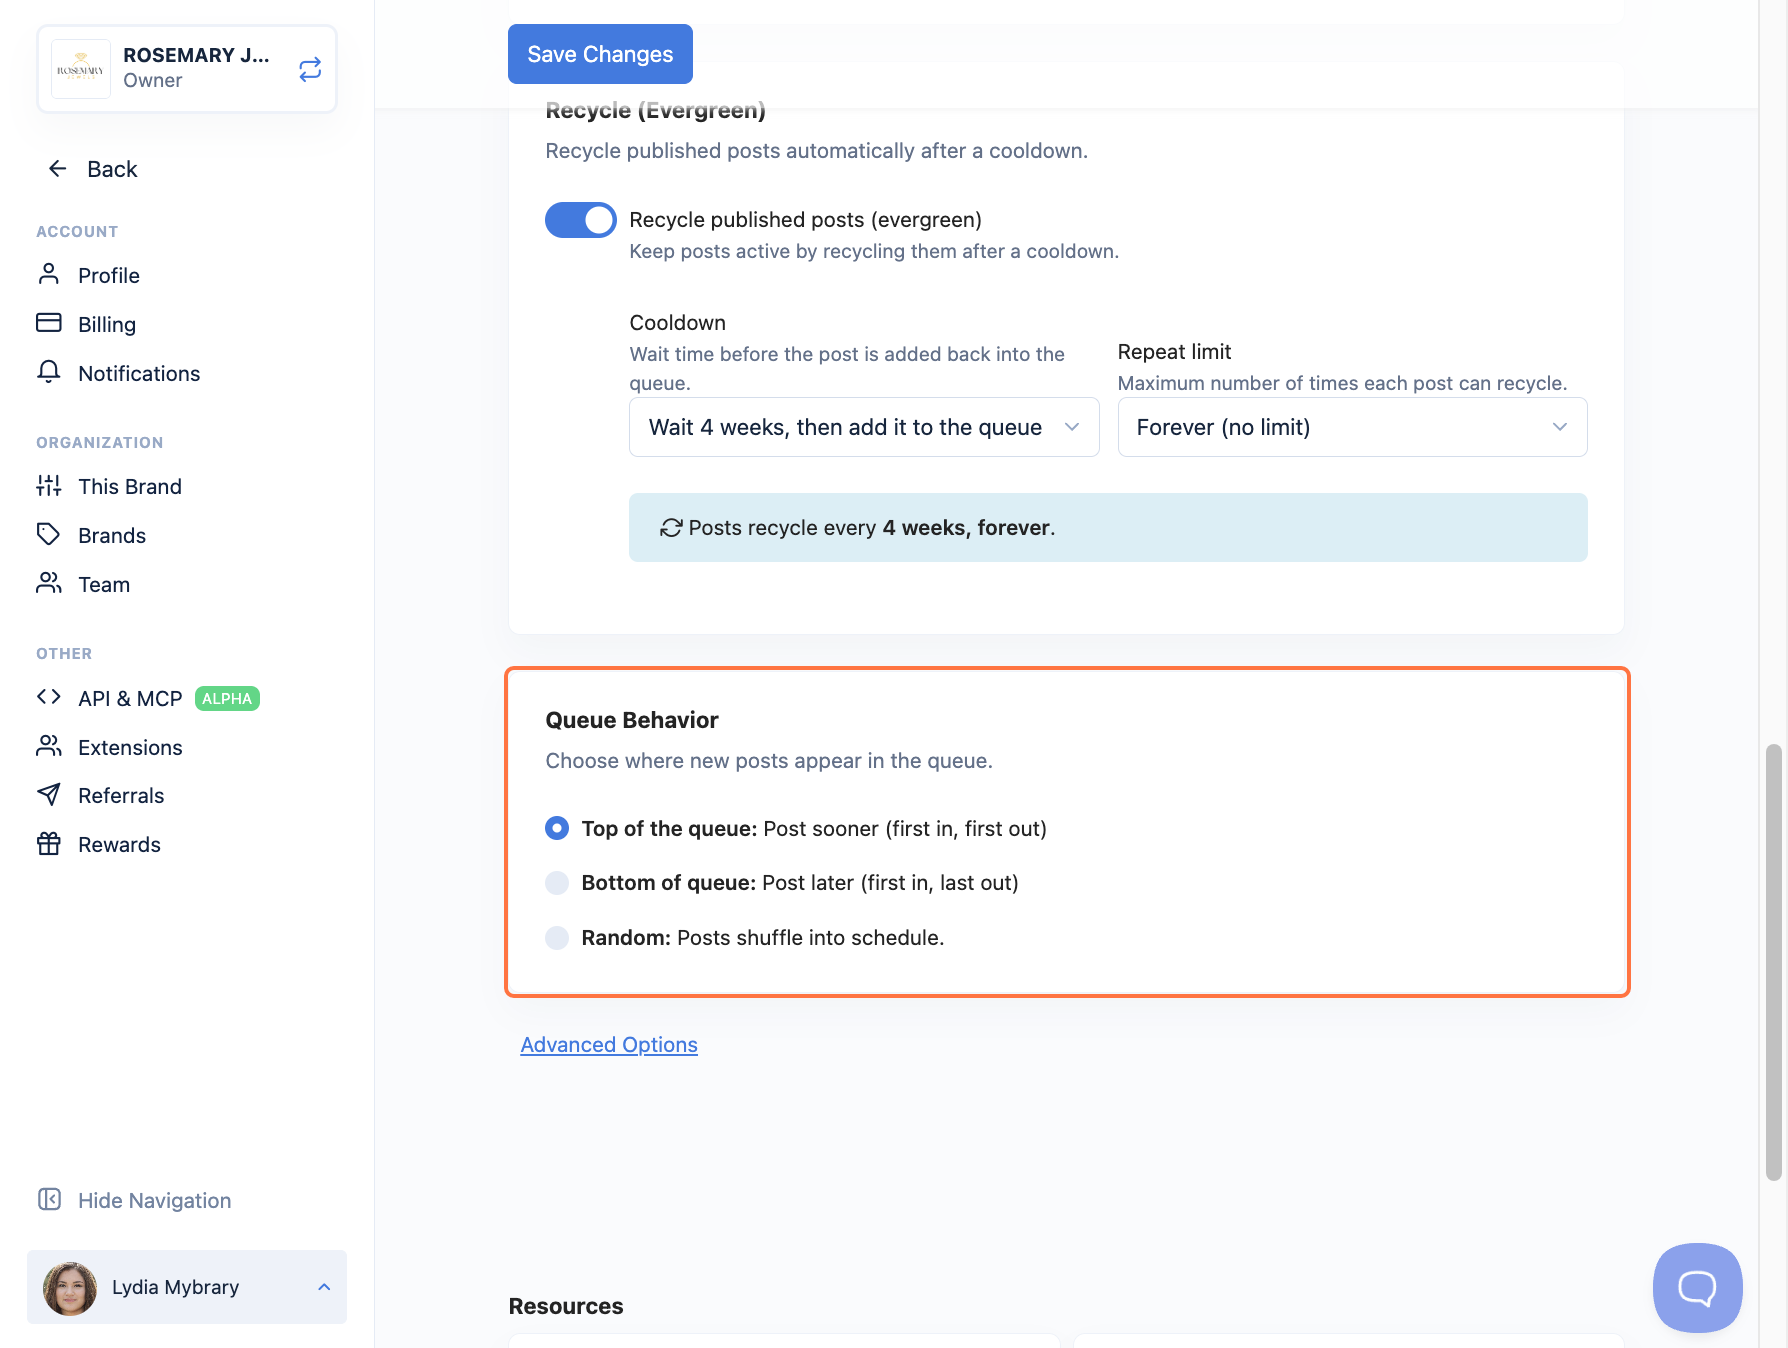
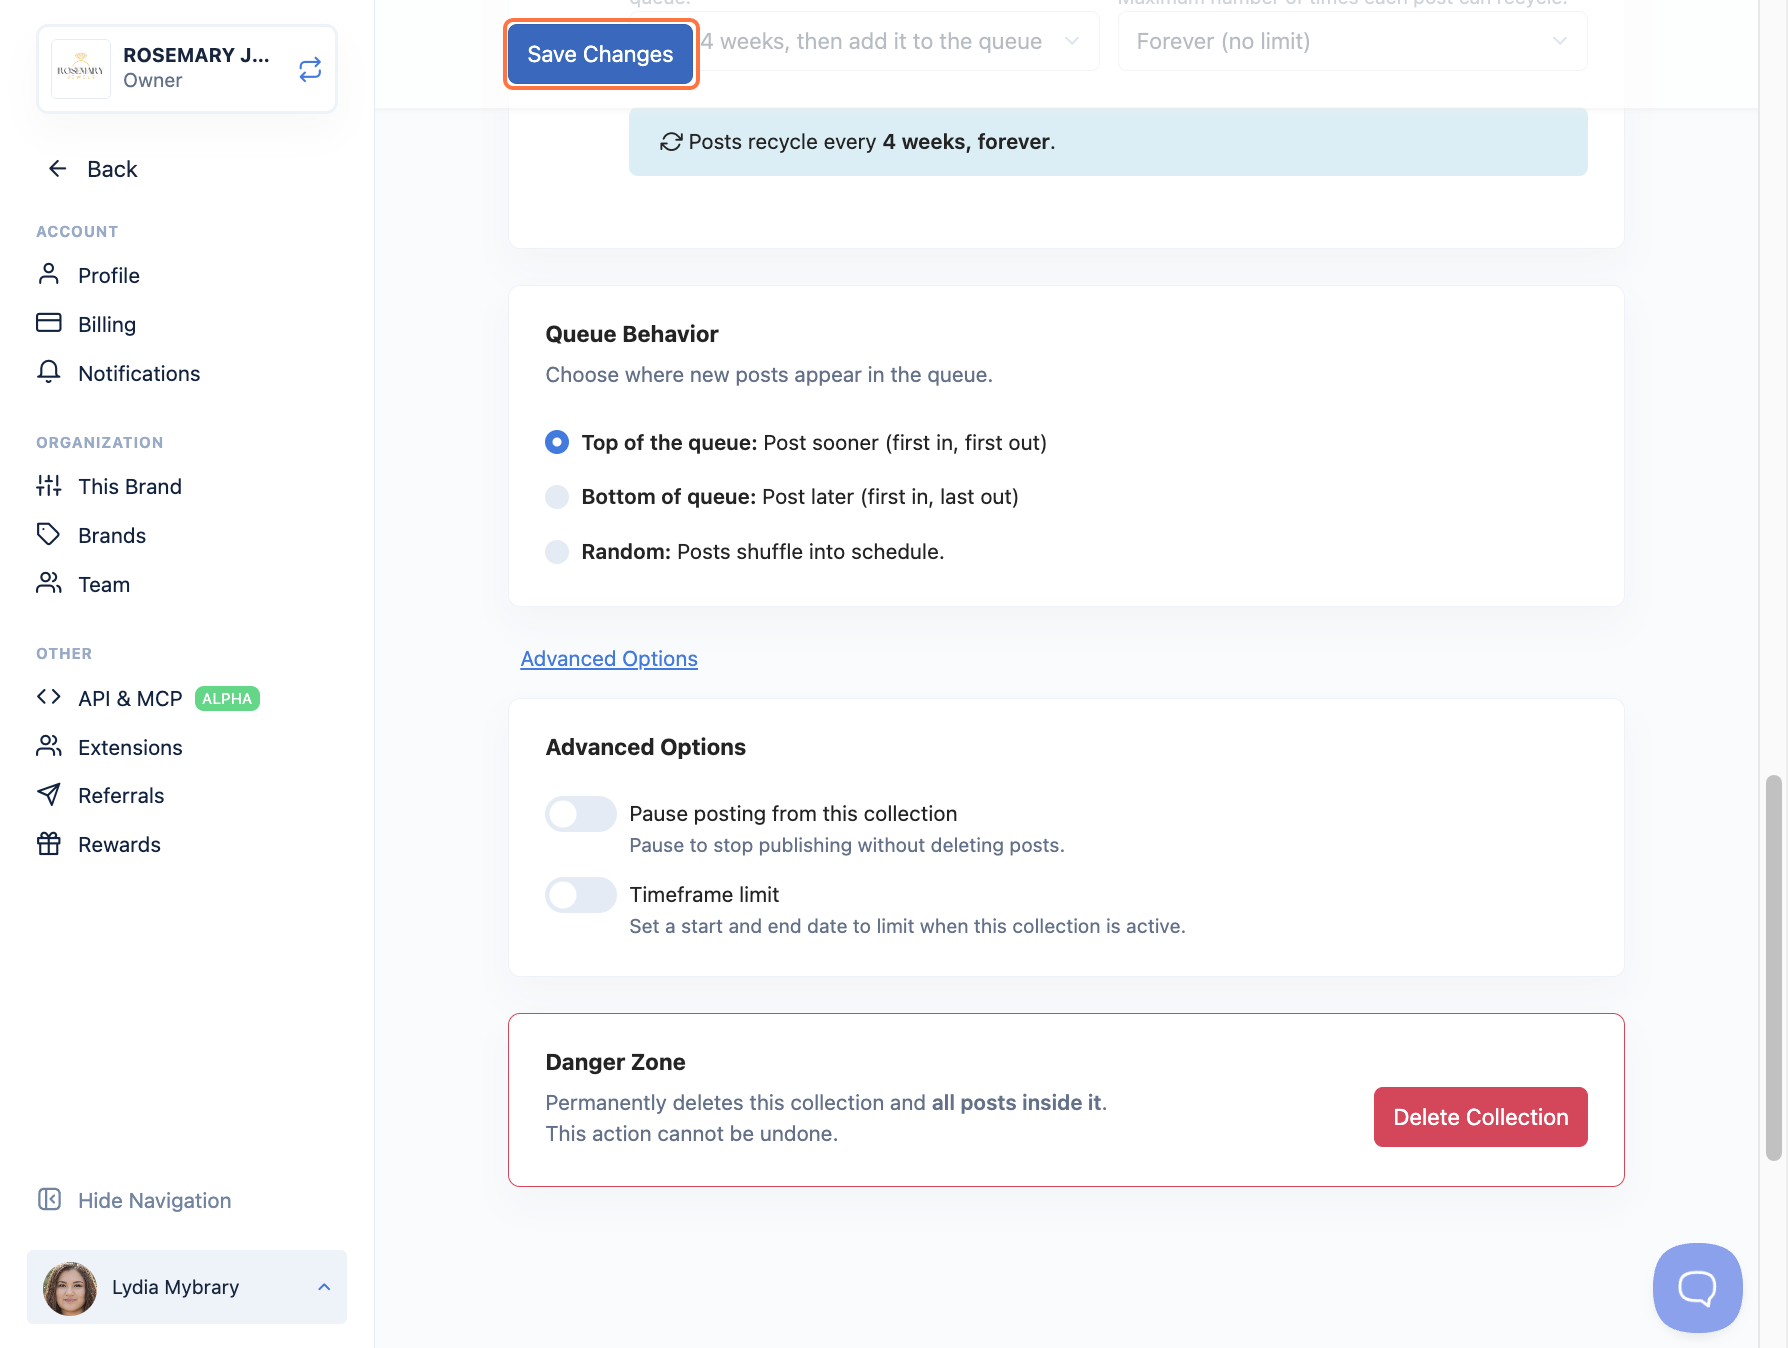
- Under Queue Behavior, choose where new posts land in your queue:
- Top of the queue: post sooner (first in, first out).
- Bottom of queue: post later (first in, last out).
- Random: shuffle posts into your schedule.
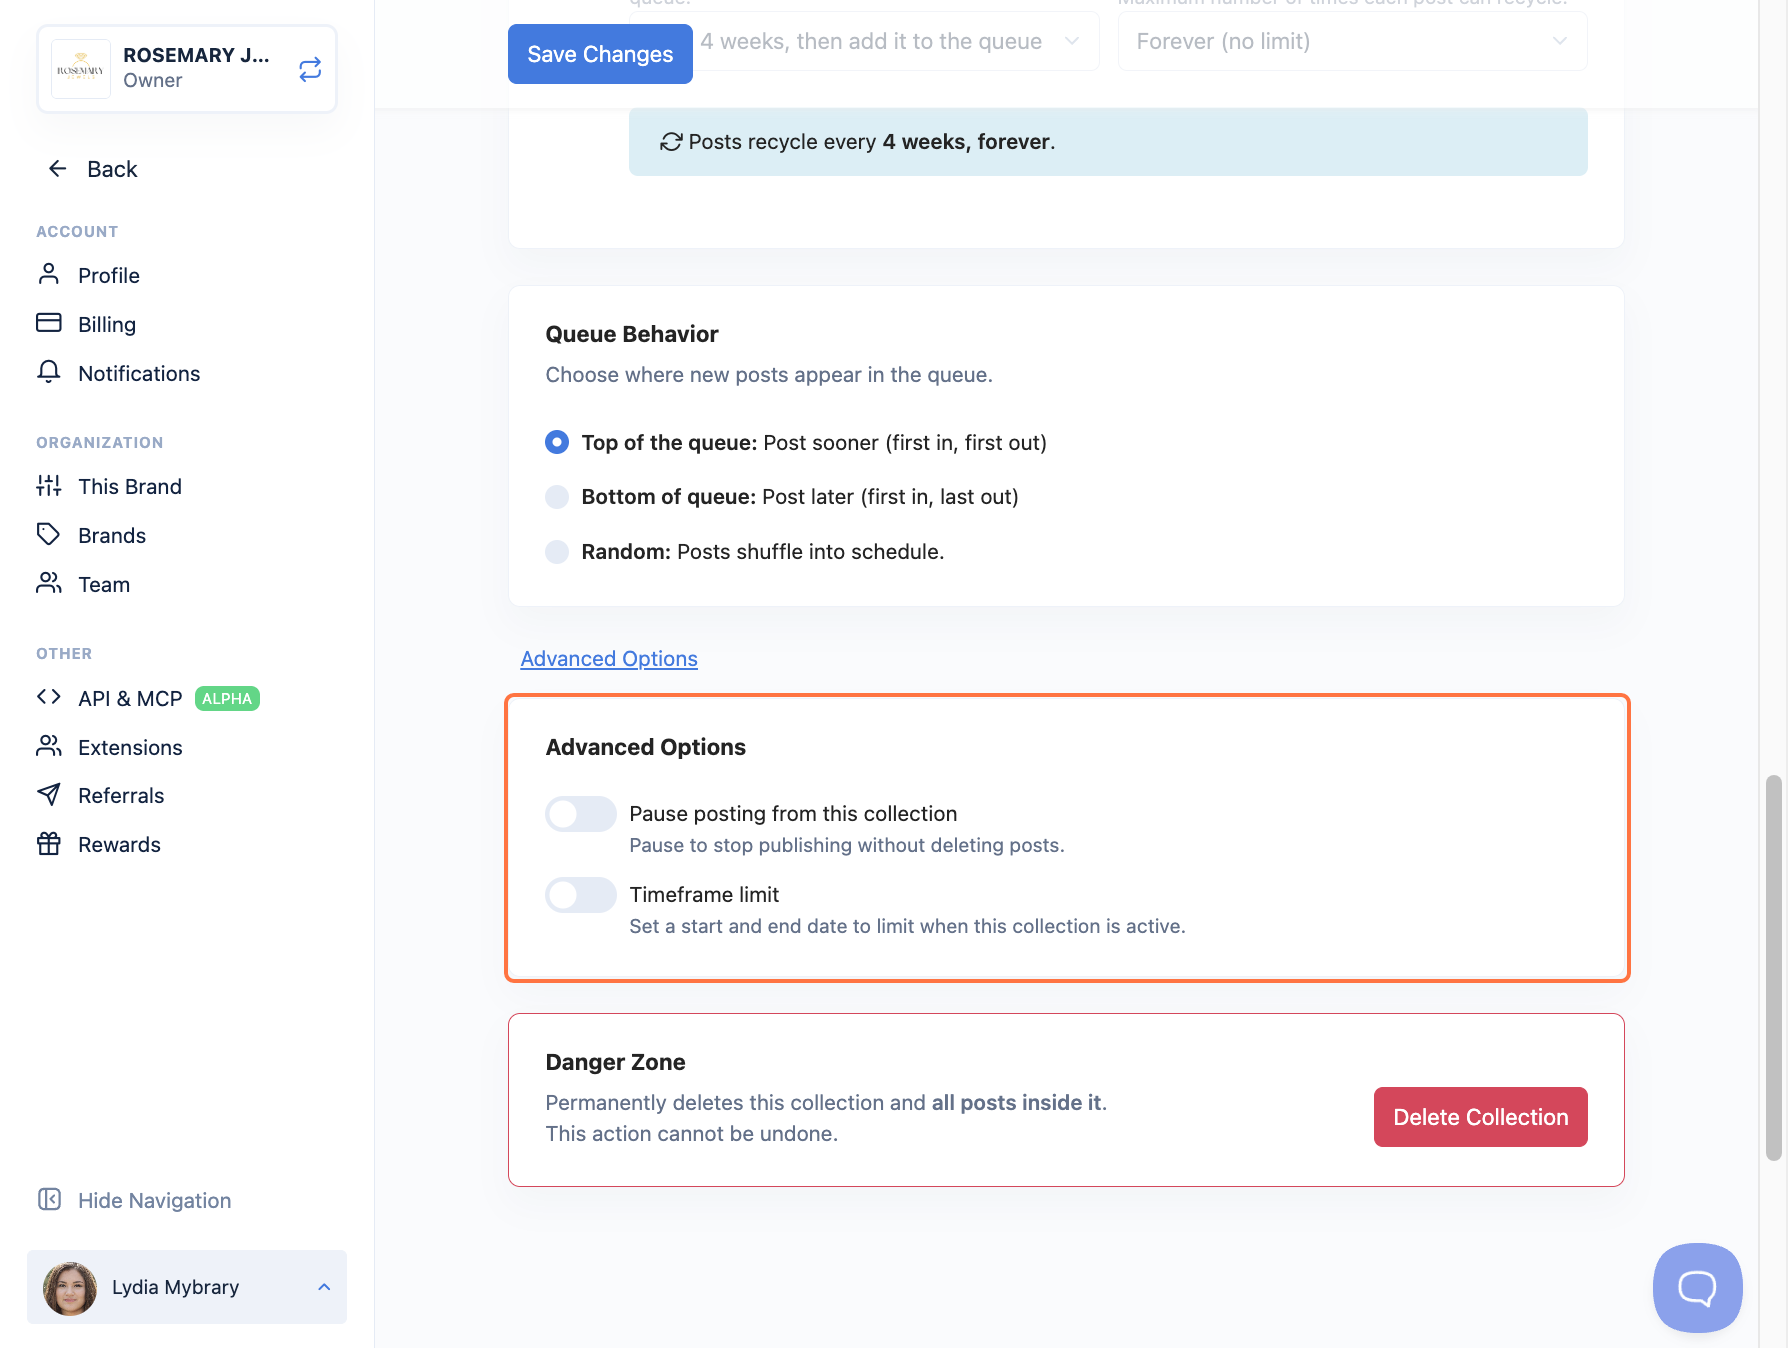
- (Optional) Click Advanced Options to expand more settings:
- Pause posting from this collection: stop publishing without deleting any posts.
- Timeframe limit: Set a start and end date to limit when the collection is active.
- Click Save Changes at the top to apply everything.
You're all set! Your episodes will now publish to the channels, days, and times you chose.
FAQs
Will my past episodes get shared too?
Only if you want them to. Turn on Import existing episodes as well as the future ones during setup, and set how many to import (1–100). Leave it off to share only new episodes going forward.
Where do I choose which social accounts to post to?
Inside the collection, not the automation. Open the collection's Settings tab and pick your channels under Default Social Channels, then set your times under Weekly Schedule.
What do smart conditions do?
Smart conditions let you filter which episodes get shared. For example, you can choose to only post episodes that have specific keywords in their titles.
Can I add a delay before the follow-up comment posts?
Yes. When you turn on Send a follow-up comment, set the Condition to After delay and choose how many minutes to wait after the main post.
Can I review posts before they go live?
Yes. Turn on Mark the posts as draft for later review, then open the Posts section to edit and approve them before they publish.
Troubleshooting
My episodes aren't showing up in Nuelink.
Double-check the link you pasted in the RSS.com Podcast Link box. Make sure the podcast is public, then wait for the next check to run.
Nothing is publishing after setup.
Open the collection linked to this automation and confirm it has at least one channel under Default Social Channels and at least one time slot under Weekly Schedule. Also check that Pause posting isn't switched on.
Posts are going to the wrong channels or times.
These come from the collection, not the automation. Open the collection's Settings tab and update Default Social Channels and Weekly Schedule, then click Save Changes.
My captions don't match my show's tone.
Edit the AI prompt in the automation's Post Caption section to describe your show's voice and audience, so future captions are written the way you want.