
How to Set Up Squarespace Shop to Auto-Post to Your Social Media
Connect your Squarespace site to Nuelink, and your content can turn into social media posts on its own. This guide shows you how to set it up so a new blog article or a new product from your store is shared automatically. It takes about 3 minutes.
Note: To follow this guide, you'll need a Nuelink account, at least one connected social channel, and your Squarespace web address ready.
Note: Nuelink has two Squarespace automations: Squarespace Blog (for your blog articles) and Squarespace Shop (for your online store products). Both are set up the same way; just pick the one you need in Step 3. This guide uses the Shop automation as the example; the Blog automation works identically, except its link field is called Squarespace Blog Post Link.
Table of Contents
Video Tutorial
Step-by-Step Guide
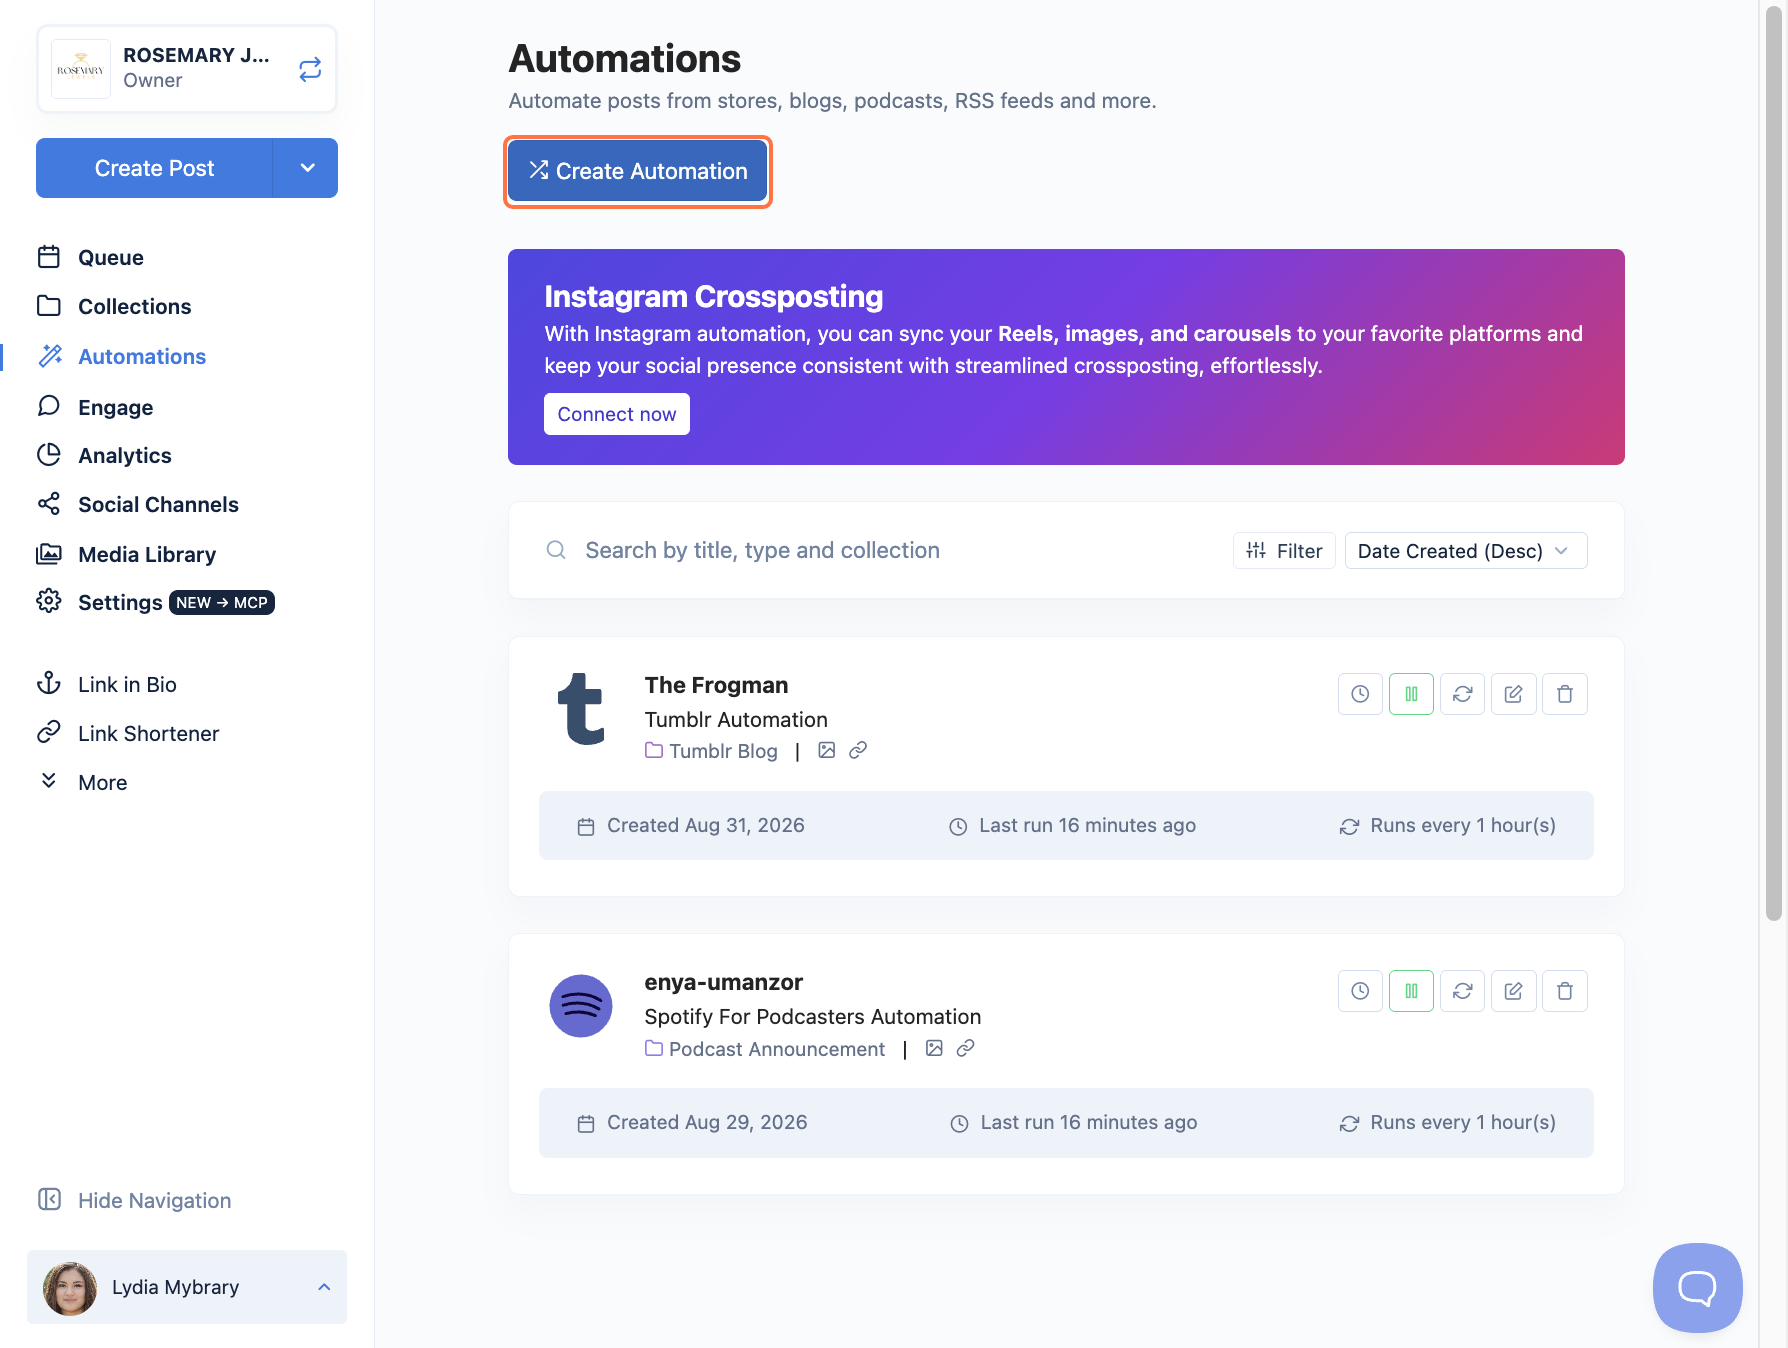
- Go to Automations in the left sidebar. Click Create Automation.
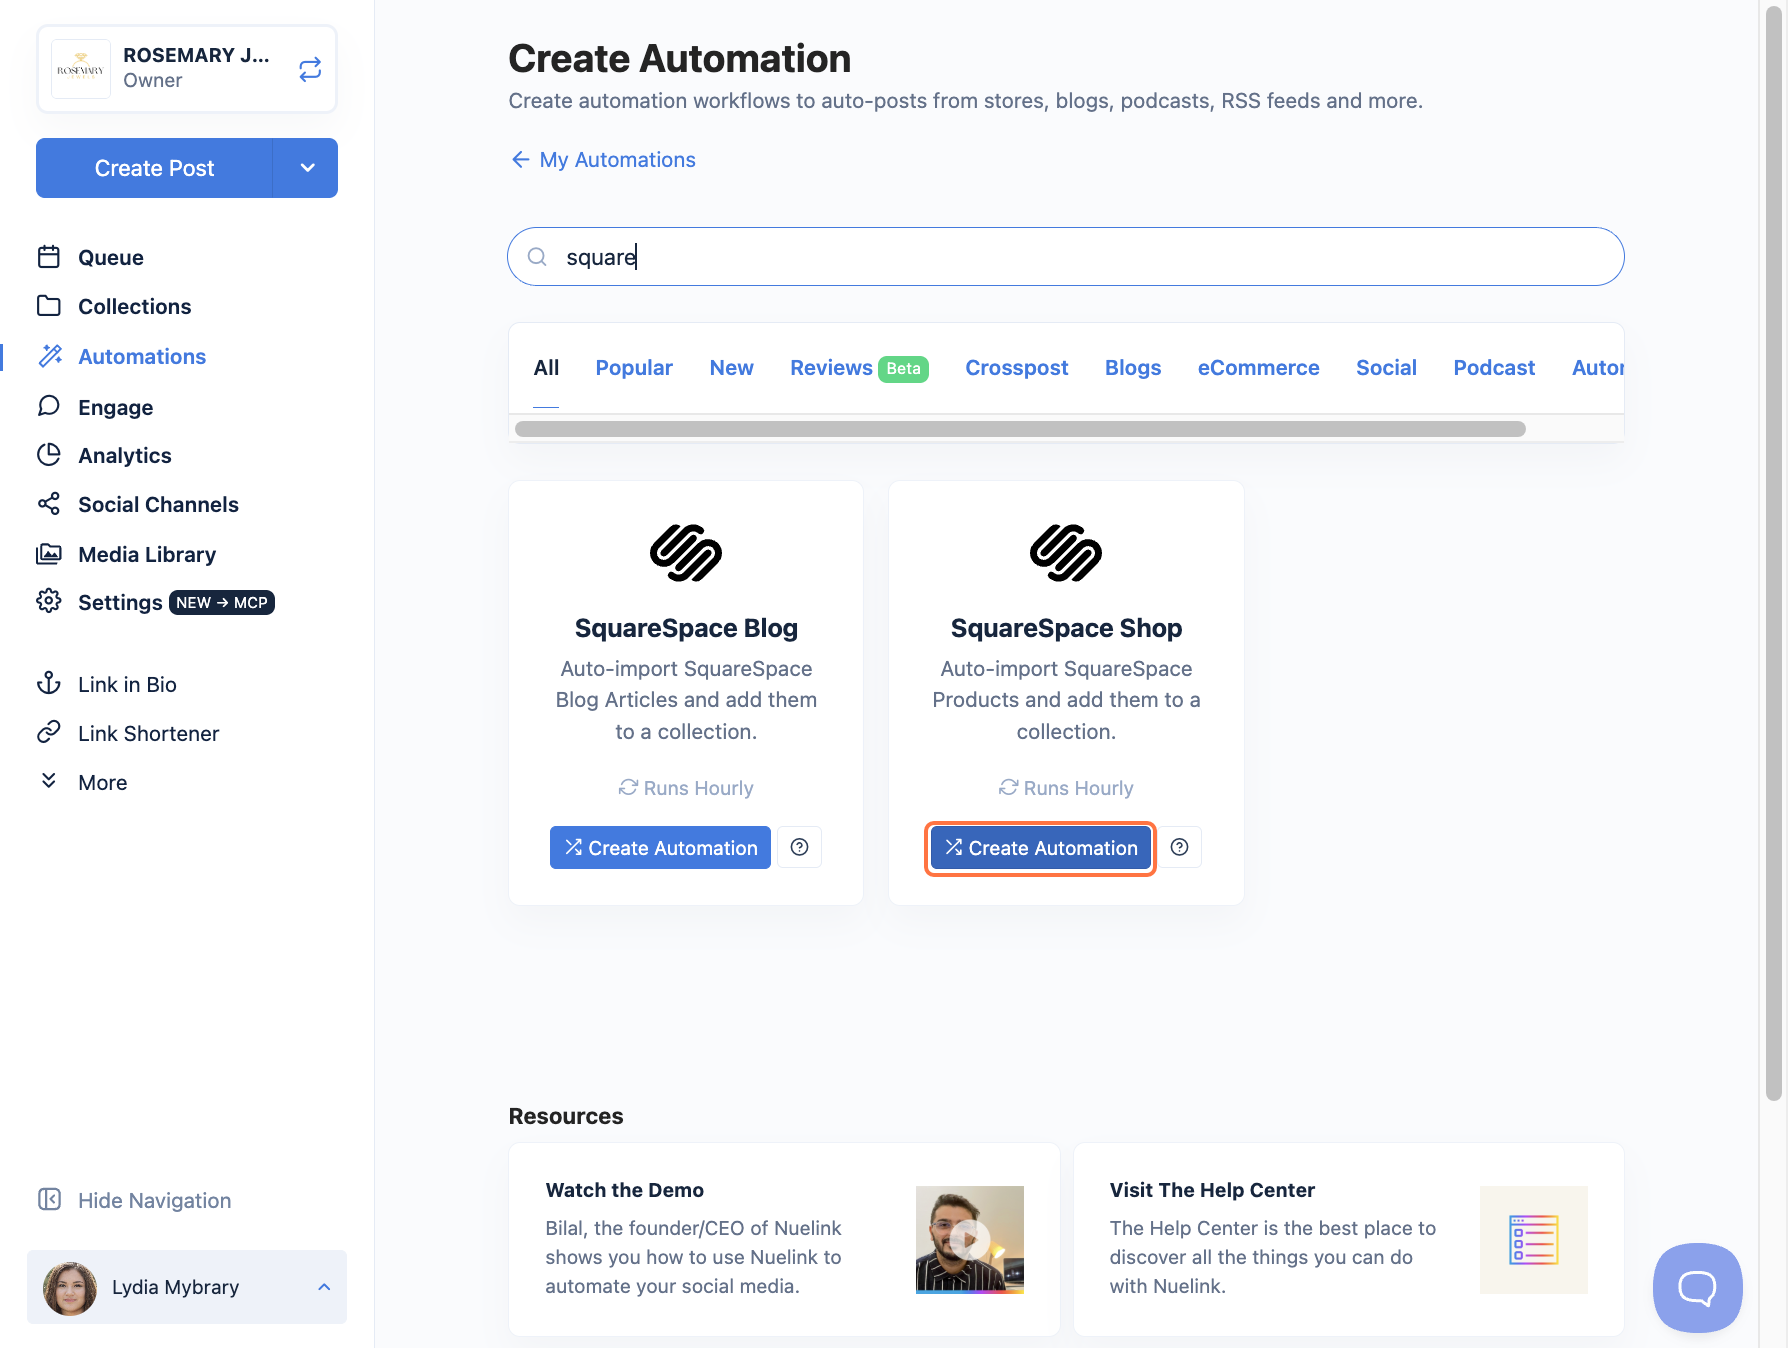
- Find Squarespace in the list of automation sources. You can scroll or use the search box to find it faster.
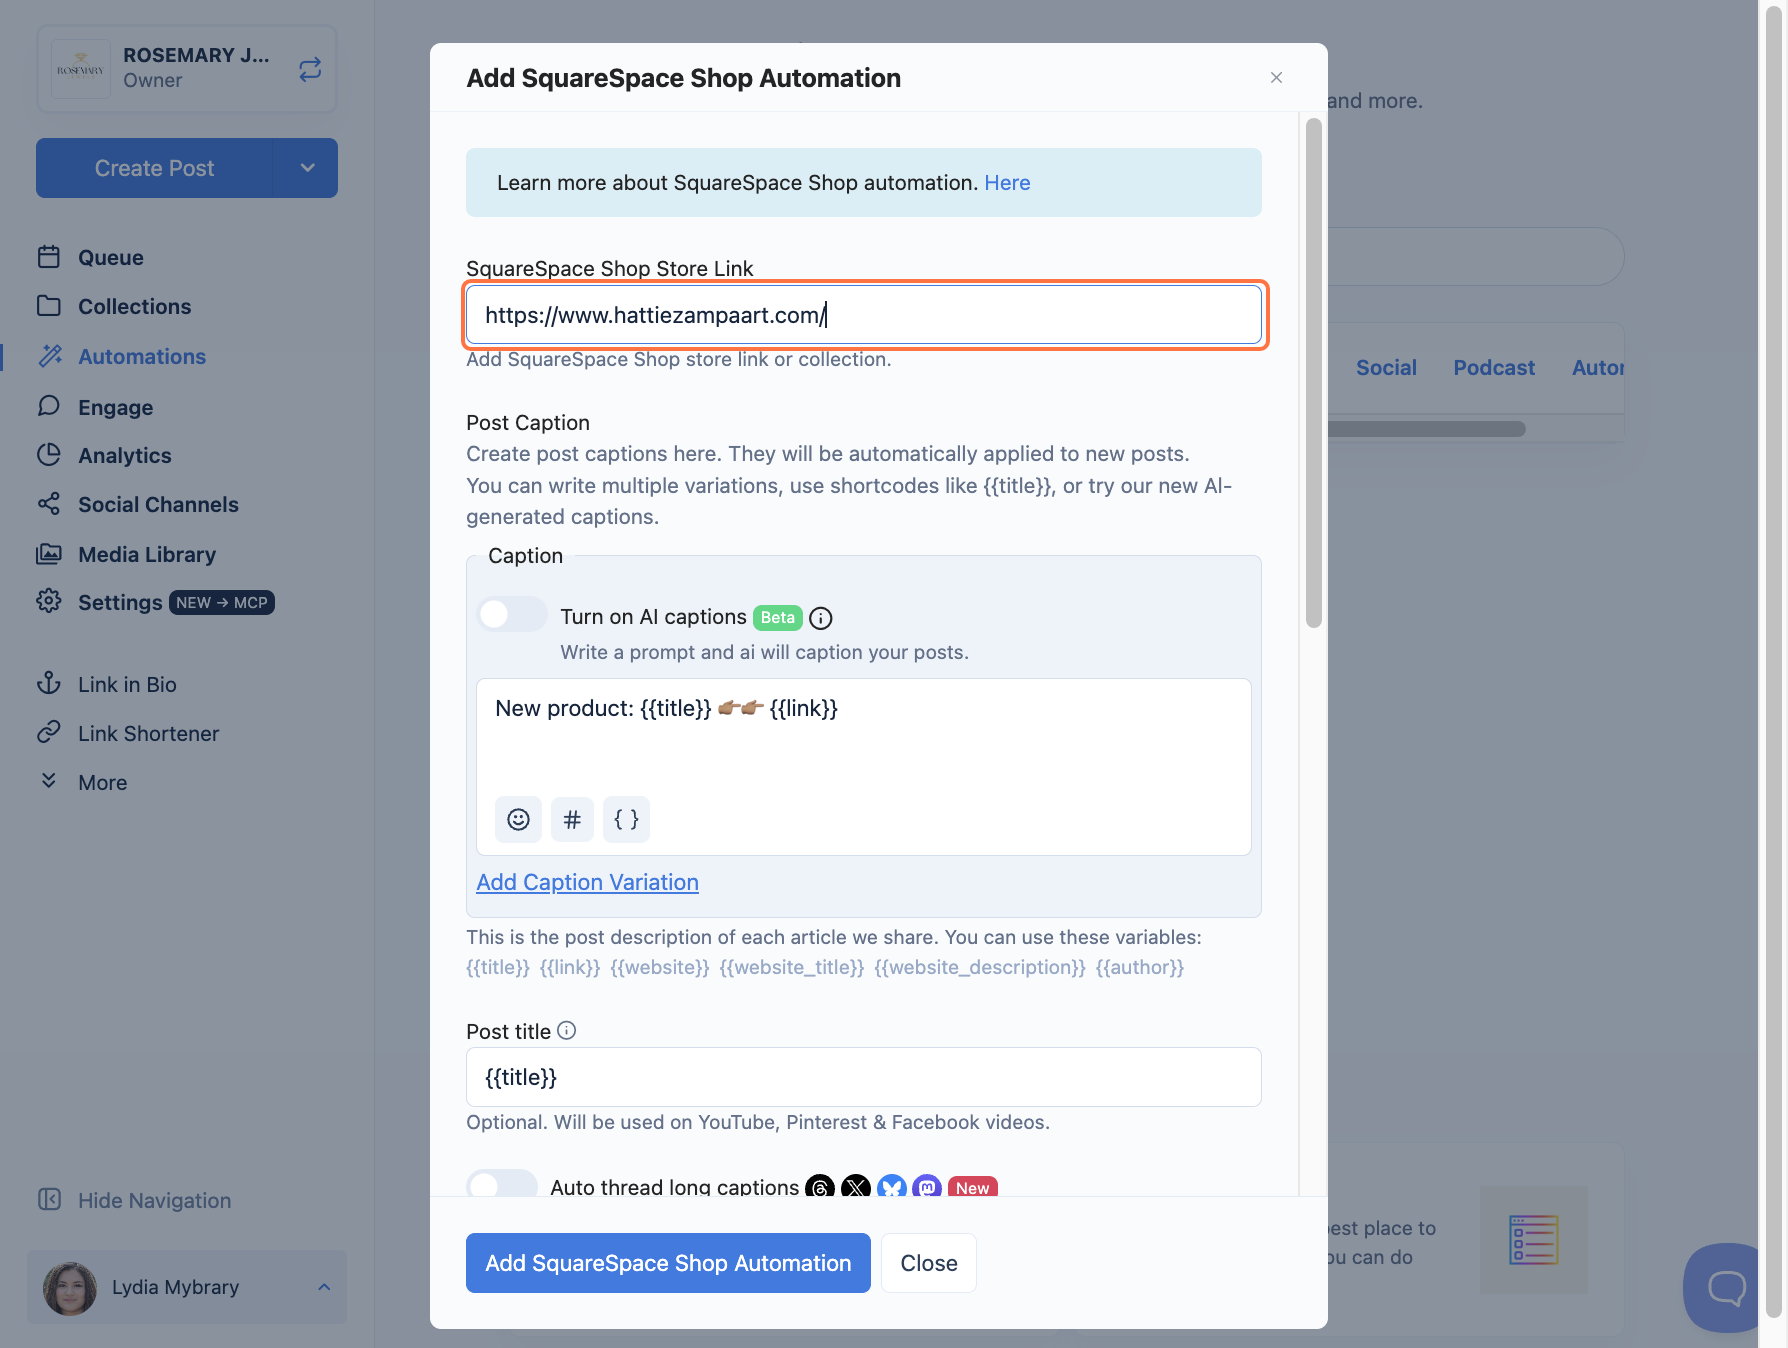
- Paste your site address into the Squarespace Shop Link field. You can use your website URL or blog URL (for example, https://website.com or https://website.com/blog).
-
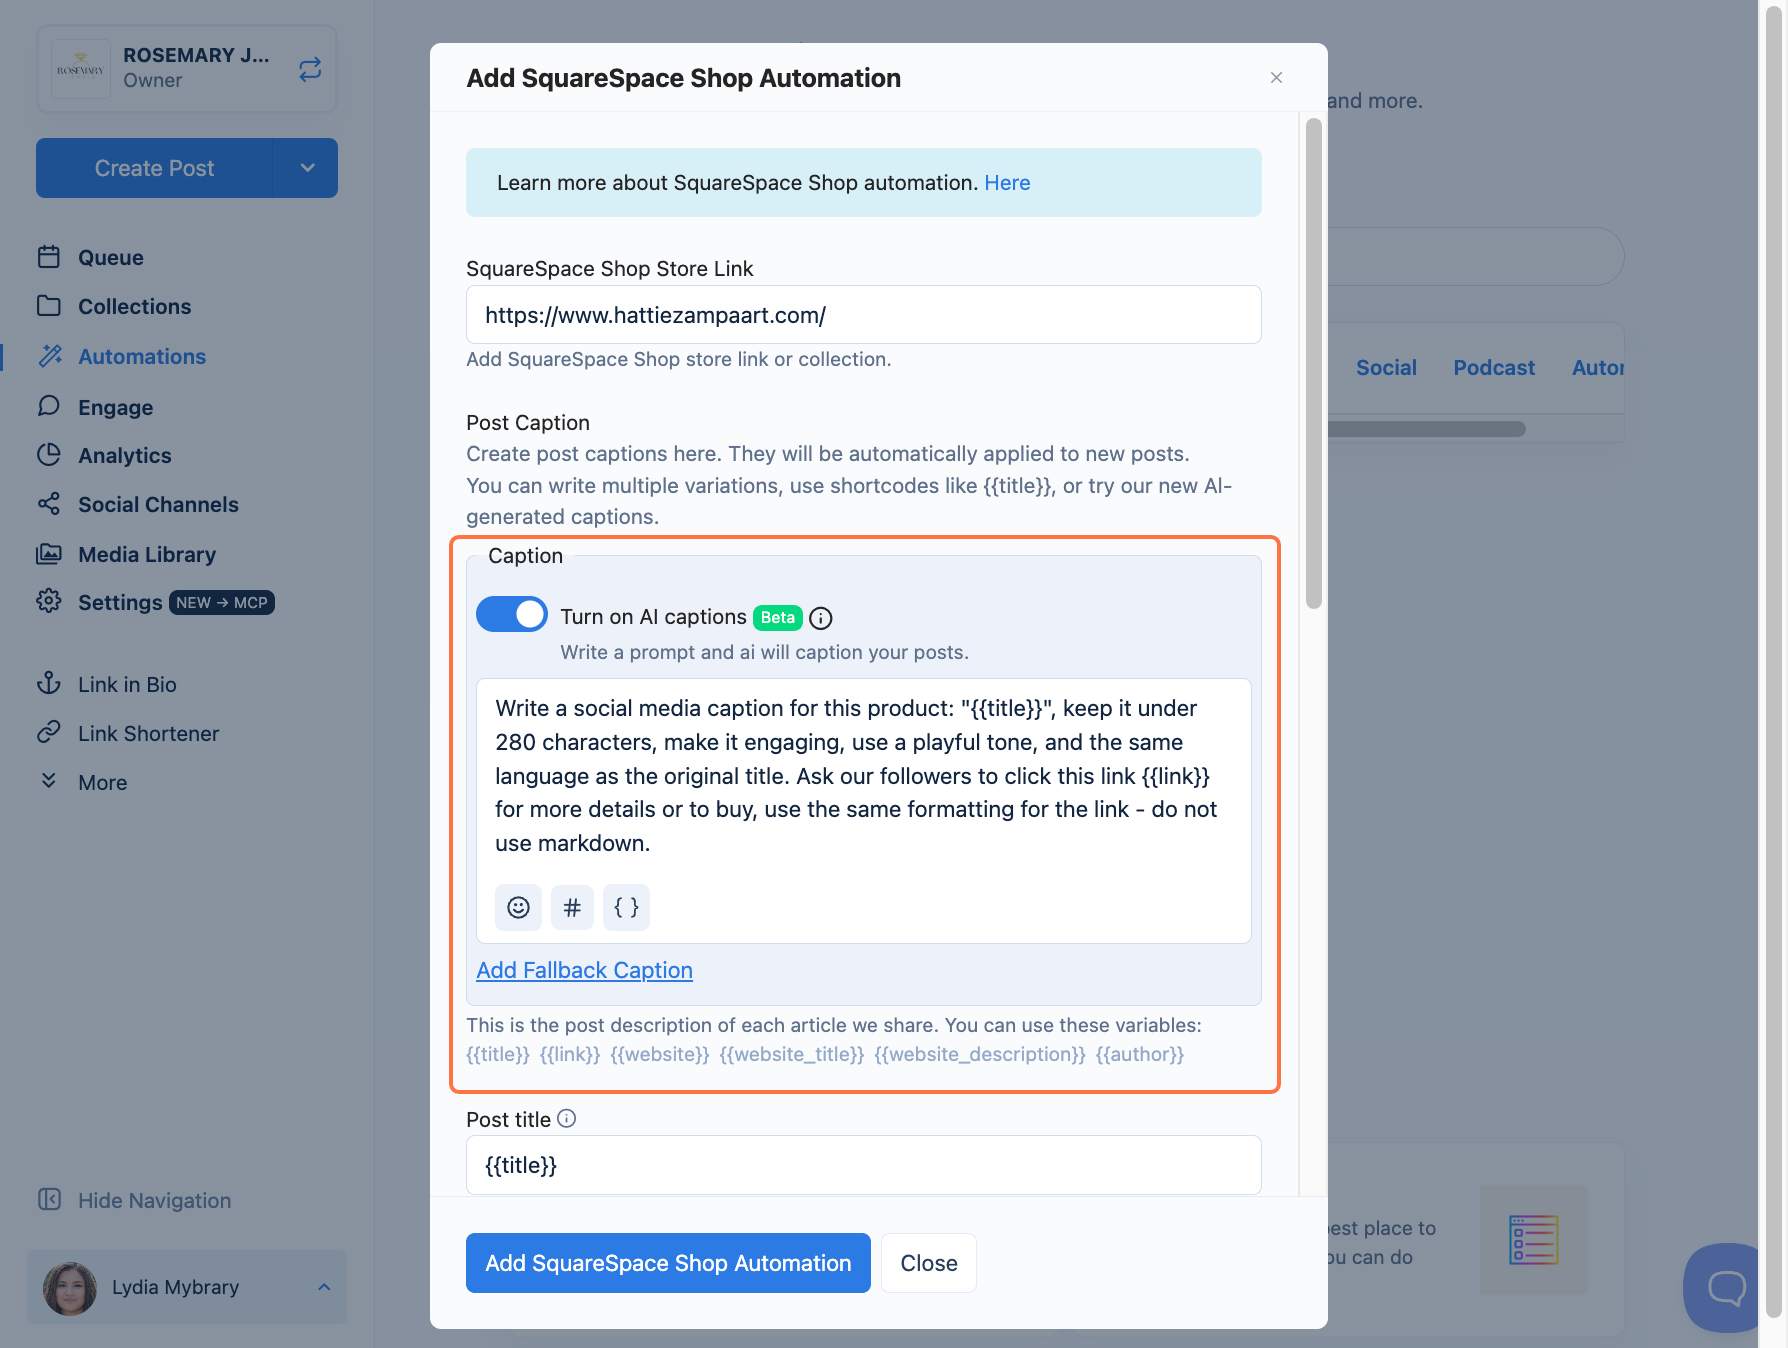
Set up your Post Caption. Write your own caption, or turn on AI captions to let Nuelink write it for you. You can edit the AI prompt to match your brand's tone, voice, and audience.
💡 You can insert variables like {{title}}, {{link}}, {{website}}, {{website_title}}, {{website_description}}, and {{author}} into your caption. Add a Fallback Caption to cover posts where a variable is empty.
- (Optional) Add a Post title. This is used on YouTube, Pinterest, and Facebook videos.
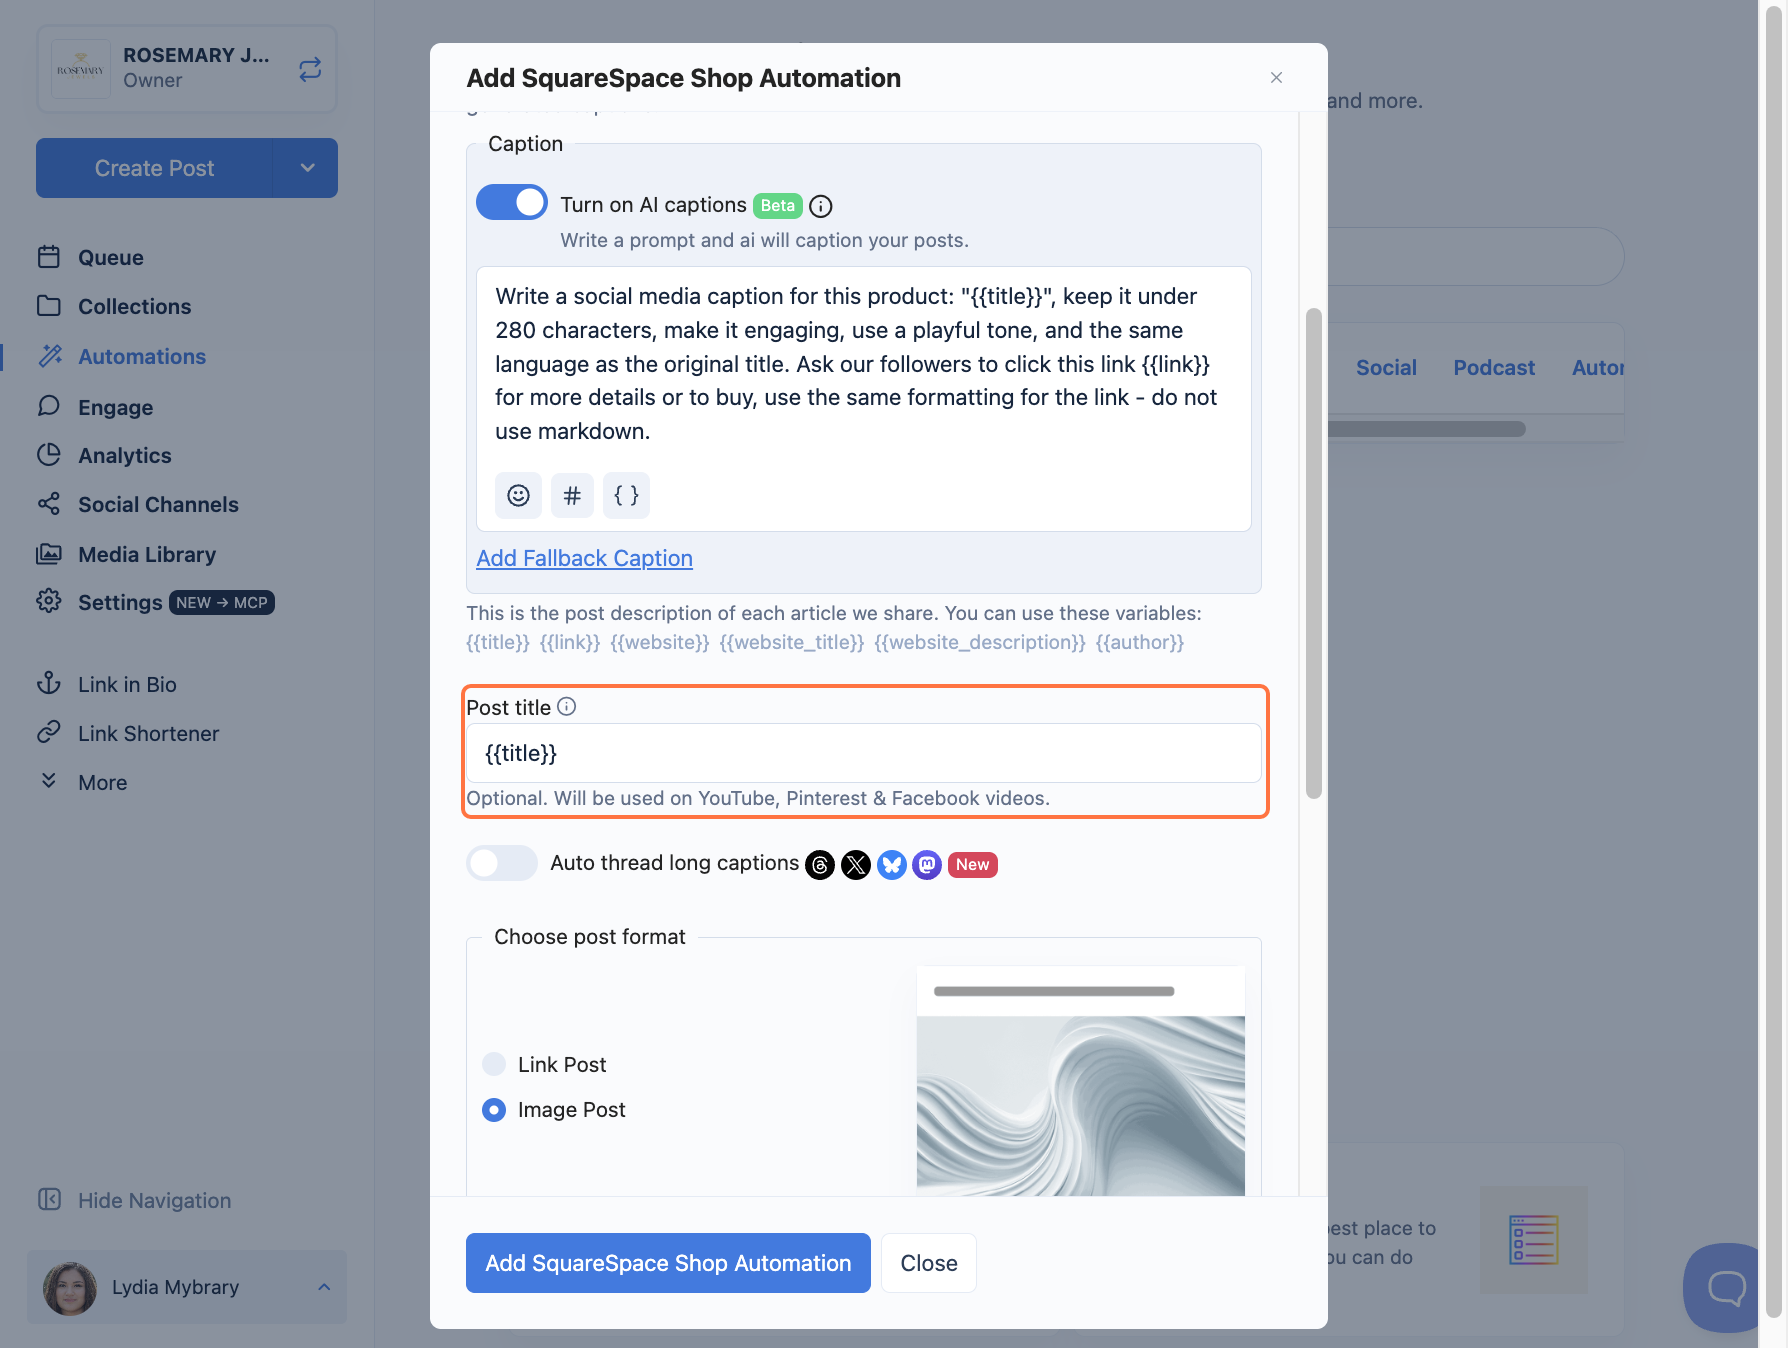
- Choose your post format. Pick a Link Post to share the article link, or an Image Post to share it as a picture.
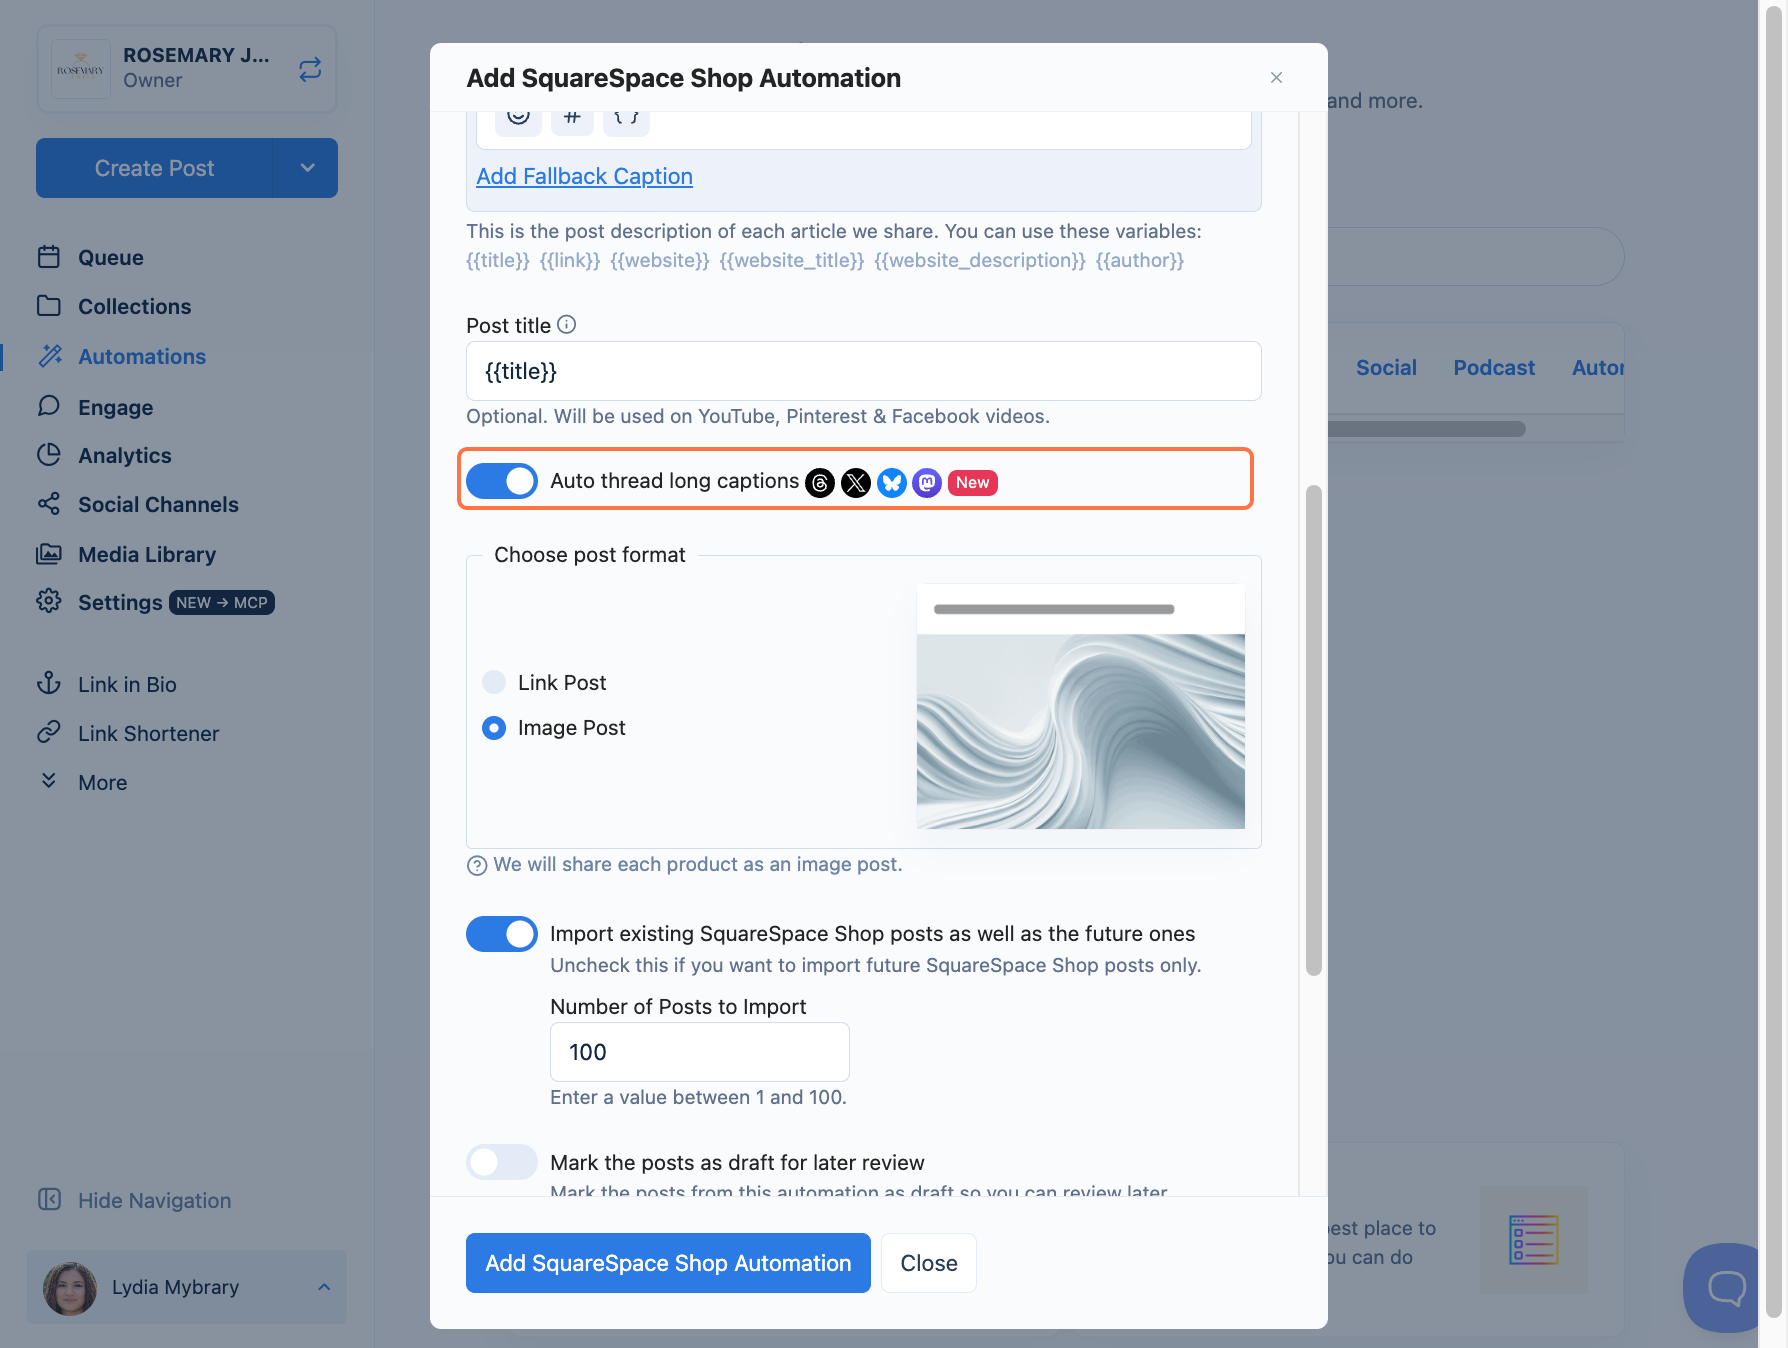
- Decide which posts to bring in. Turn on Import existing Squarespace Blog posts as well as the future ones to include older posts, or leave it off to import only new ones. Then set Number of Posts to Import (any value from 1 to 100).
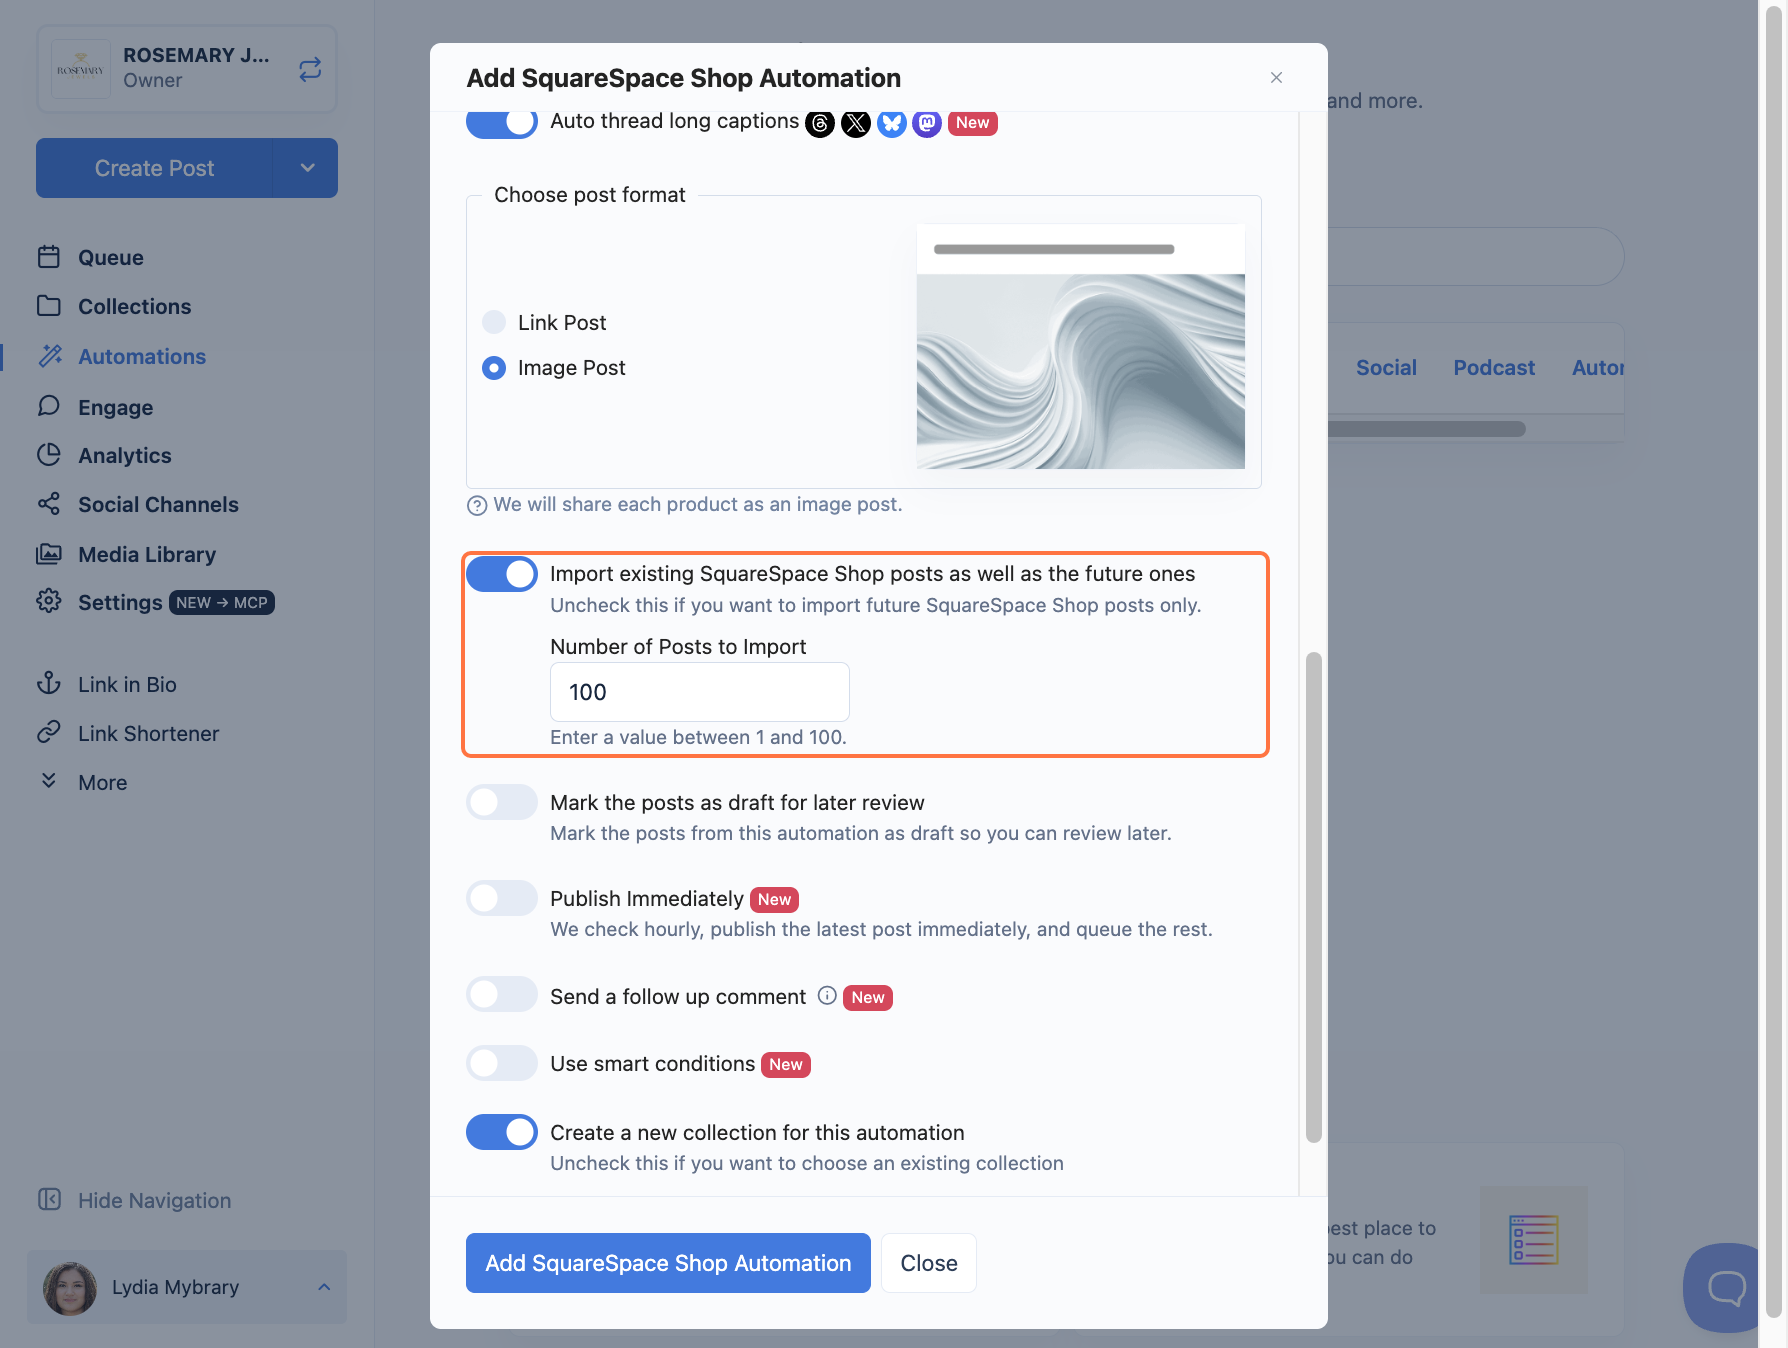
- (Optional) Turn on Mark the posts as draft for later review if you want to check each post before it publishes.
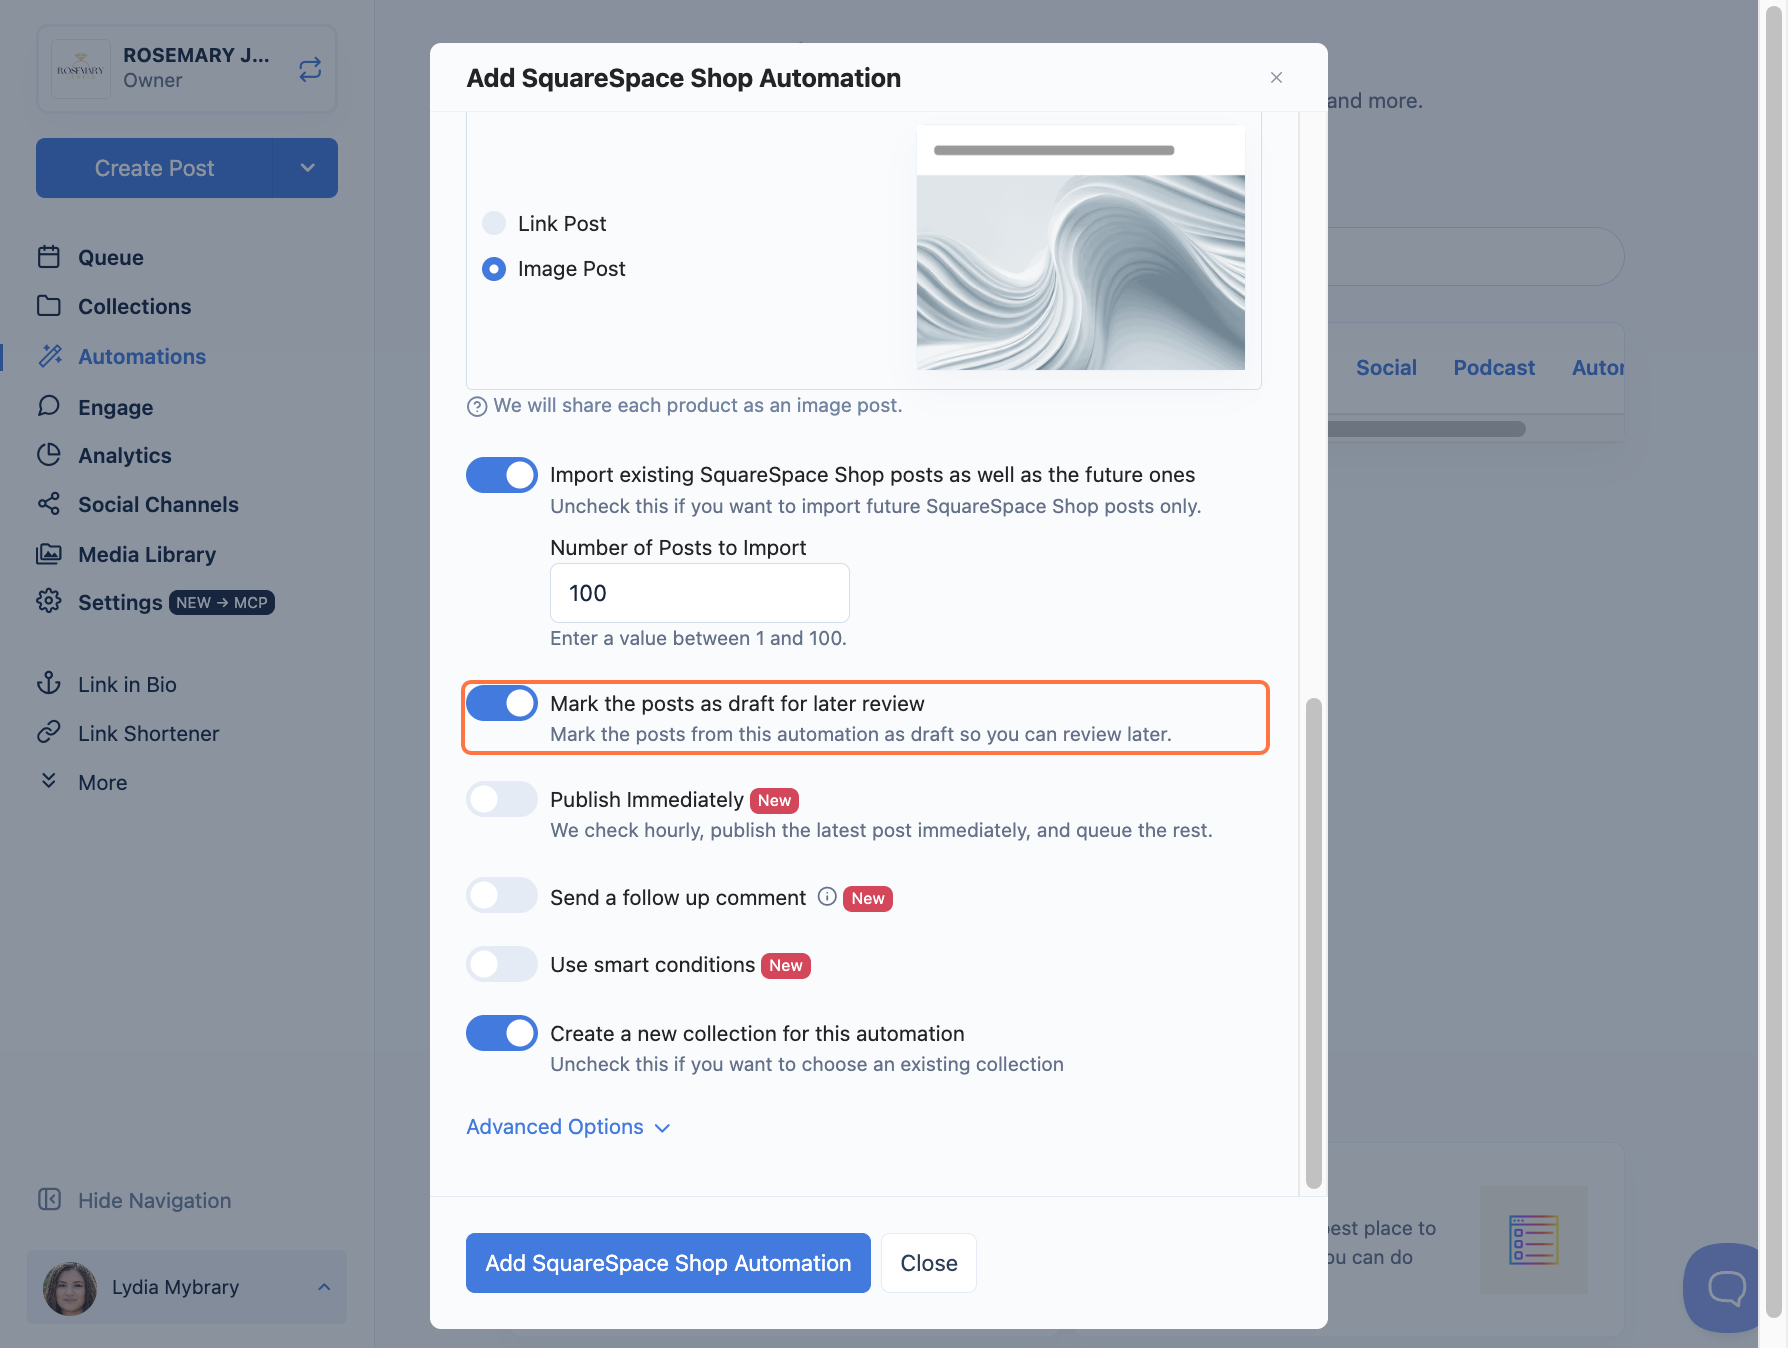
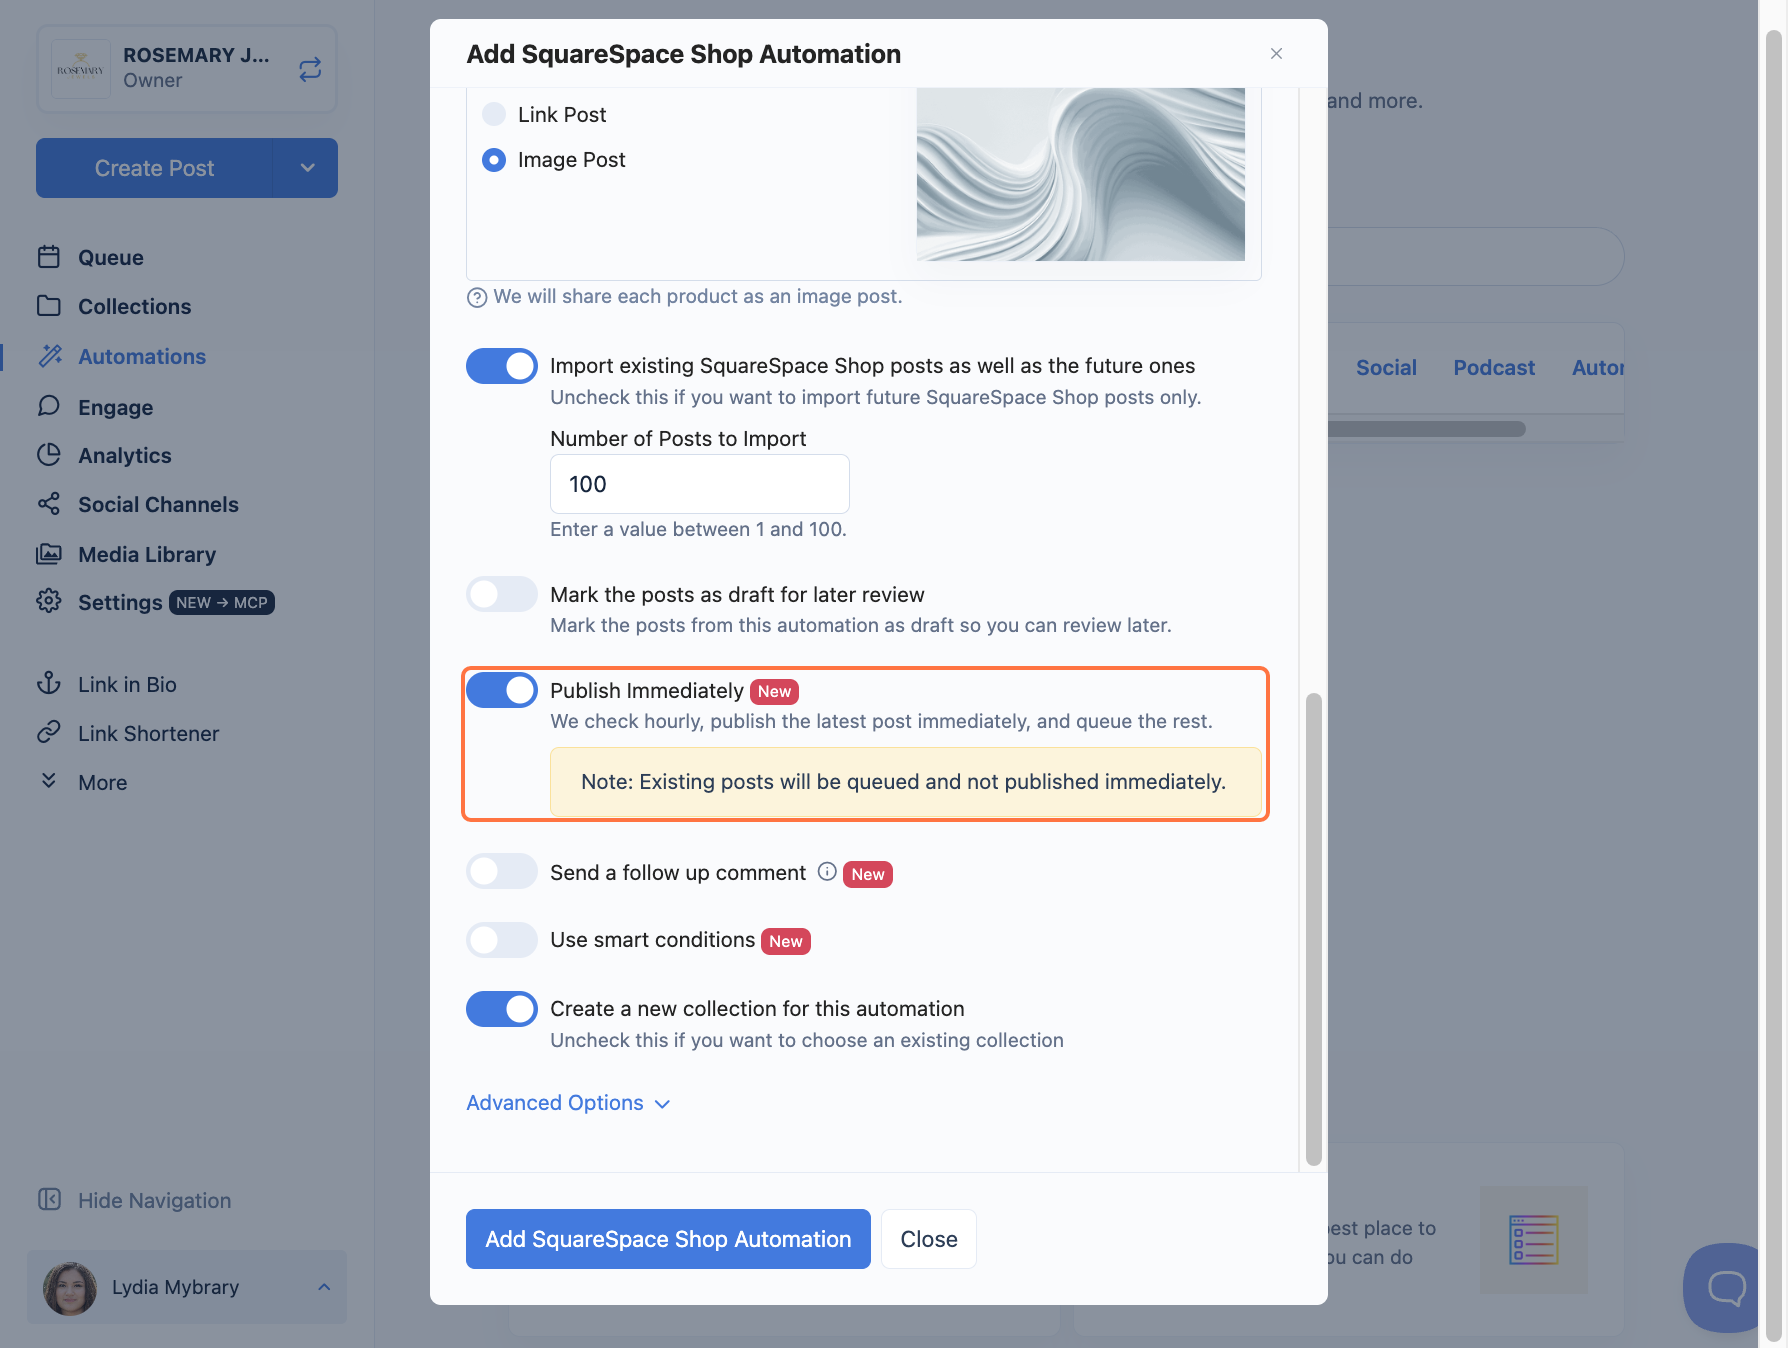
- (Optional) Turn on Publish Immediately. Nuelink checks hourly, publishes the latest post right away, and queues the rest.
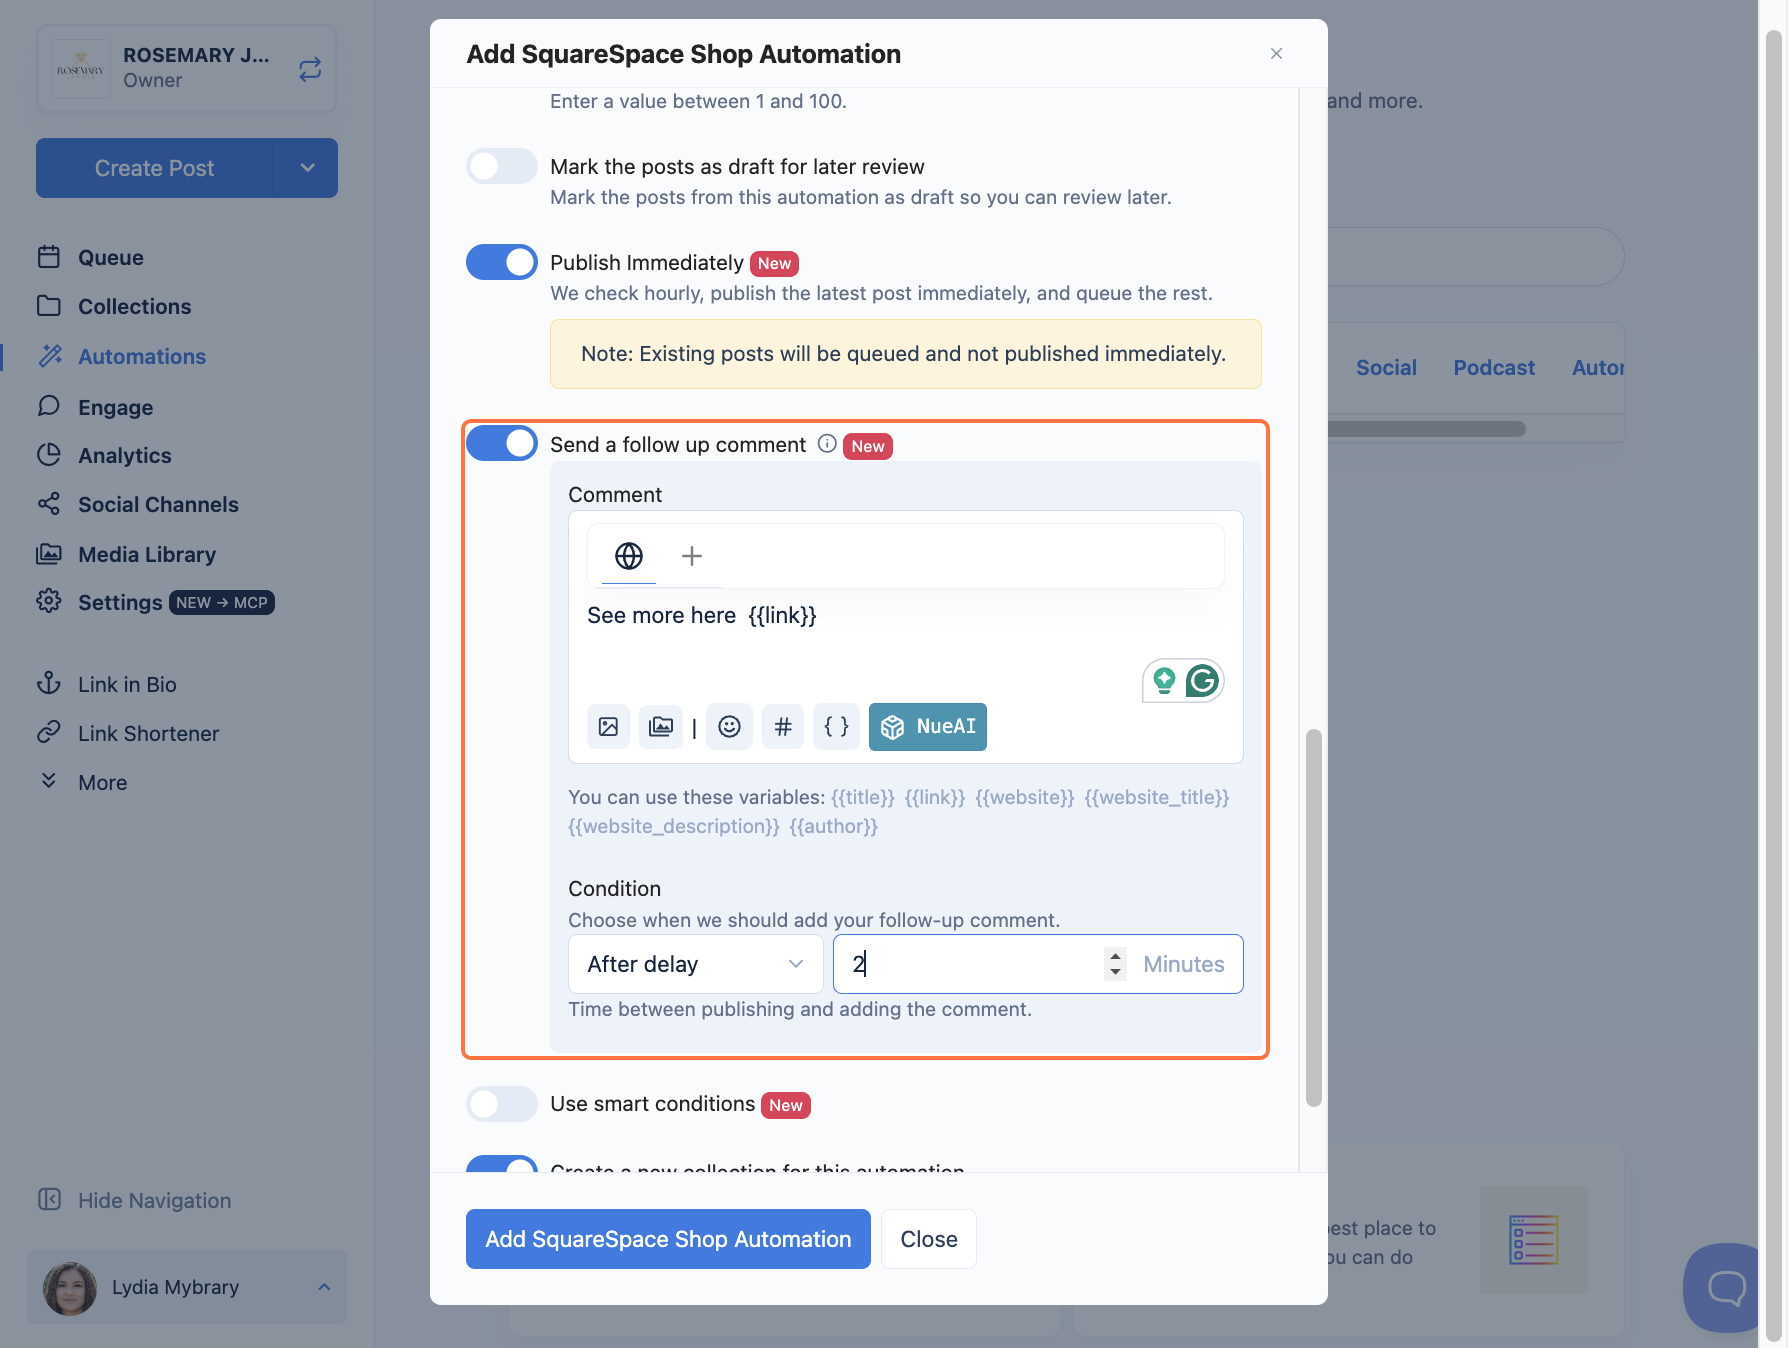
- (Optional) Turn on Send a follow-up comment to auto-post a first comment after each post. Write your comment (or use NueAI), then set the Condition, for example, After delay and the number of minutes to wait.
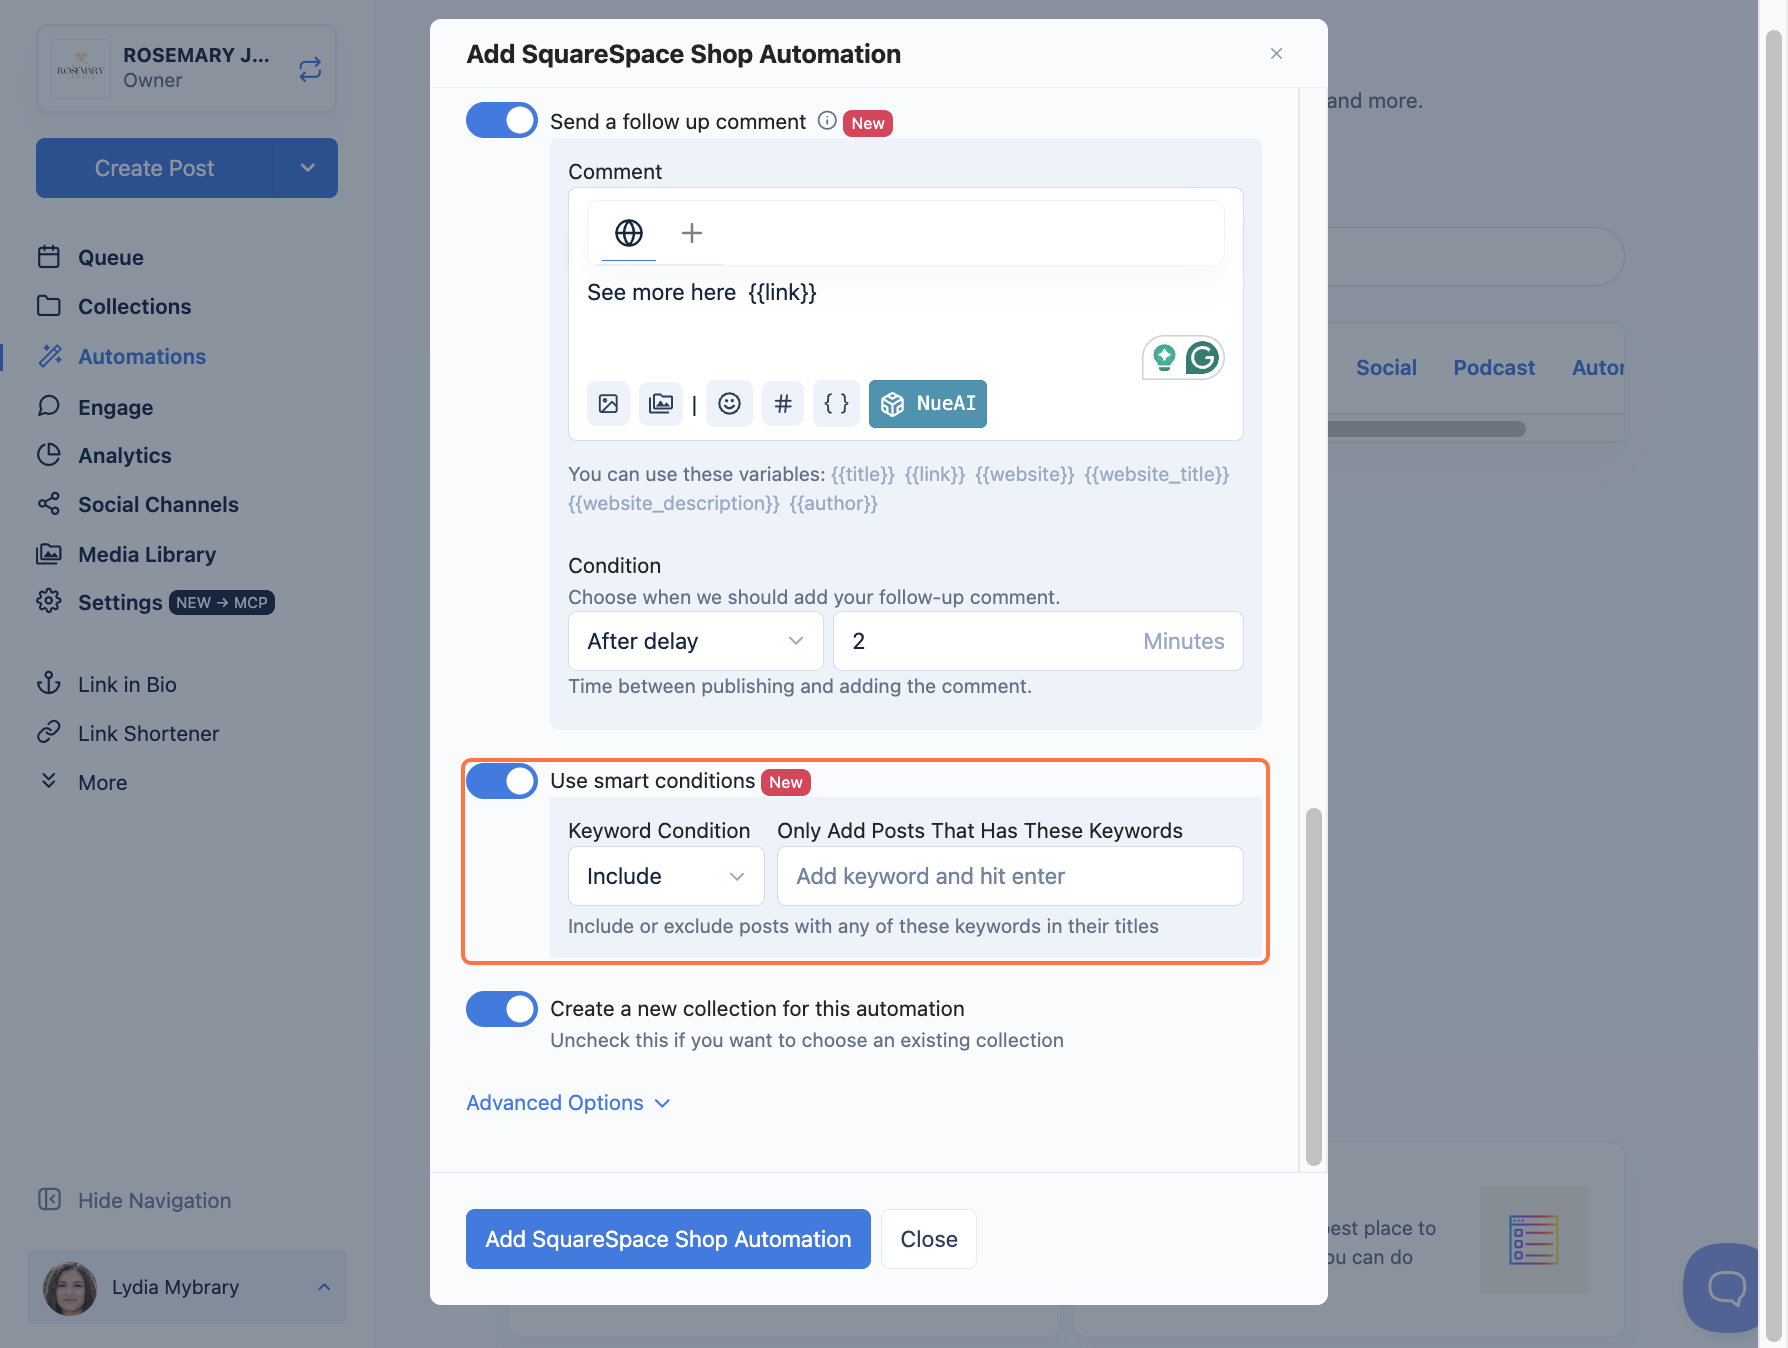
- (Optional) Turn on Use smart conditions to only share posts that match rules you choose, like specific keywords in their titles.
- Choose your collection. Creating a new collection for this automation is on by default. Uncheck it if you'd rather add these posts to a collection you already use. (You'll set the channels and schedule inside the collection; see the next section.)
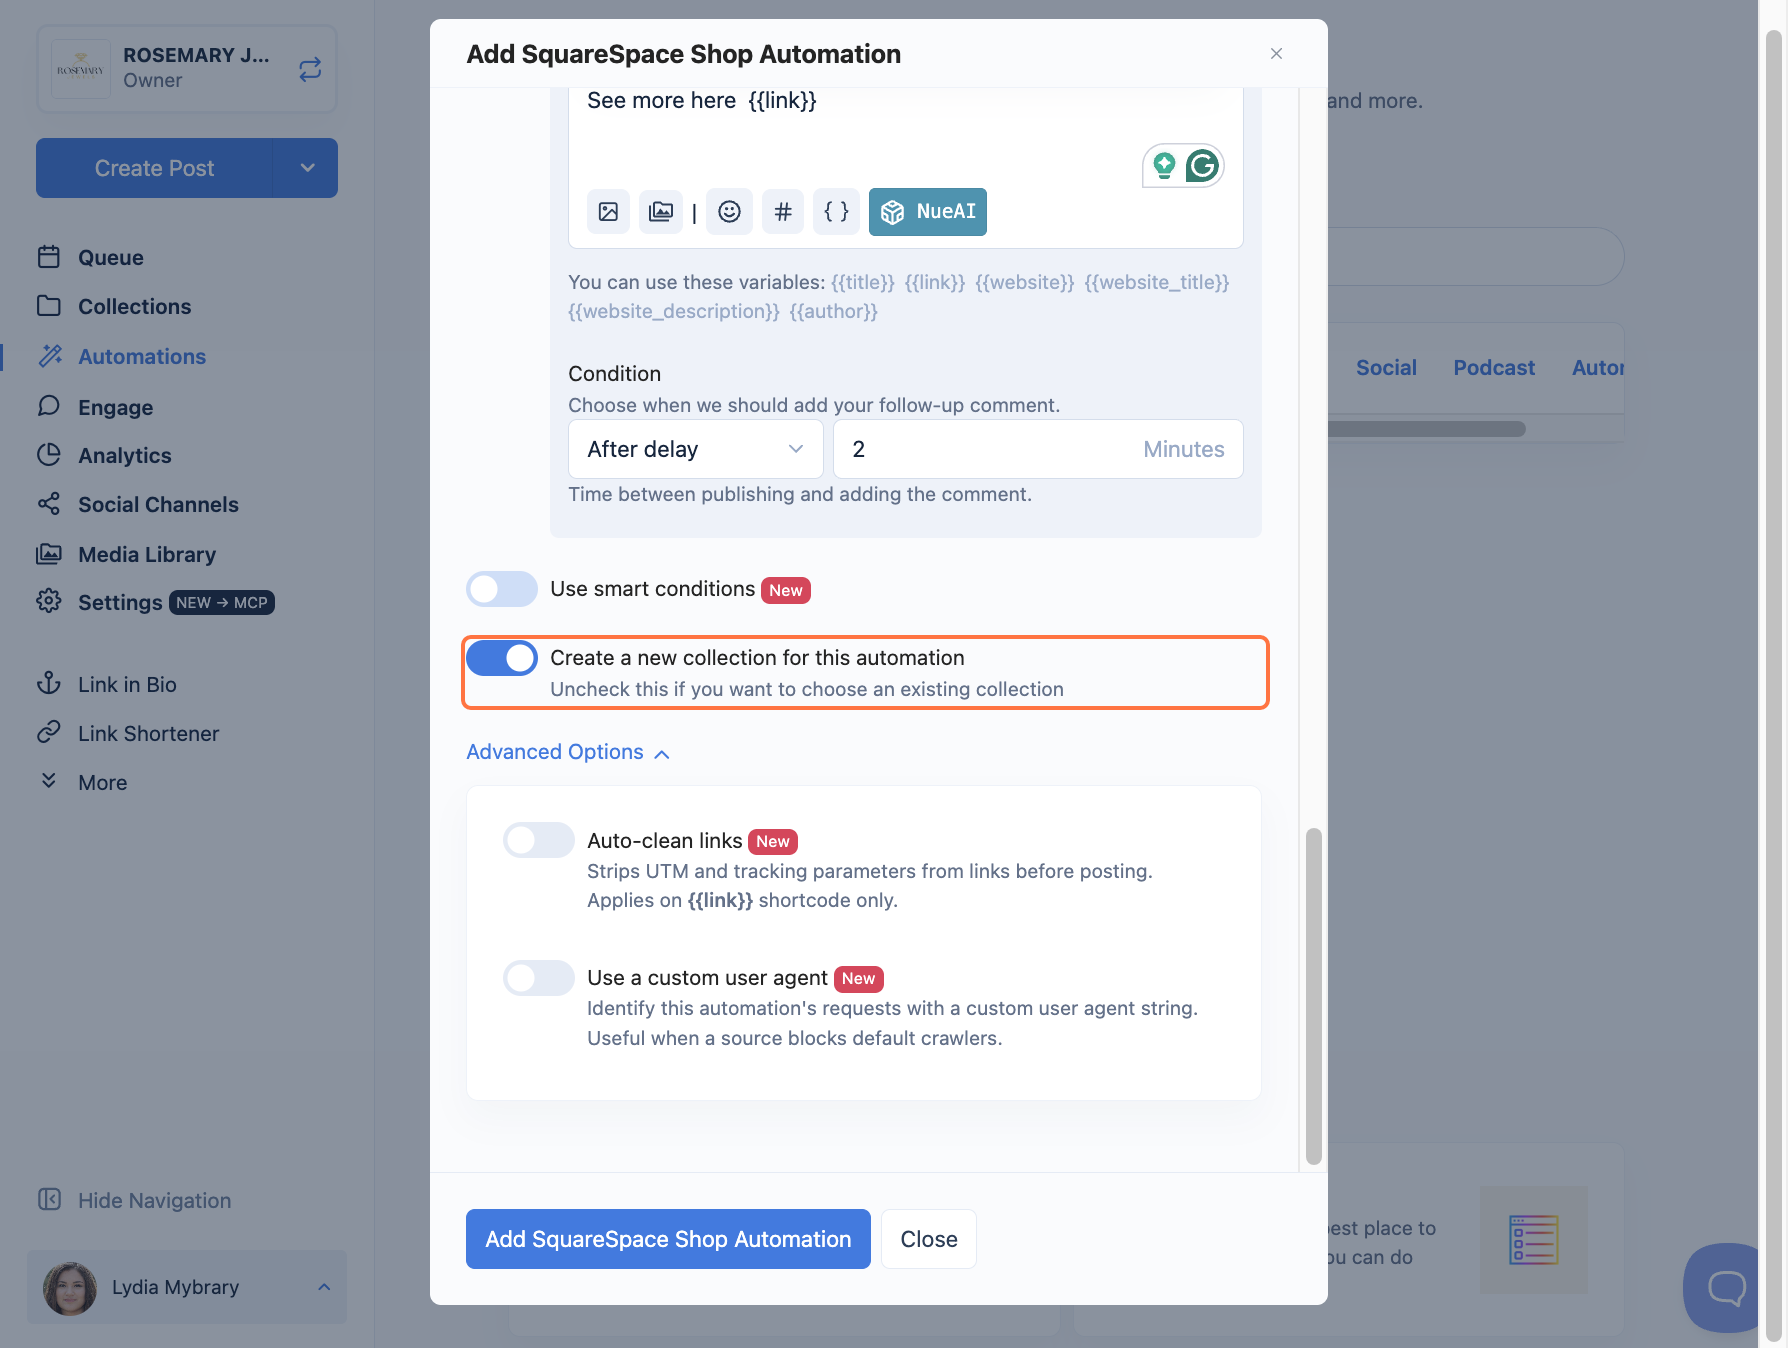
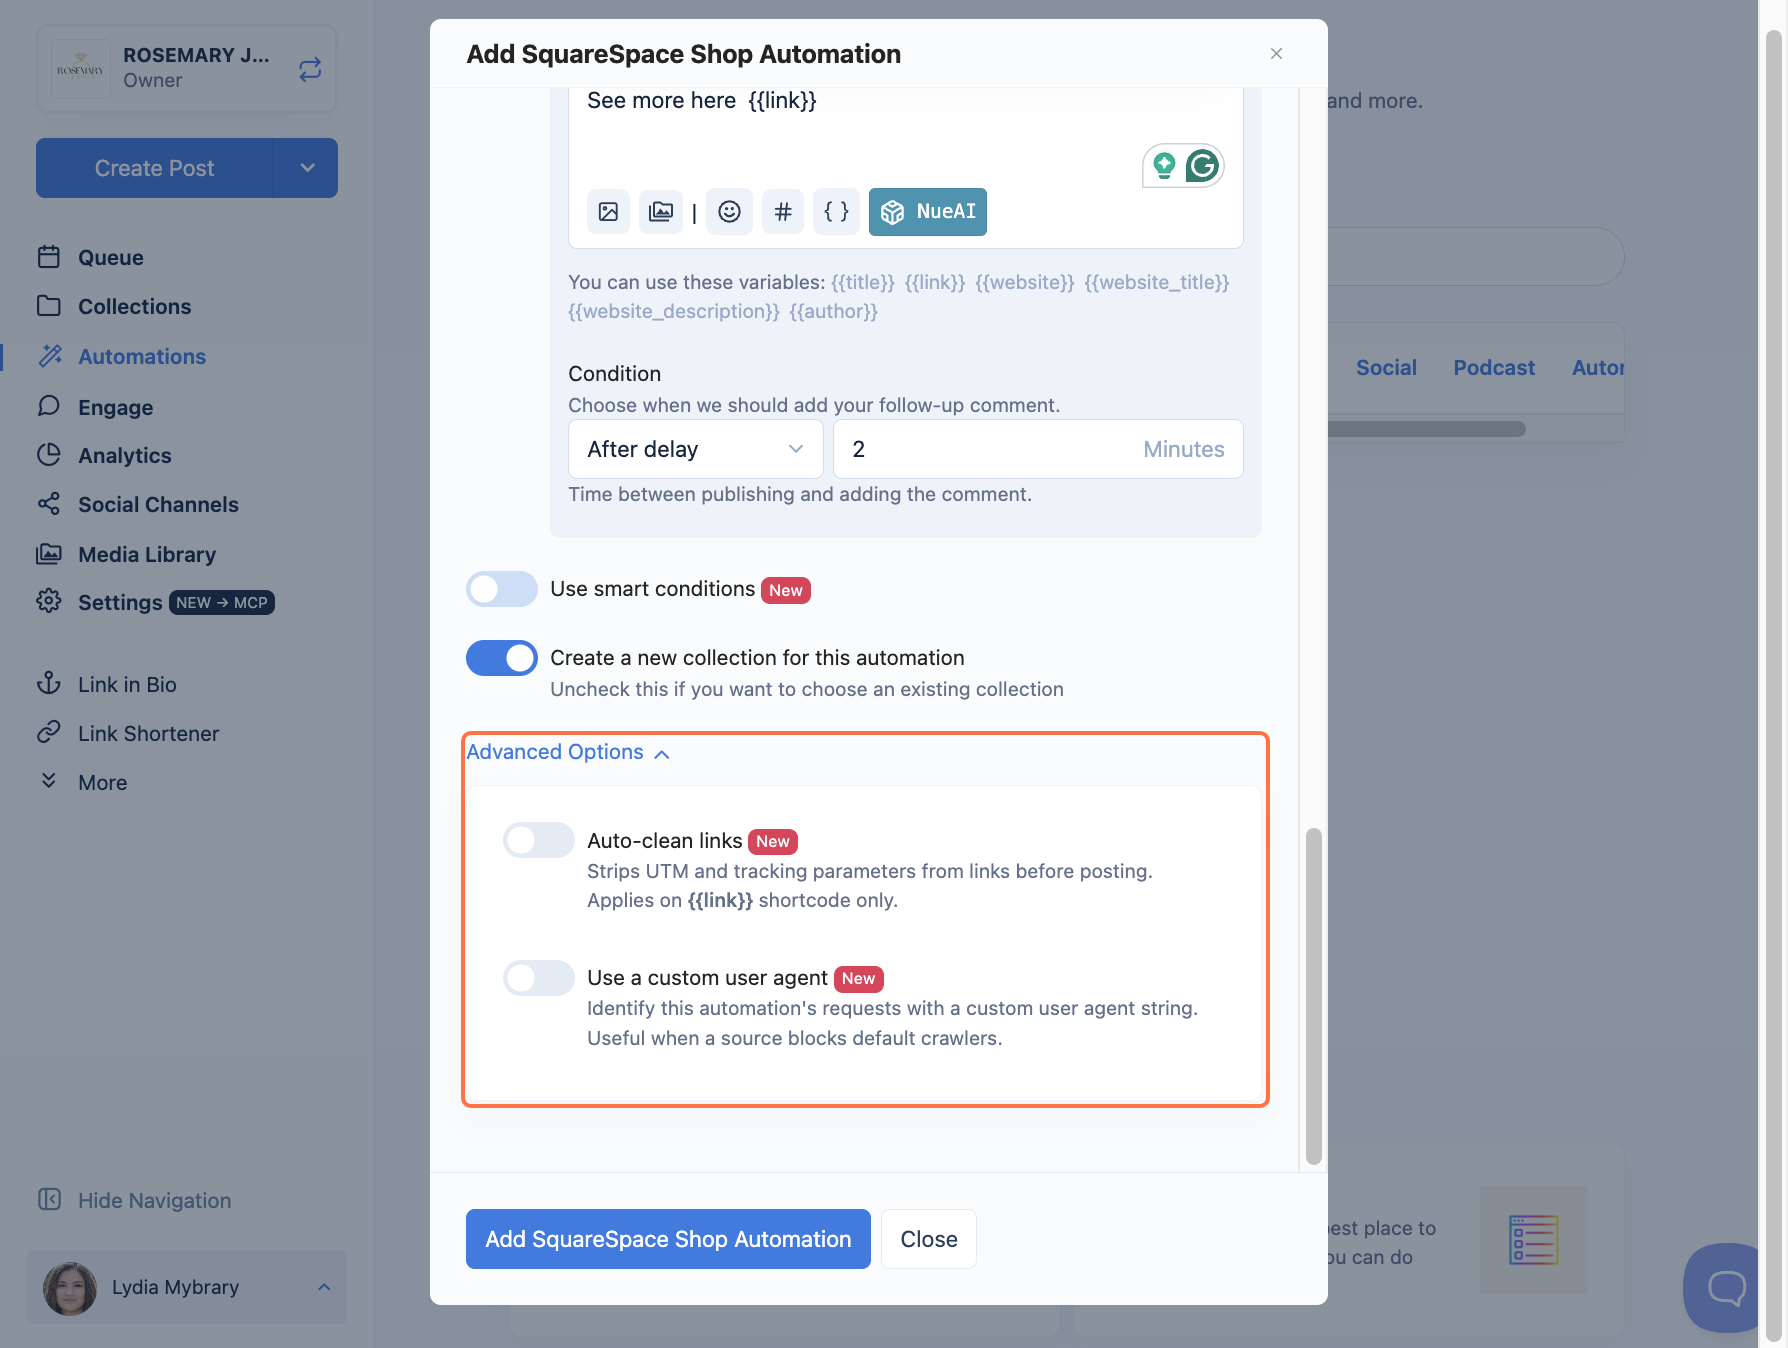
- (Optional) Open Advanced Options to fine-tune your automation:
- Check frequency: how often Nuelink checks your site for new posts (for example, every 24 hours).
- Auto-clean links: removes tracking parameters from your links before posting.
- Use a custom user agent: helpful if your site blocks default crawlers.
- Click Add Squarespace Blog Automation to finish. (For a store, this button reads Add Squarespace Shop Automation.)
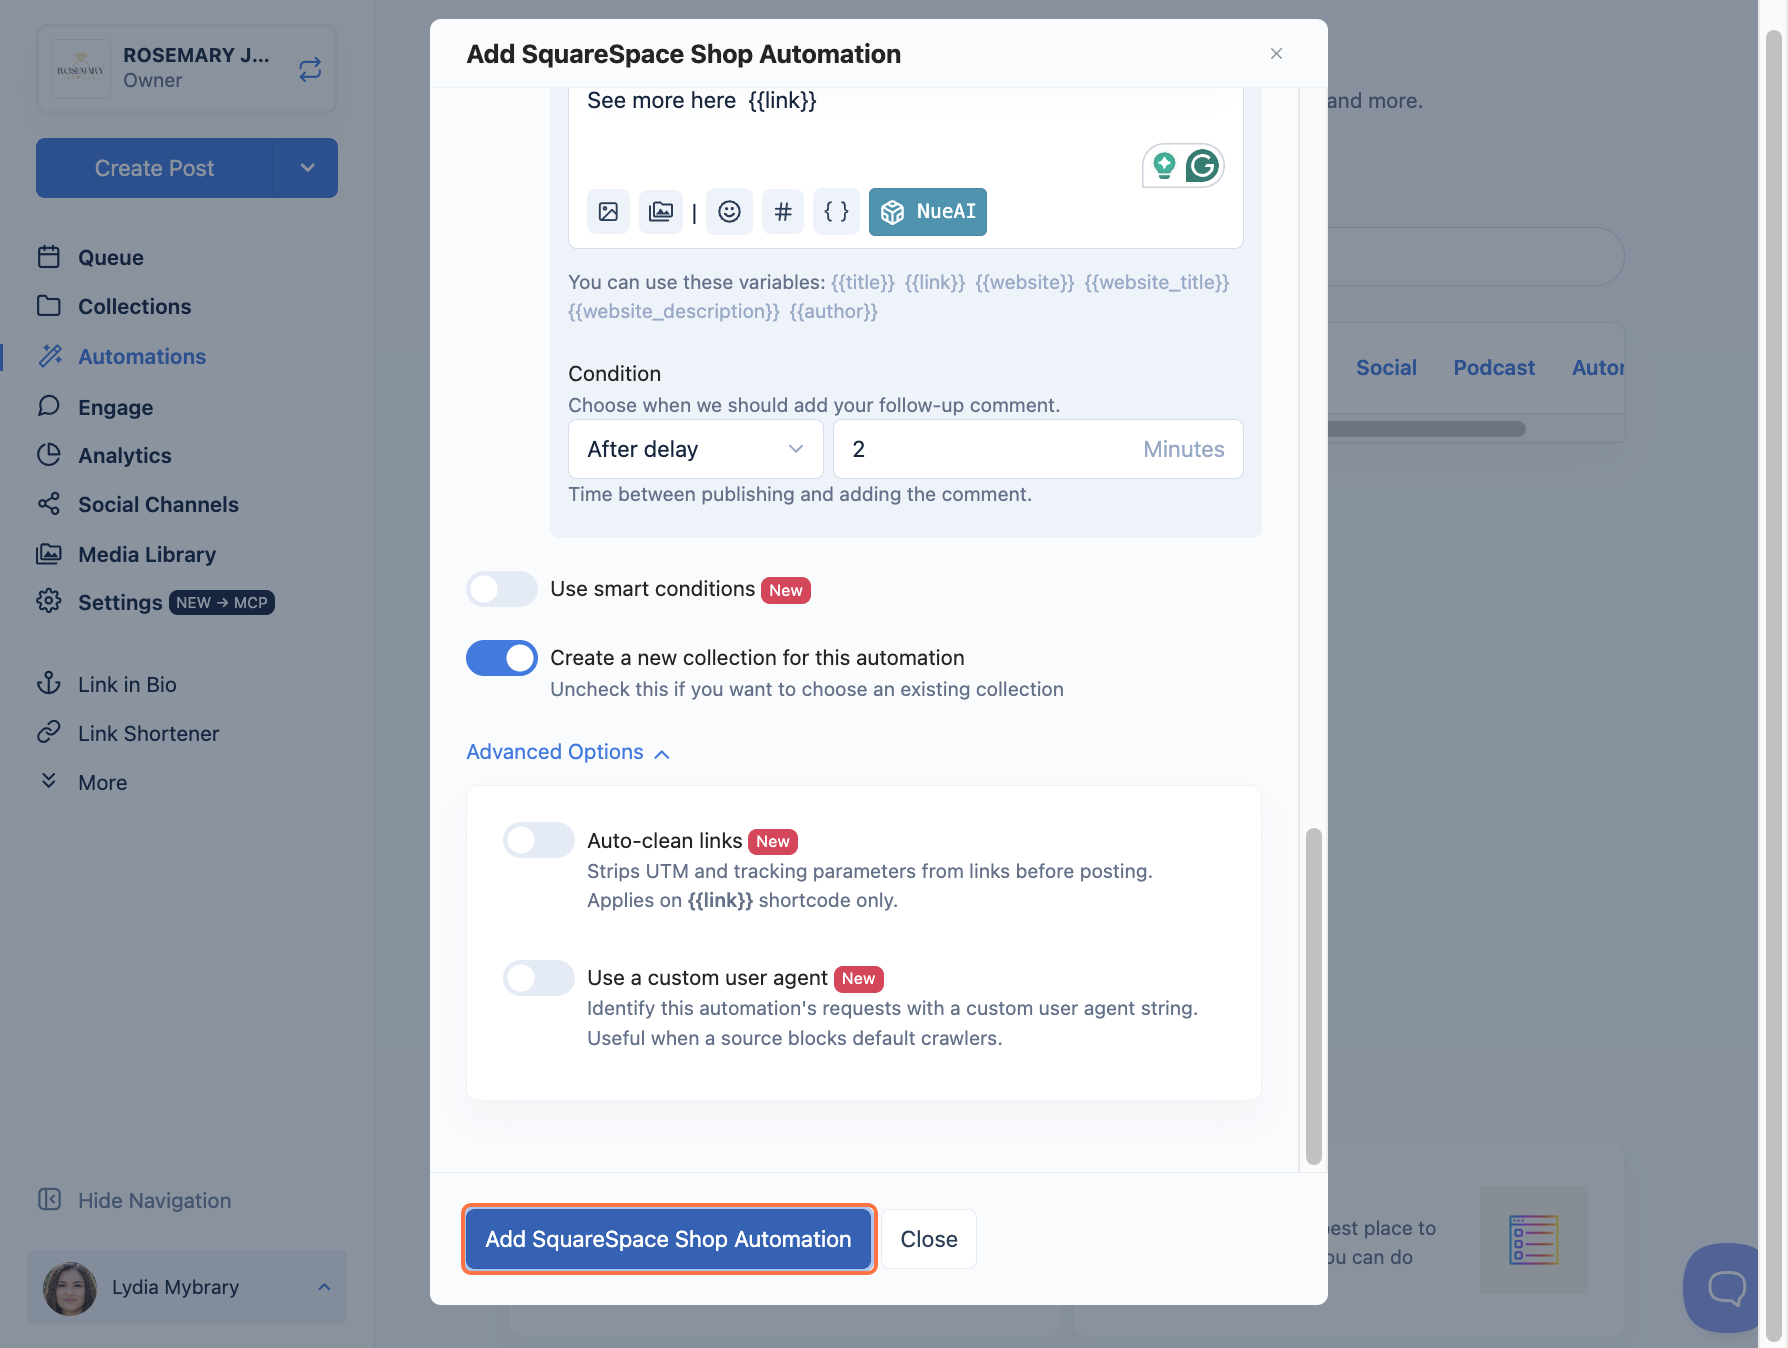
You're all set! Next, open your collection to choose where and when your posts go out.
Set Up Your Collection
Follow these steps to choose where and when your automated posts go out.
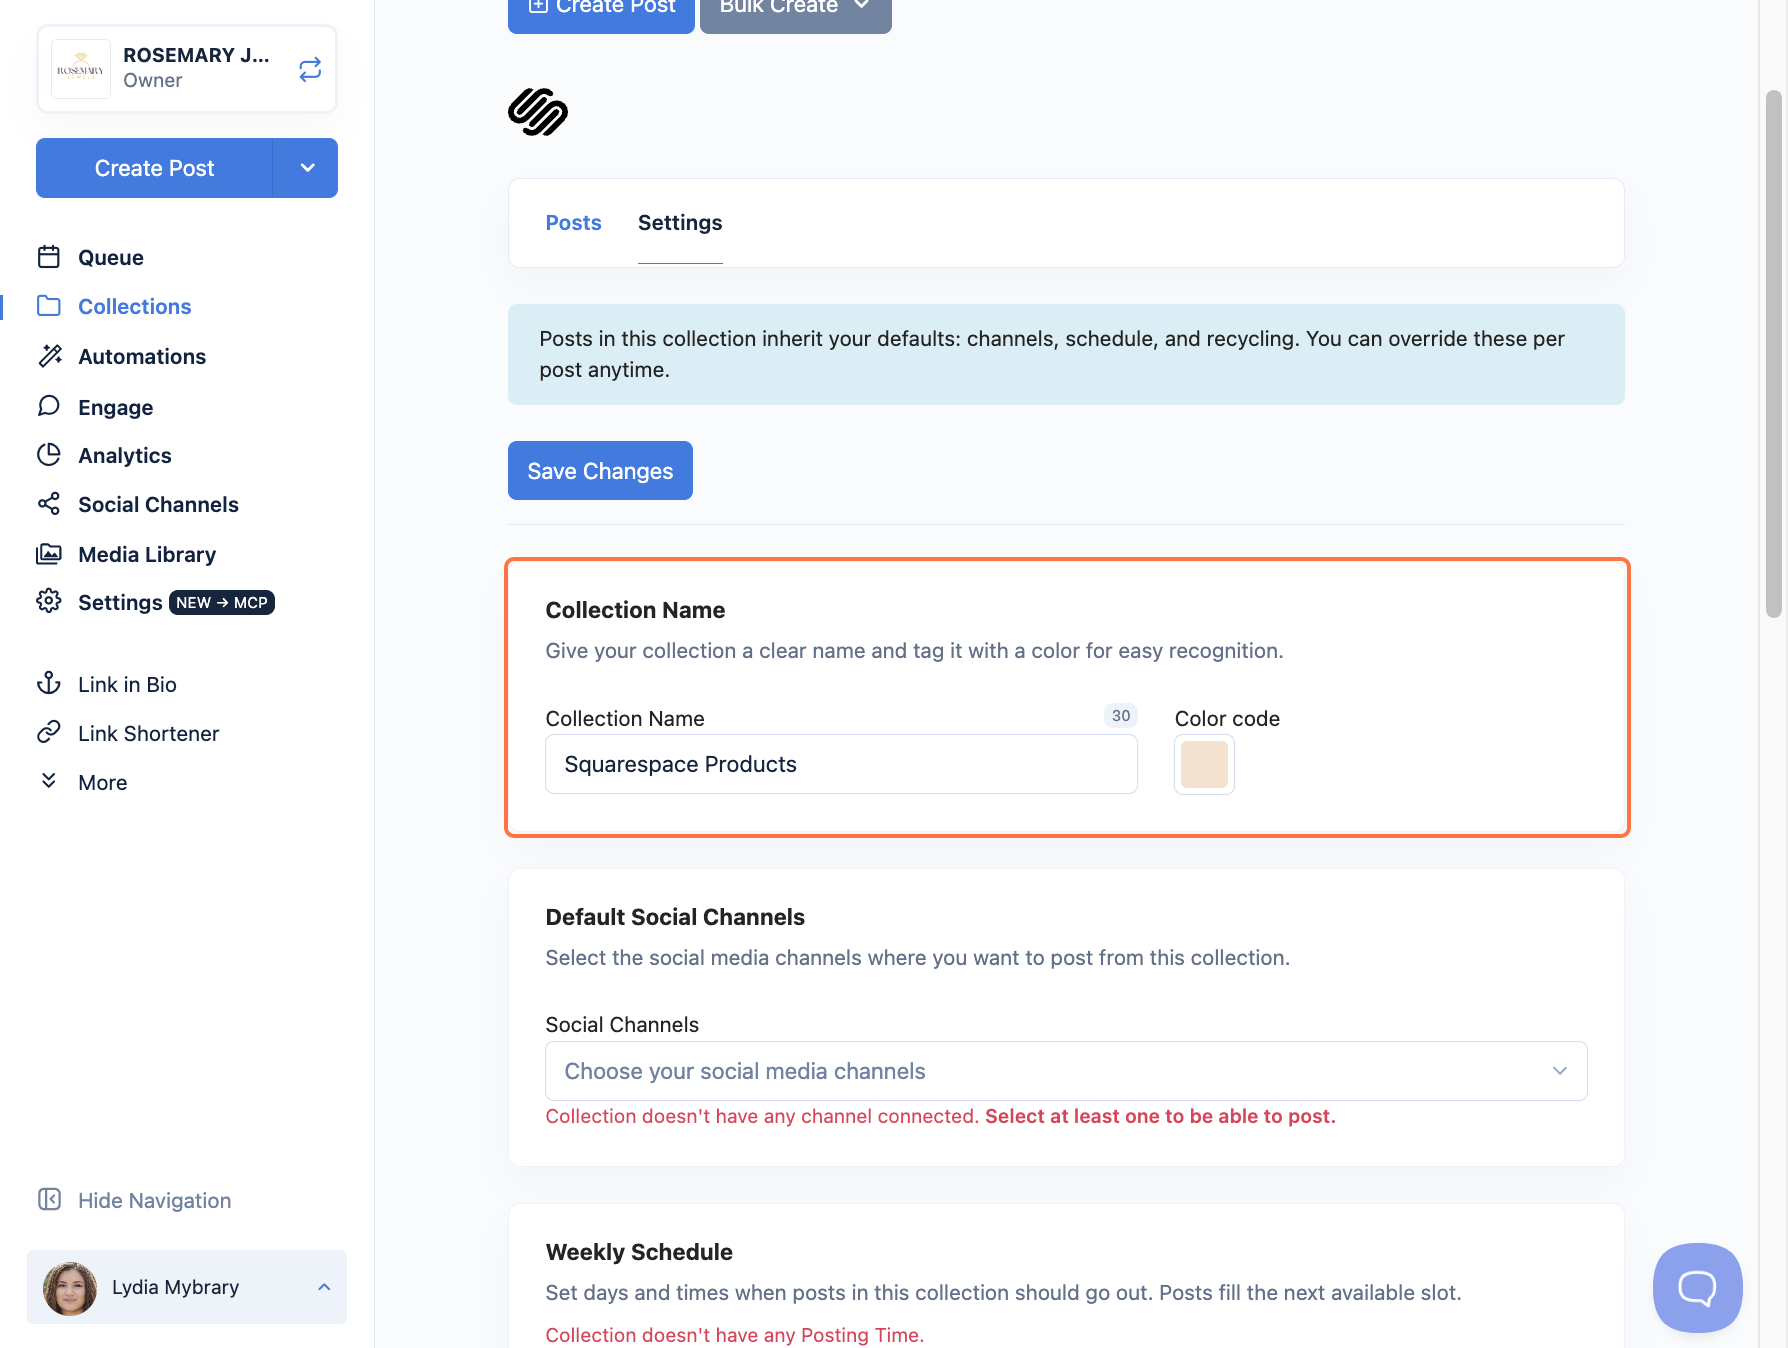
- Under Collection Name, give your collection a clear name and pick a color to tag it.
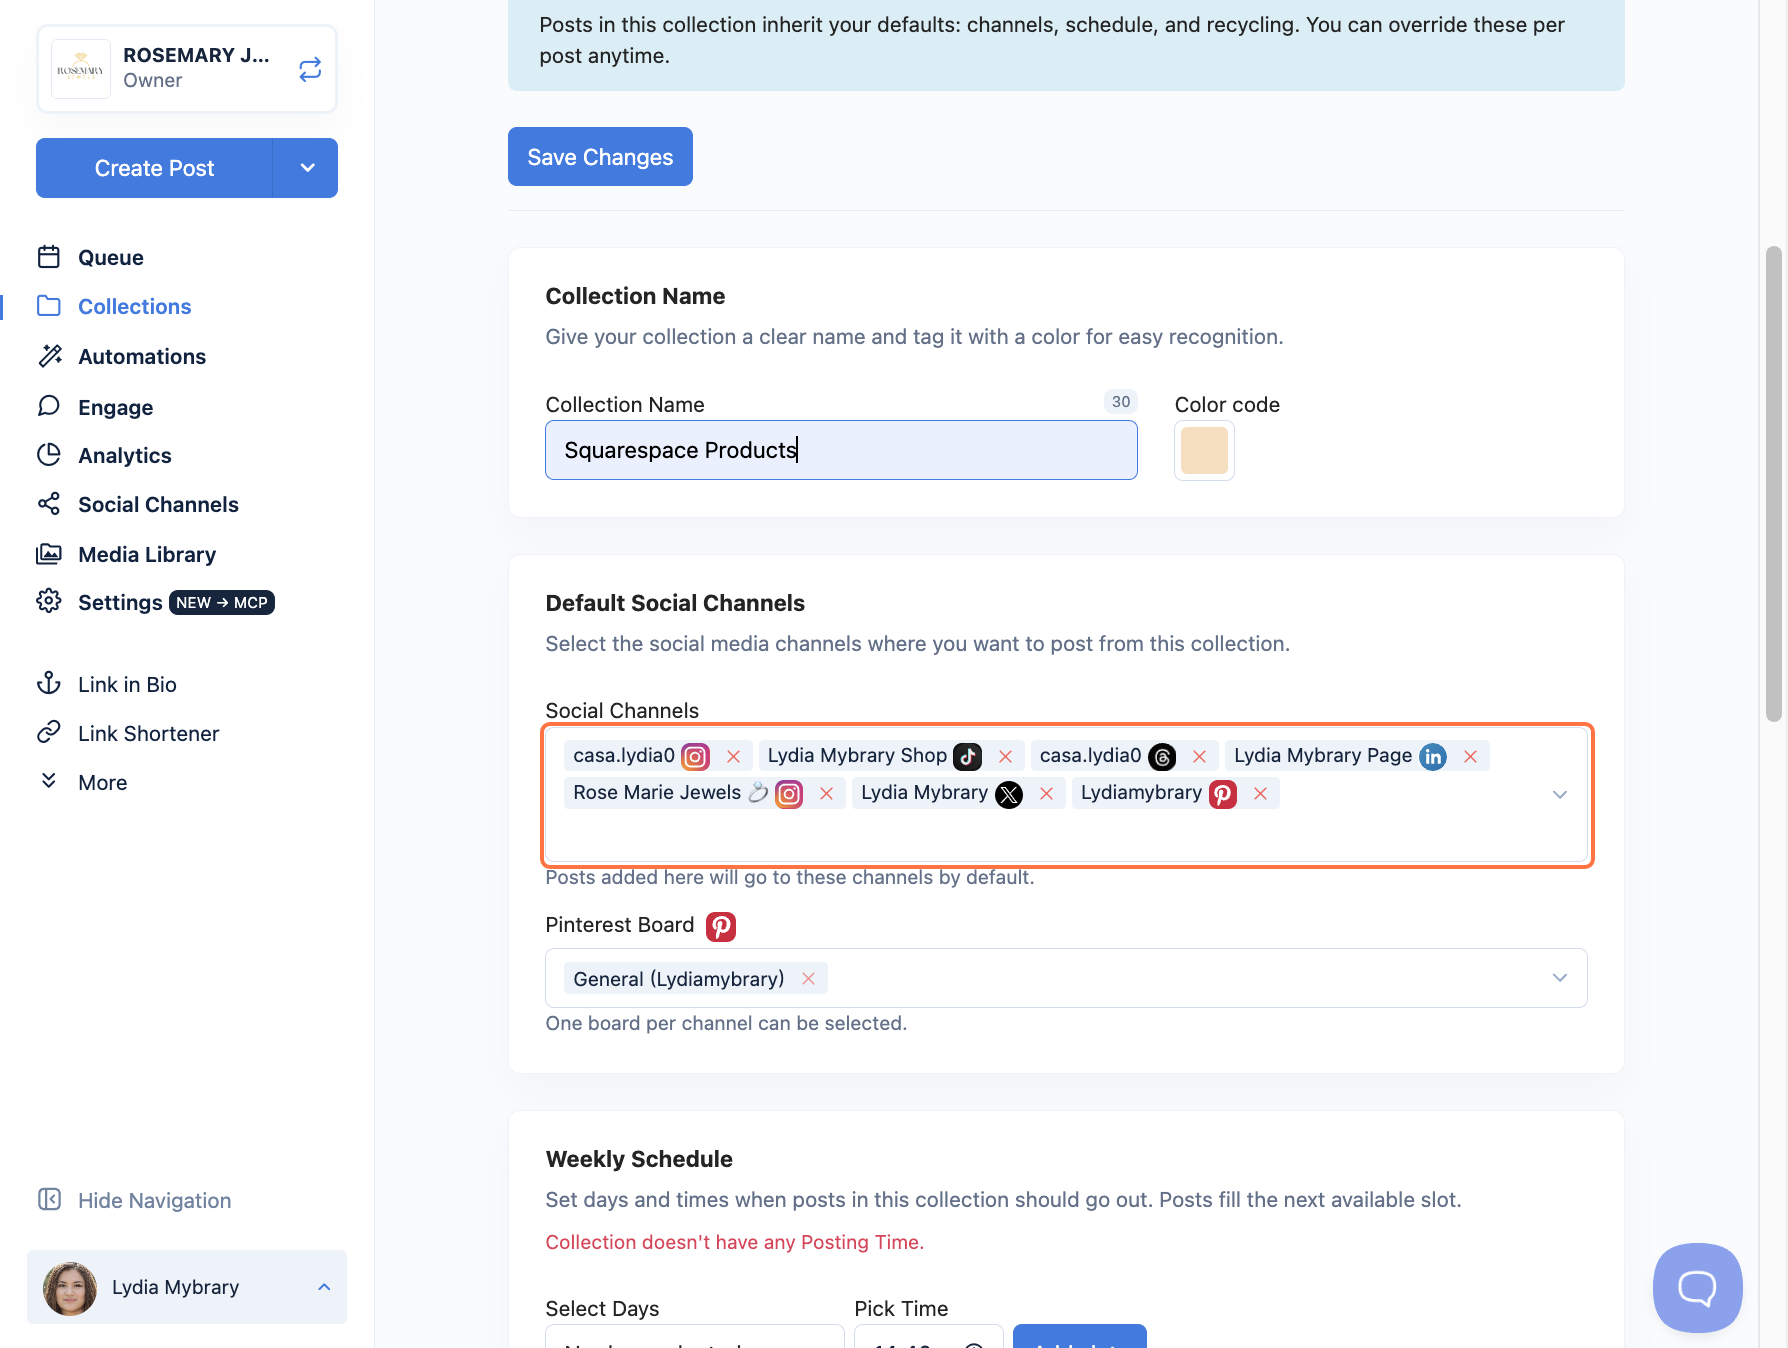
- Under Default Social Channels, select the social accounts where these posts should go. Choose at least one so the collection can publish.
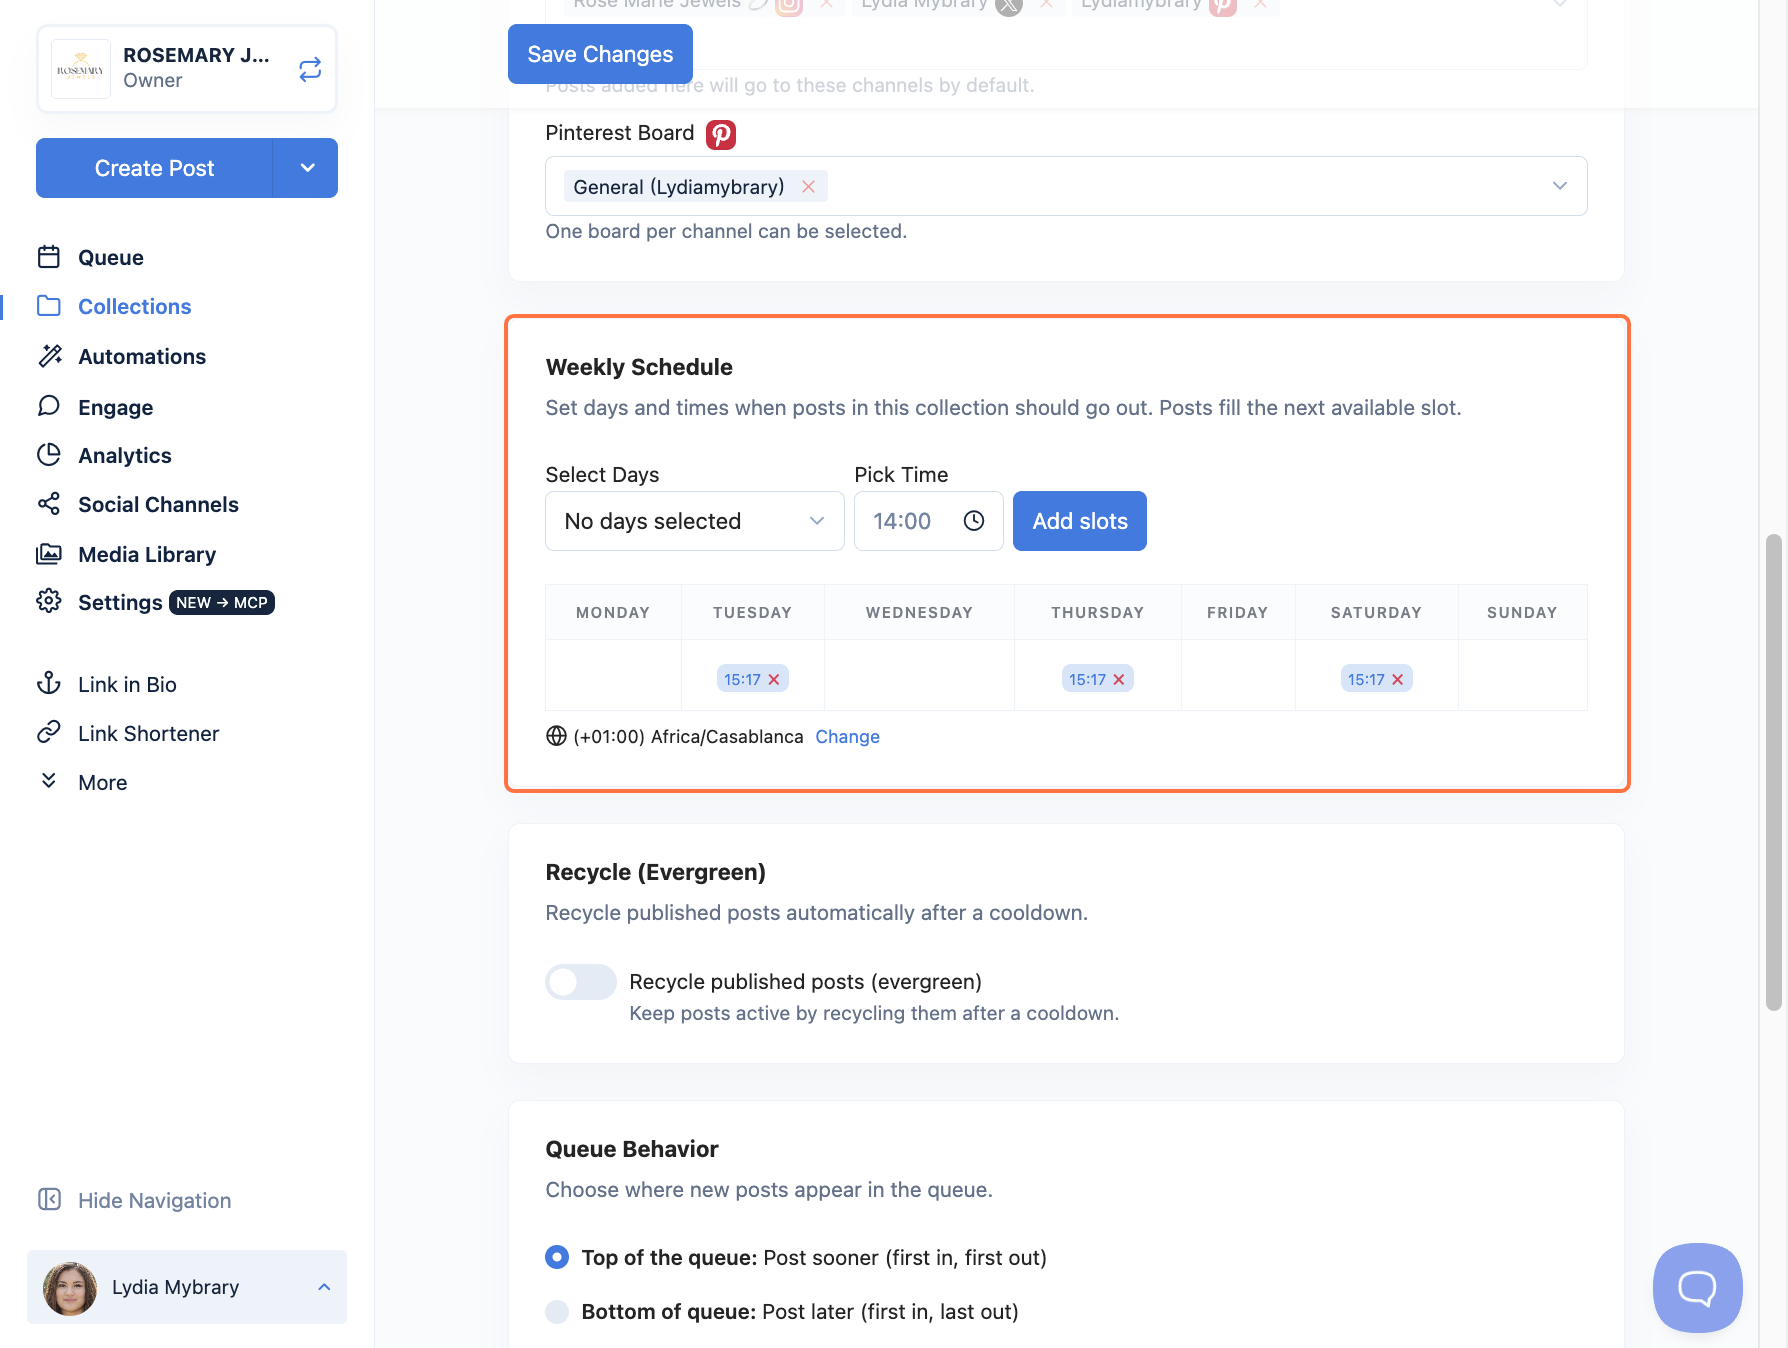
- Under Weekly Schedule, use Select Days and Pick Time, then click Add slots to add each posting time. Repeat to build your full weekly schedule. New posts fill the next open slot.
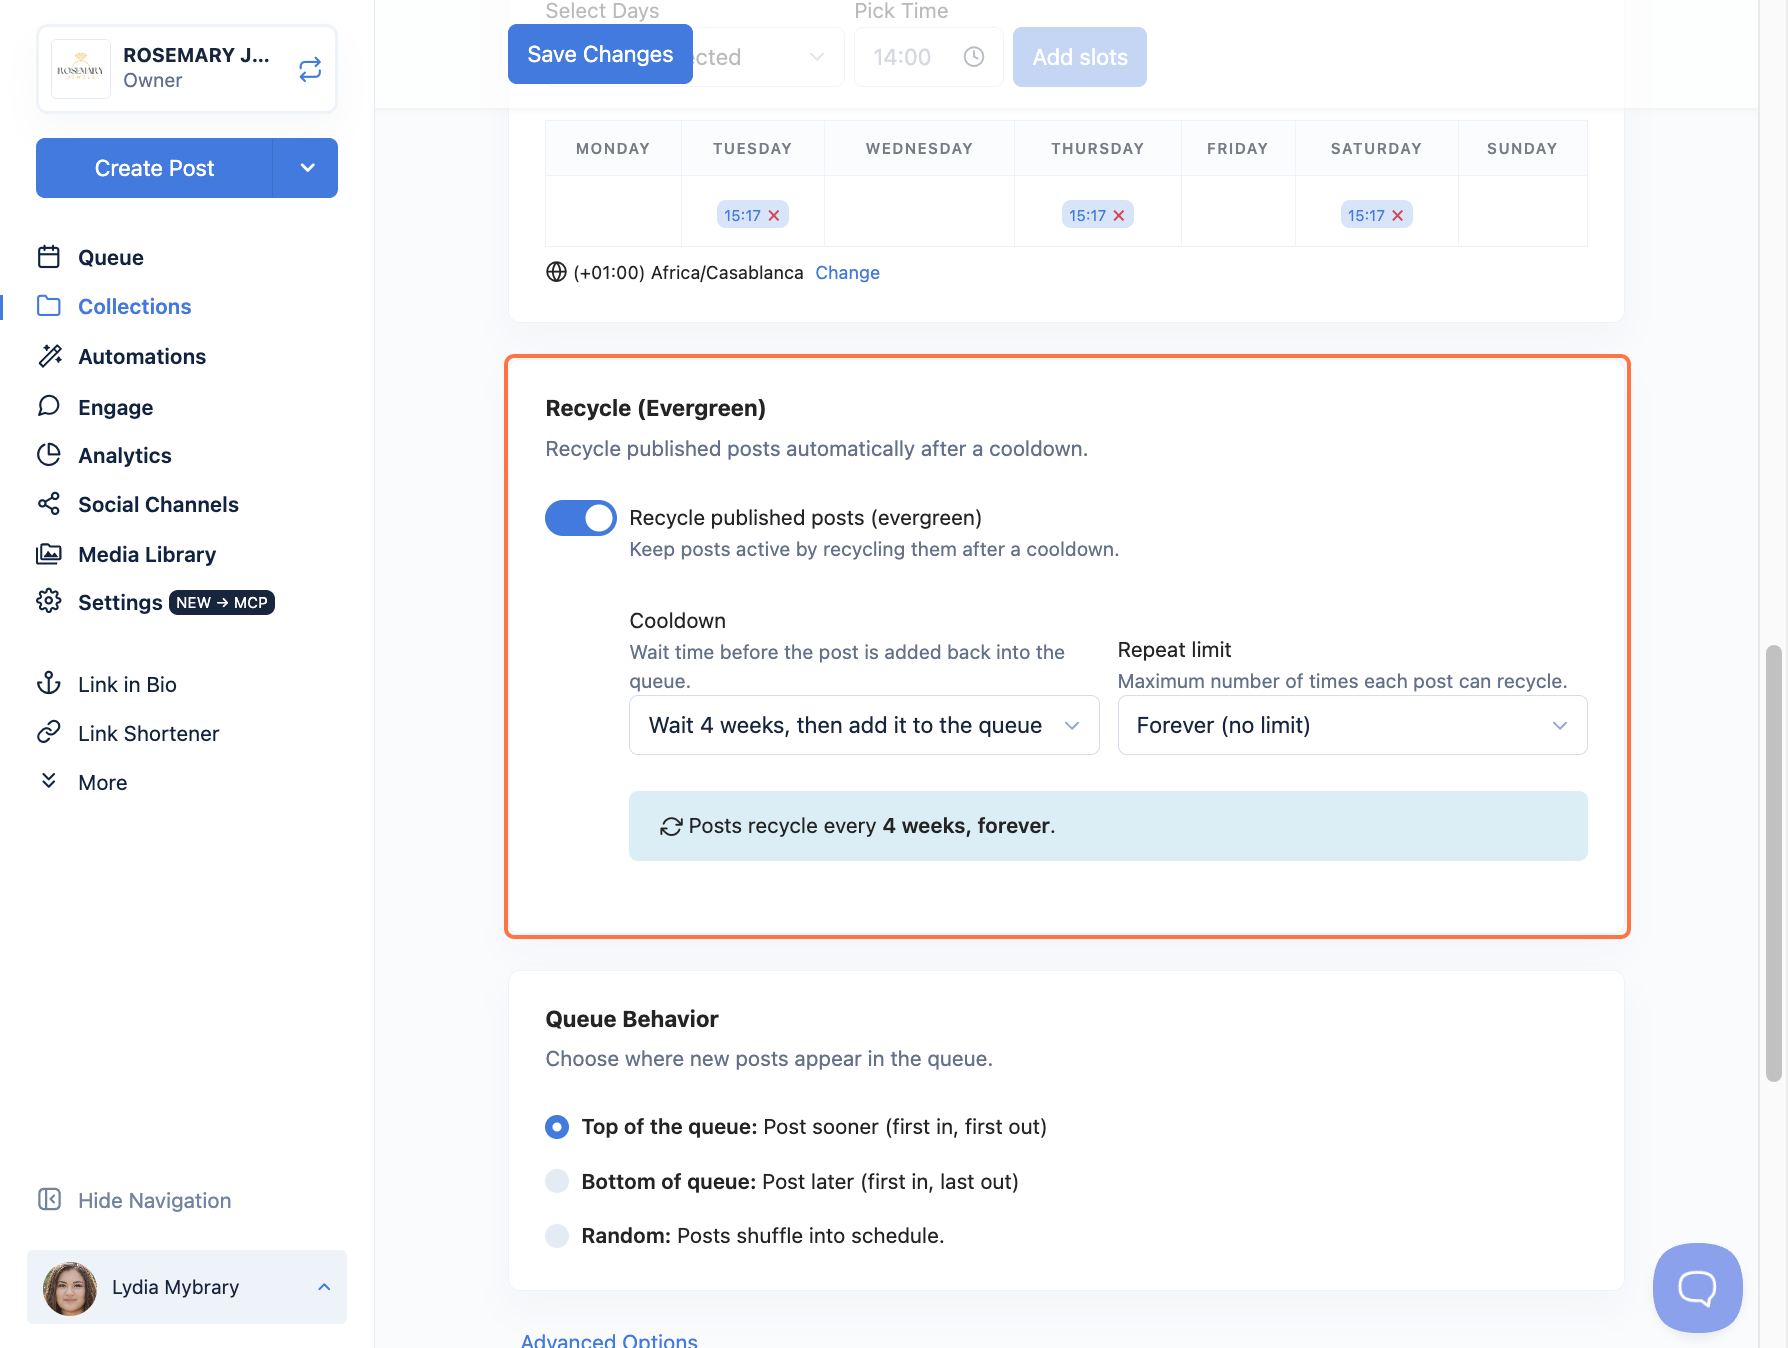
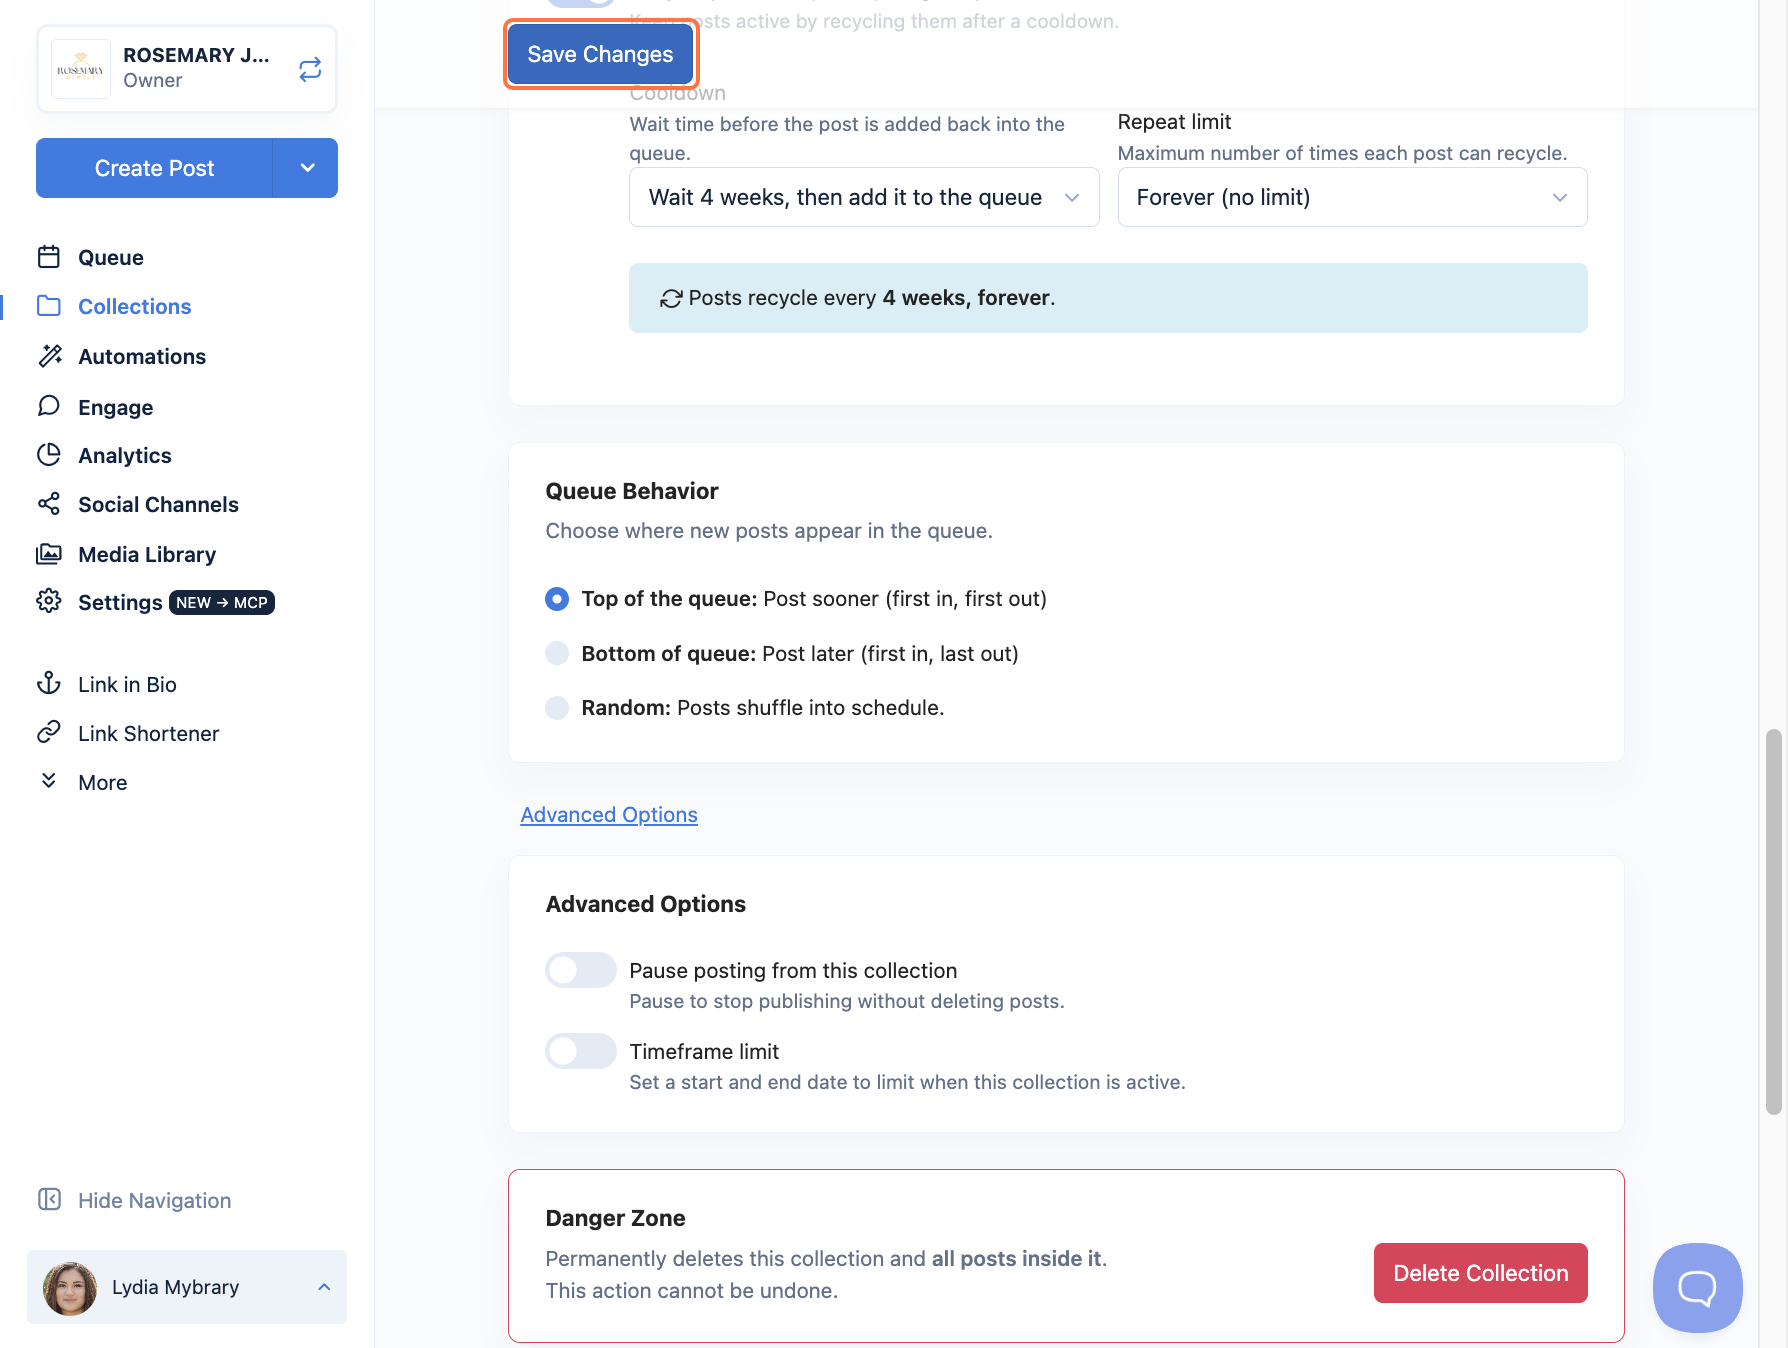
- (Optional) Turn on Recycle (Evergreen) to automatically re-share published posts after a cooldown.
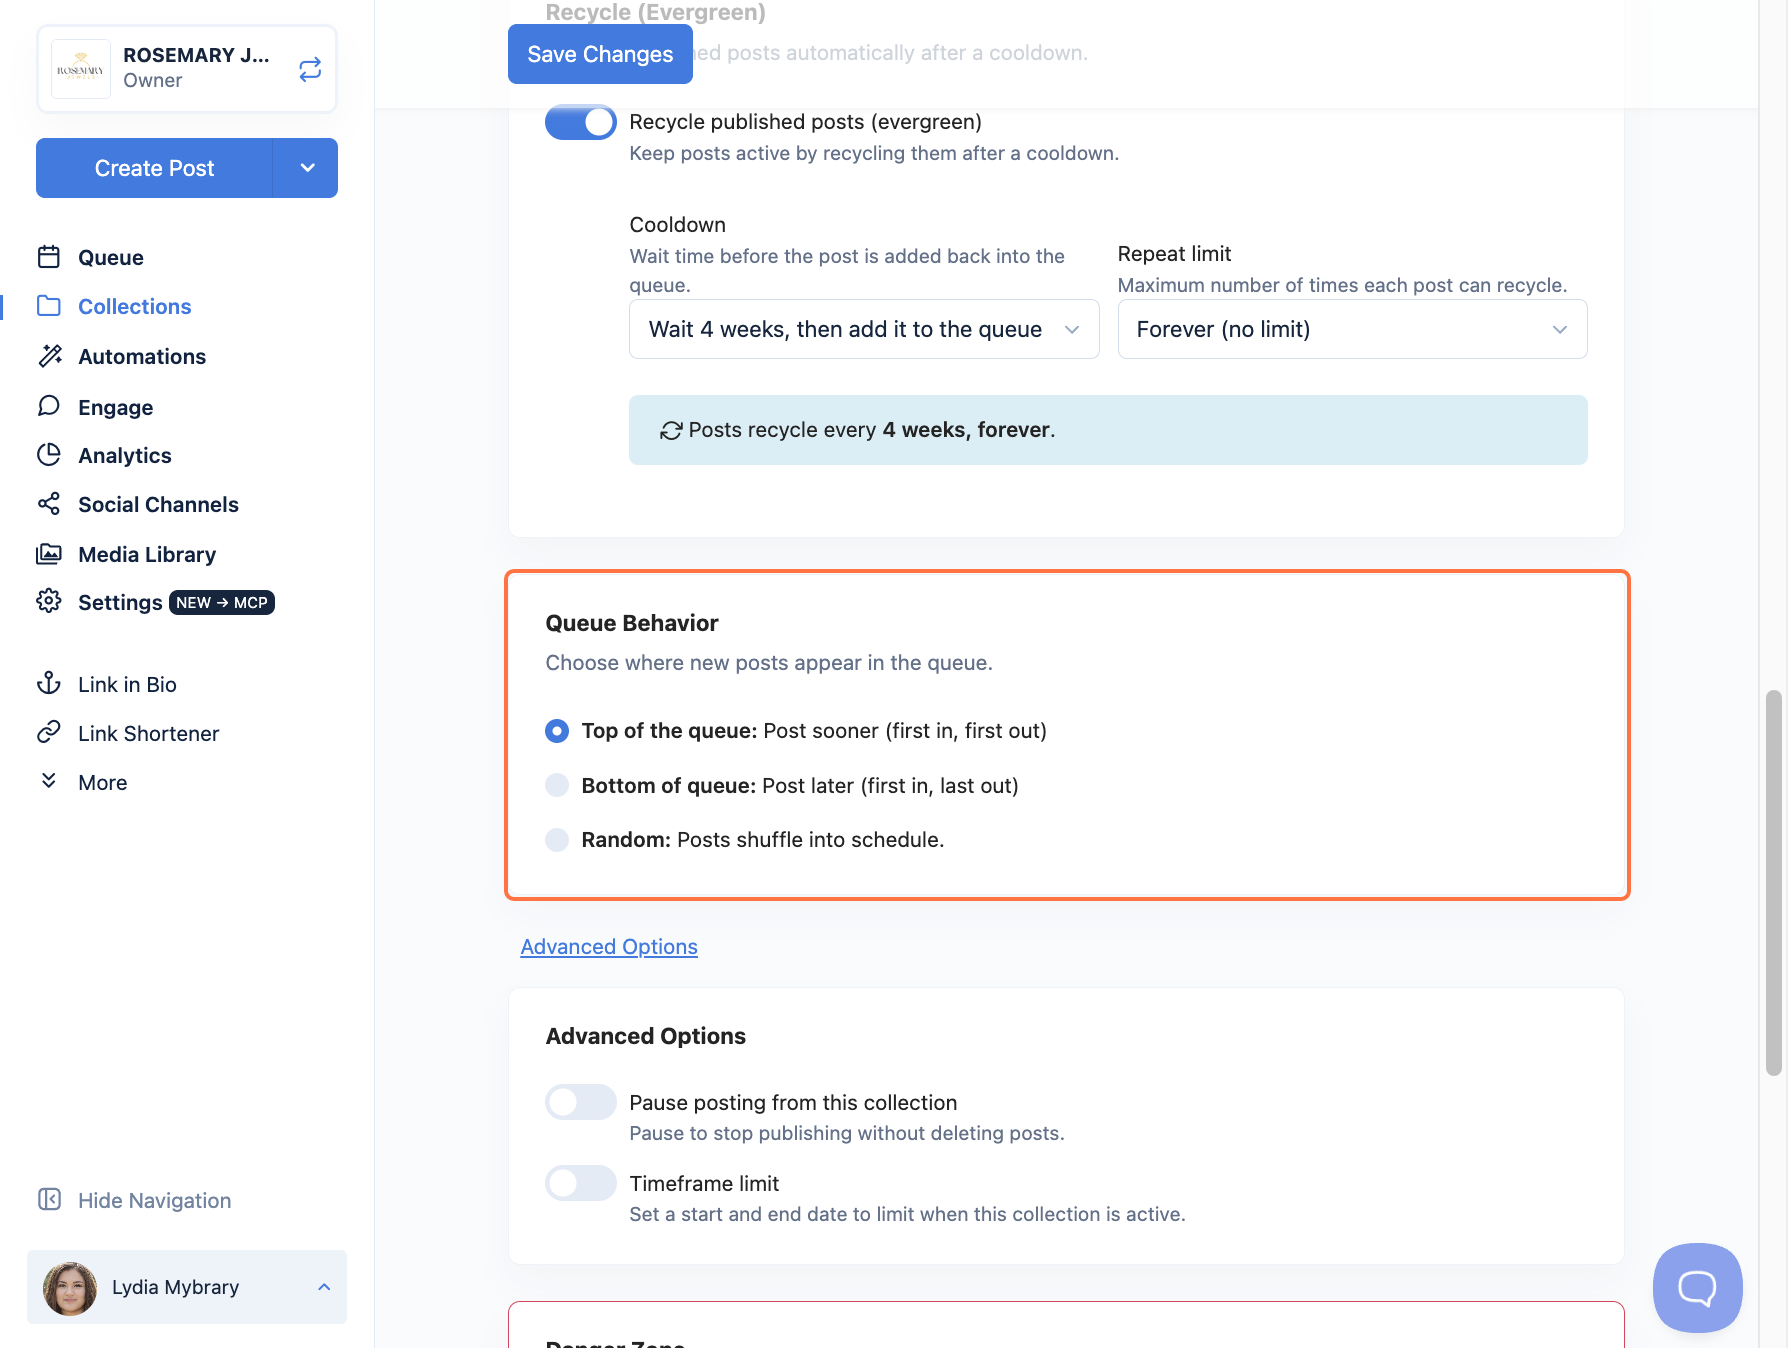
- Under Queue Behavior, choose how new posts enter the queue: Top of the queue, Bottom of the queue, or Random.
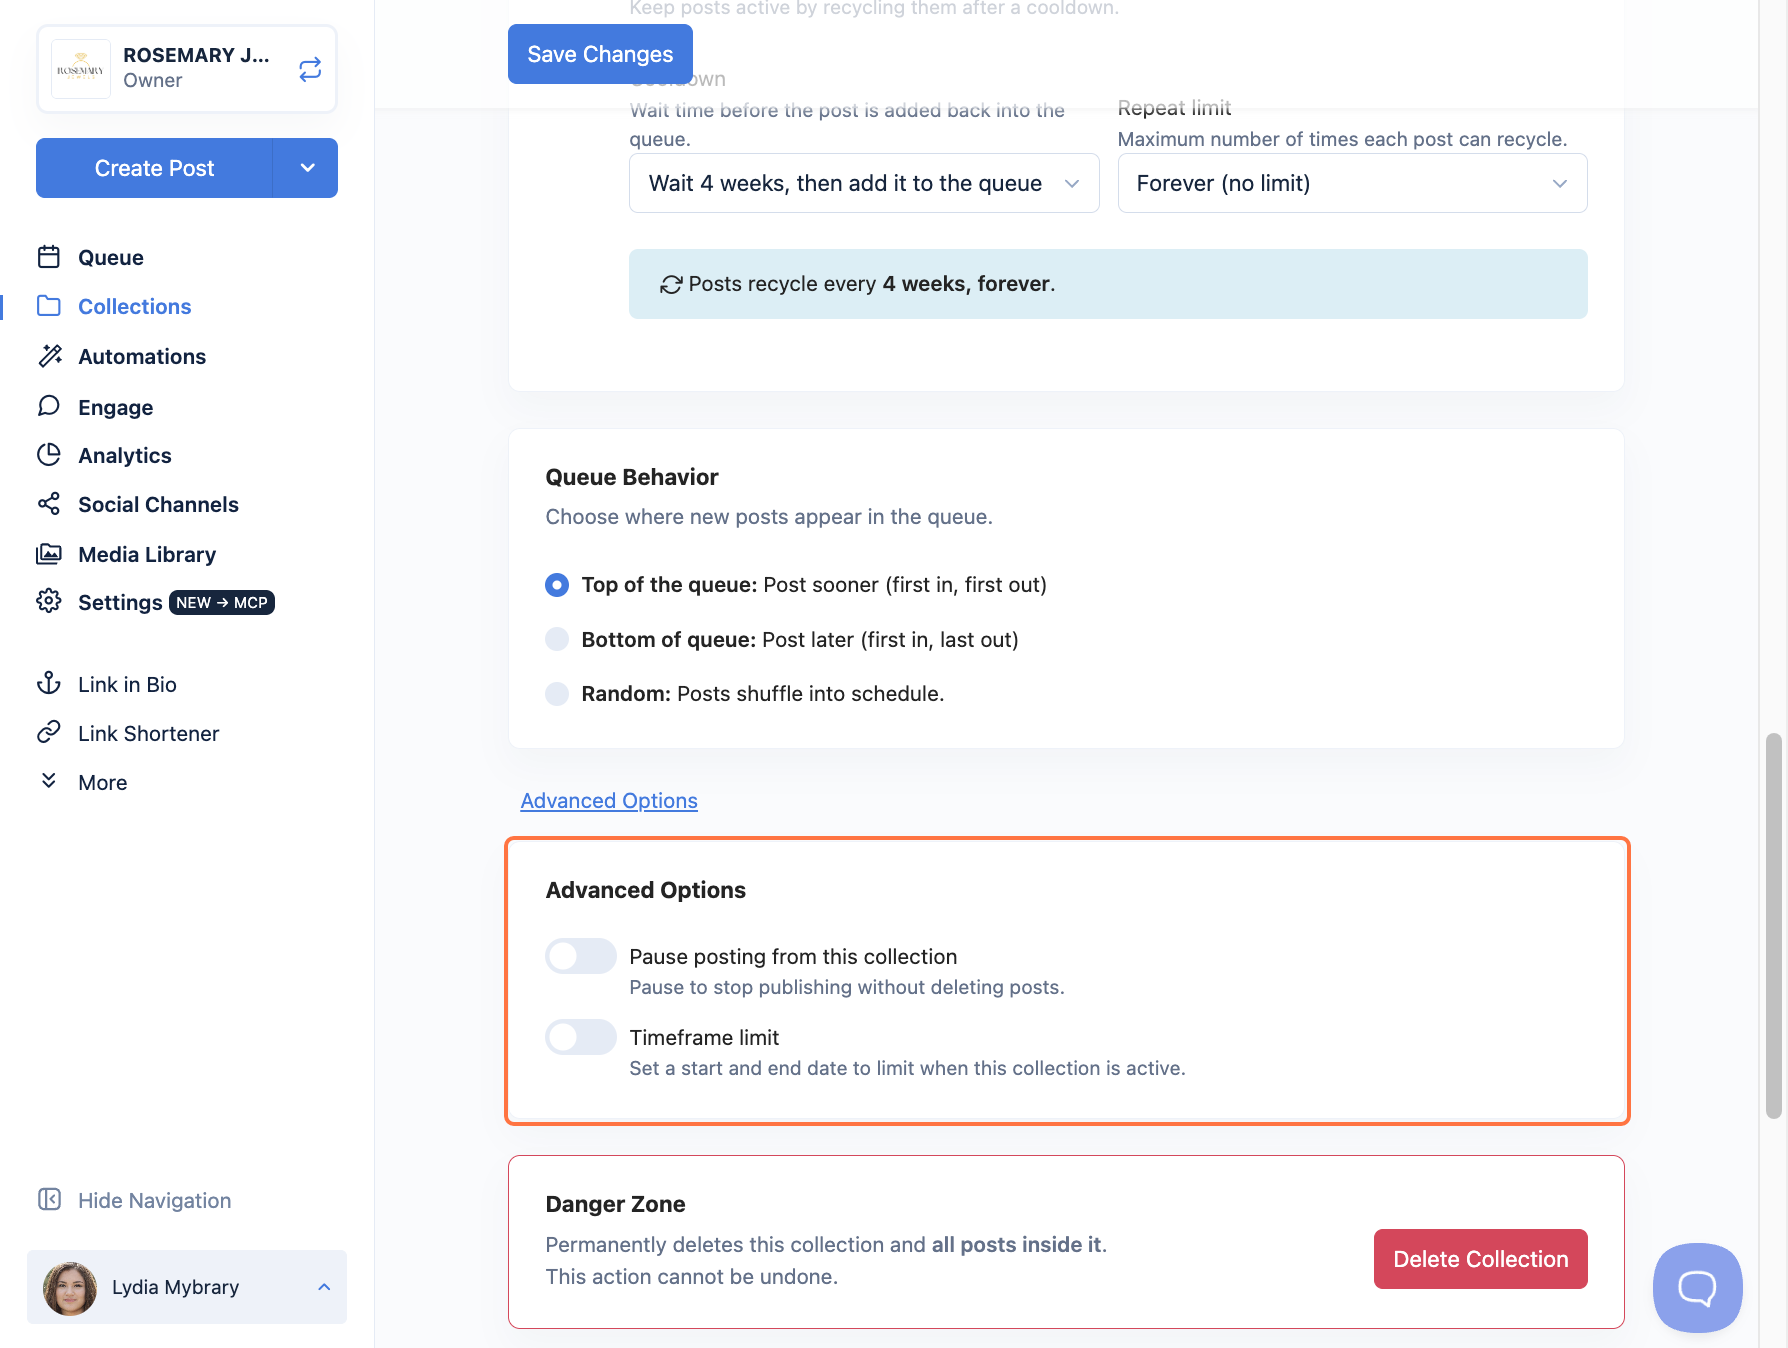
- (Optional) Open Advanced Options to pause posting from the collection or set a Timeframe limit with a start and end date.
- Click Save Changes to finish.
You're ready to go! Your automated posts will now publish to the channels and times you set.
FAQs
Will my old blog posts get shared too?
Only if you want them to, turn on Import existing articles during setup to include past posts; leave it off, and Nuelink shares only new articles going forward.
How soon will a new blog post appear on my social media?
Nuelink checks your blog on the schedule you set. When it finds a new post, it adds it to your collection and publishes it at your next scheduled time slot.
Can I review posts before they go live?
Yes. You can mark imported posts as drafts, then open them in the Posts section to edit and approve before they publish.
Can I change the caption Nuelink creates?
Absolutely. You can edit any post before it goes out, and you can adjust the AI prompt so future captions match your brand's voice.
Can I connect more than one Squarespace blog?
Yes. Just repeat these steps for each blog you'd like to automate.
Troubleshooting
My blog posts aren't showing up in Nuelink.
Double-check that you pasted the correct Squarespace blog URL. Make sure the blog is public and live, then wait for the next check cycle for posts to appear.
Posts are publishing to the wrong channels or times.
These settings come from your collection. Open the collection linked to this automation and update its channels and time slots.
The automation was added, but nothing is posting.
Confirm you selected at least one social channel and set a posting schedule. Also check that your automation isn't paused in the Automations section.
My captions don't match my brand's tone.
Edit the AI prompt in the automation settings to describe your brand's voice and audience, so future captions are written the way you want.