
How to Setup Weebly to Auto-Post Your Blogs to Social Media
In this guide, we will walk you through a few simple steps to set up your Weebly automation on Nuelink. First, ensure you are signed into your Nuelink account and that your social channels are connected.
With this Nuelink Weebly automation, your blogs will be automatically turned into social media posts, and they will be auto-published on your social media channels according to your preferred schedule.
Video Tutorial:
In This Guide:
What’s a Social Media Automation?
Setup a Weebly Automation on Nuelink:
Schedule Weebly Automation Posts on Nuelink:
Weebly Automation FAQs & Troubleshooting:
What’s a Social Media Automation?
Automation on Nuelink allows you to automatically add content to your collections and schedule it for posting on your social media channels. You can use automations to auto-post your blog articles, store products, YouTube videos, and podcast episodes to a collection, auto-retweet, add follow-up comments, and more.
Setup a Weebly Automation on Nuelink:
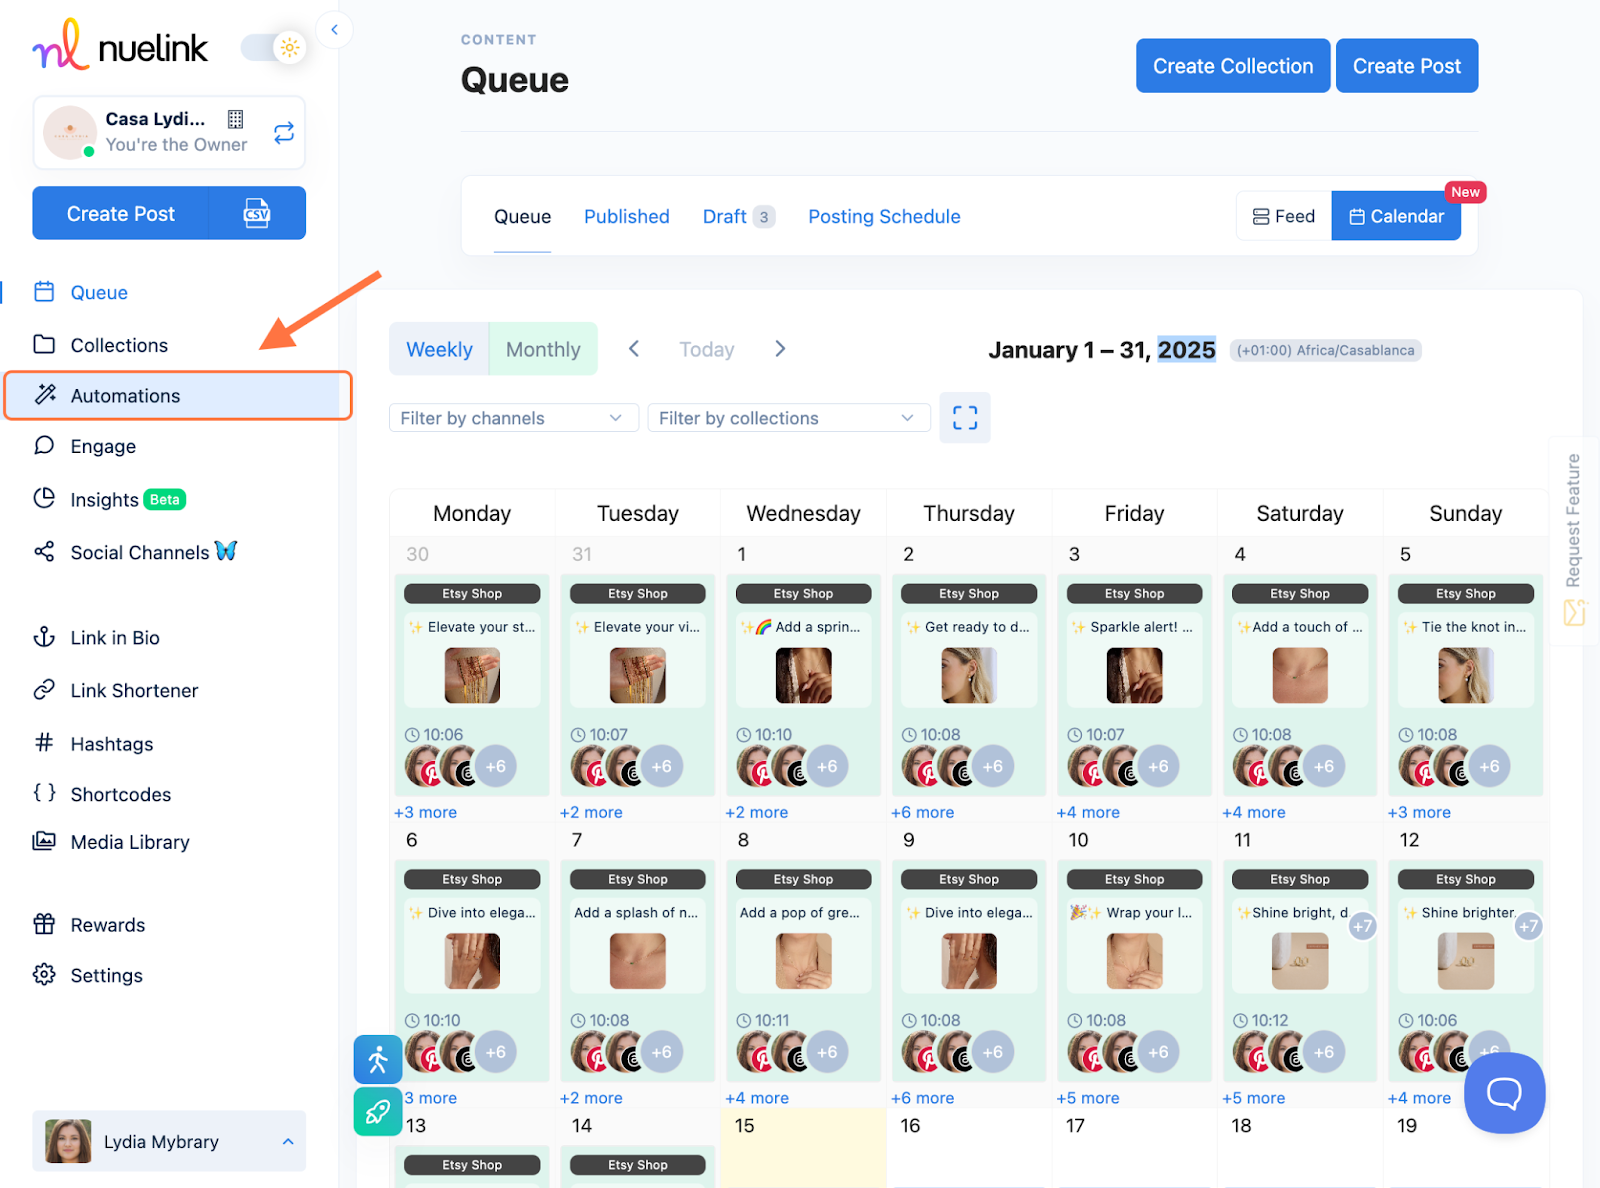
- Log into your Nuelink account, and click on the Automation section from the side menu:
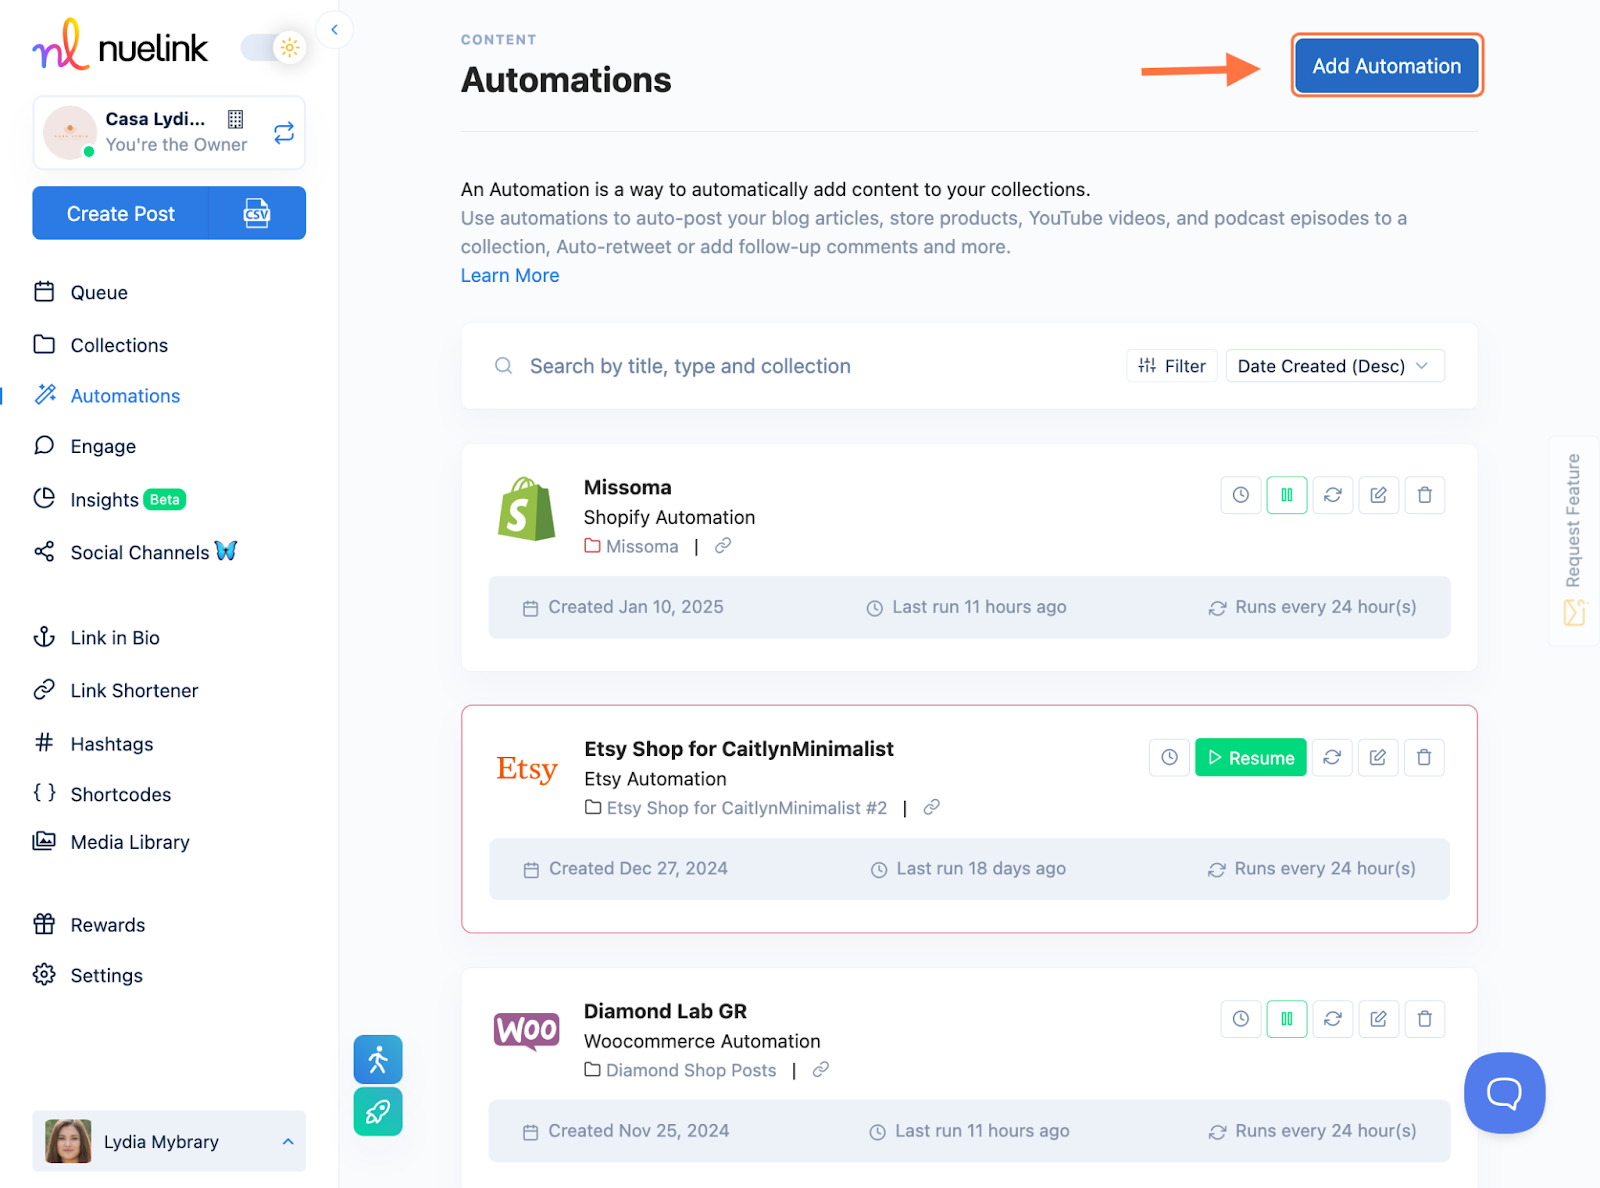
- Click on the “Add New Automation” button from the top right corner:
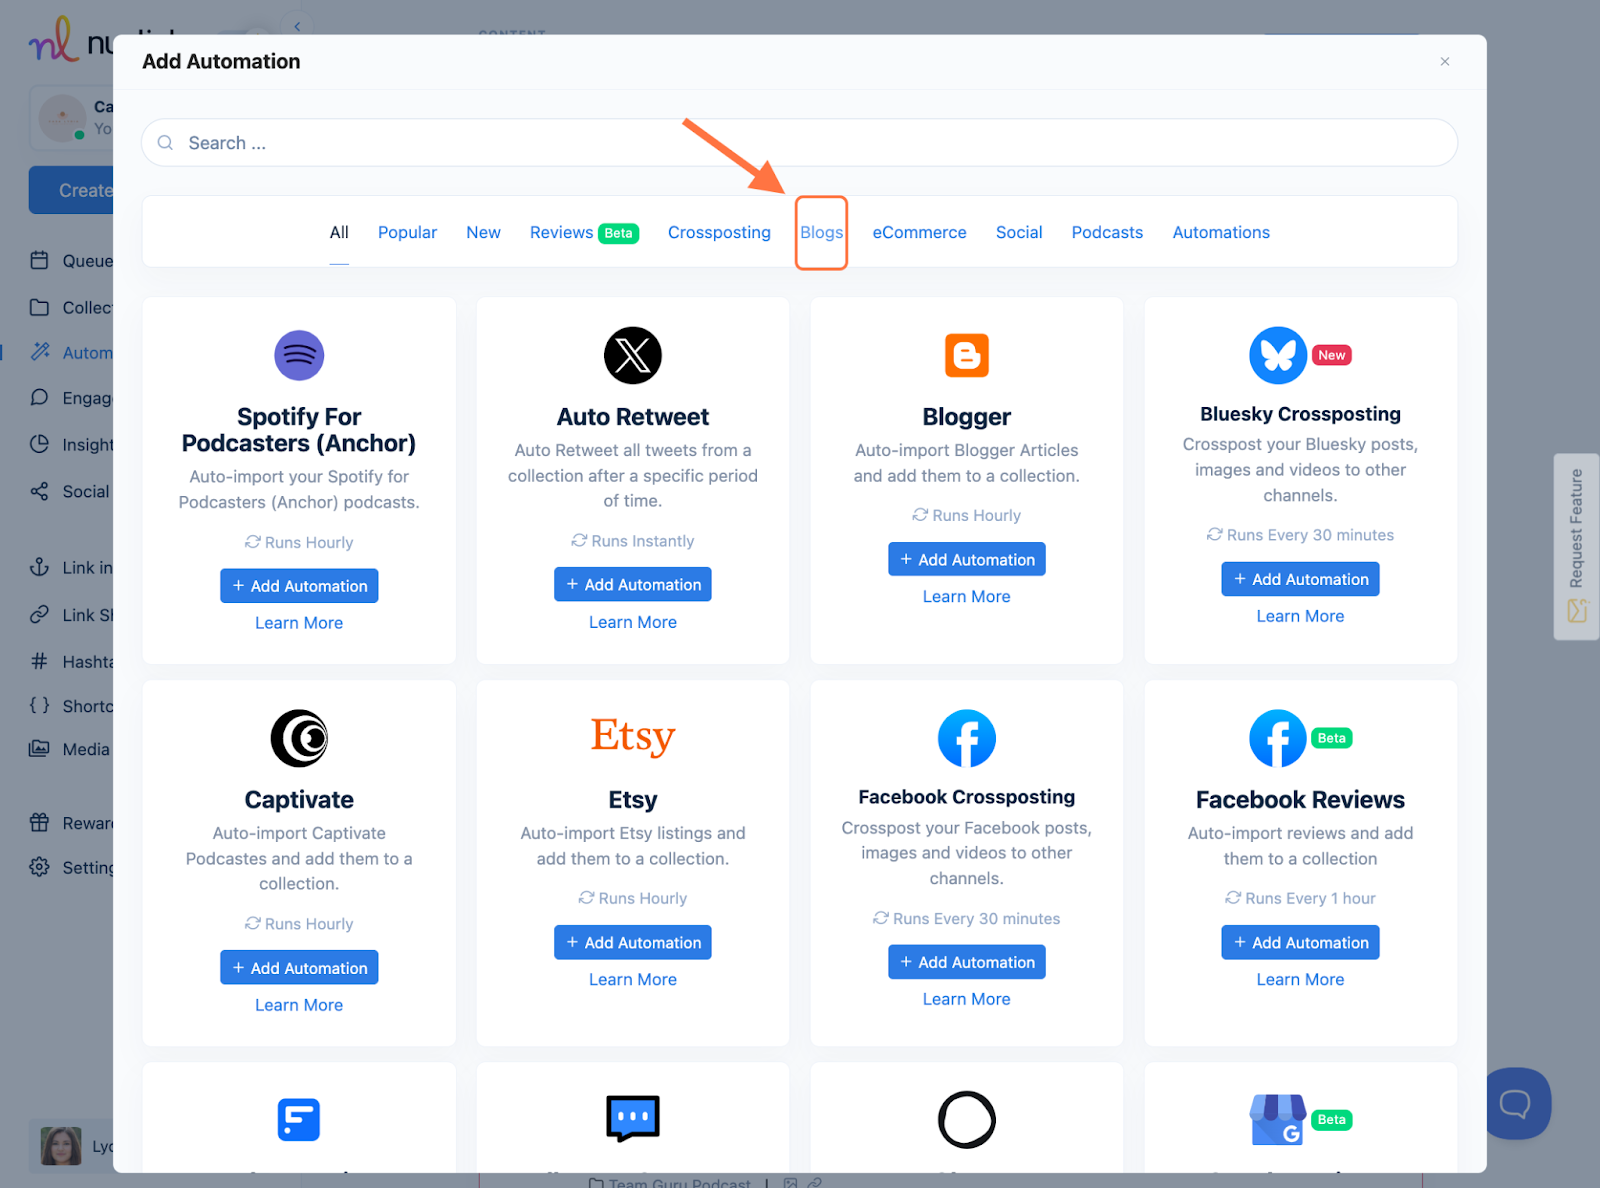
- Go to the “Blogs” tab:
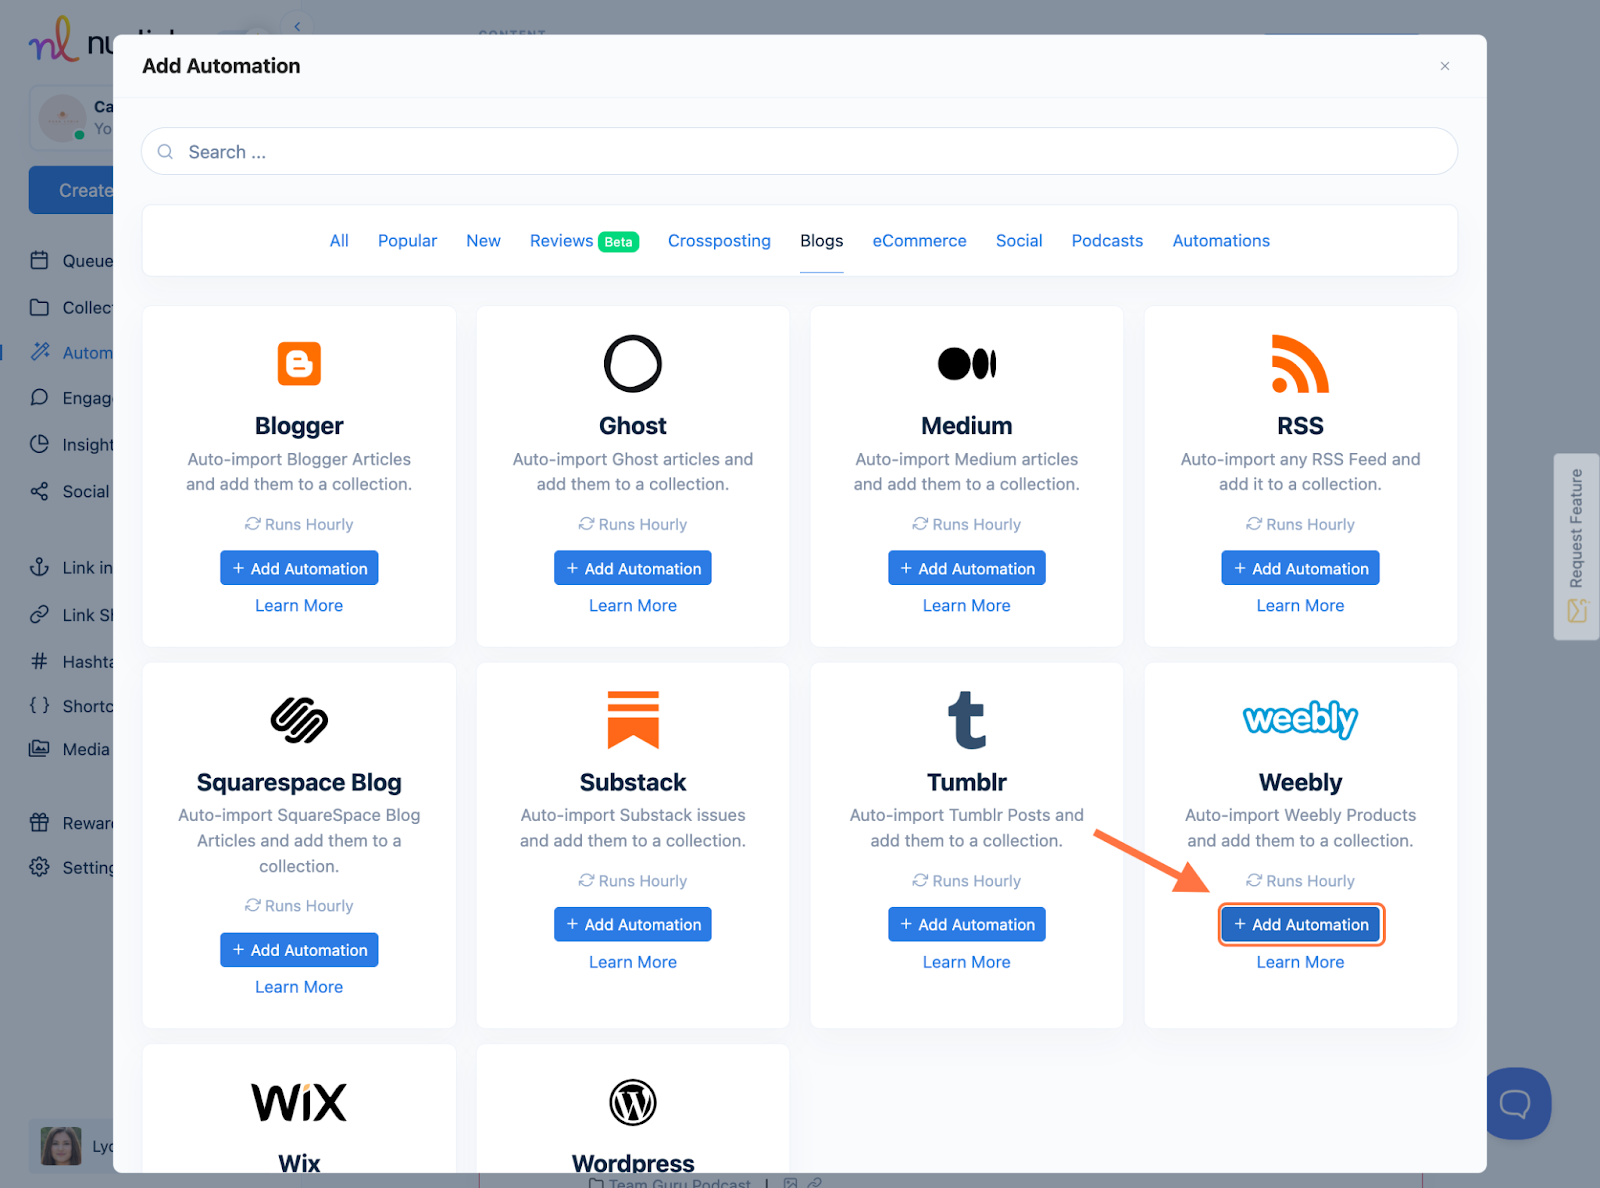
- Click on “+ Add Automation” below the Weebly icon:
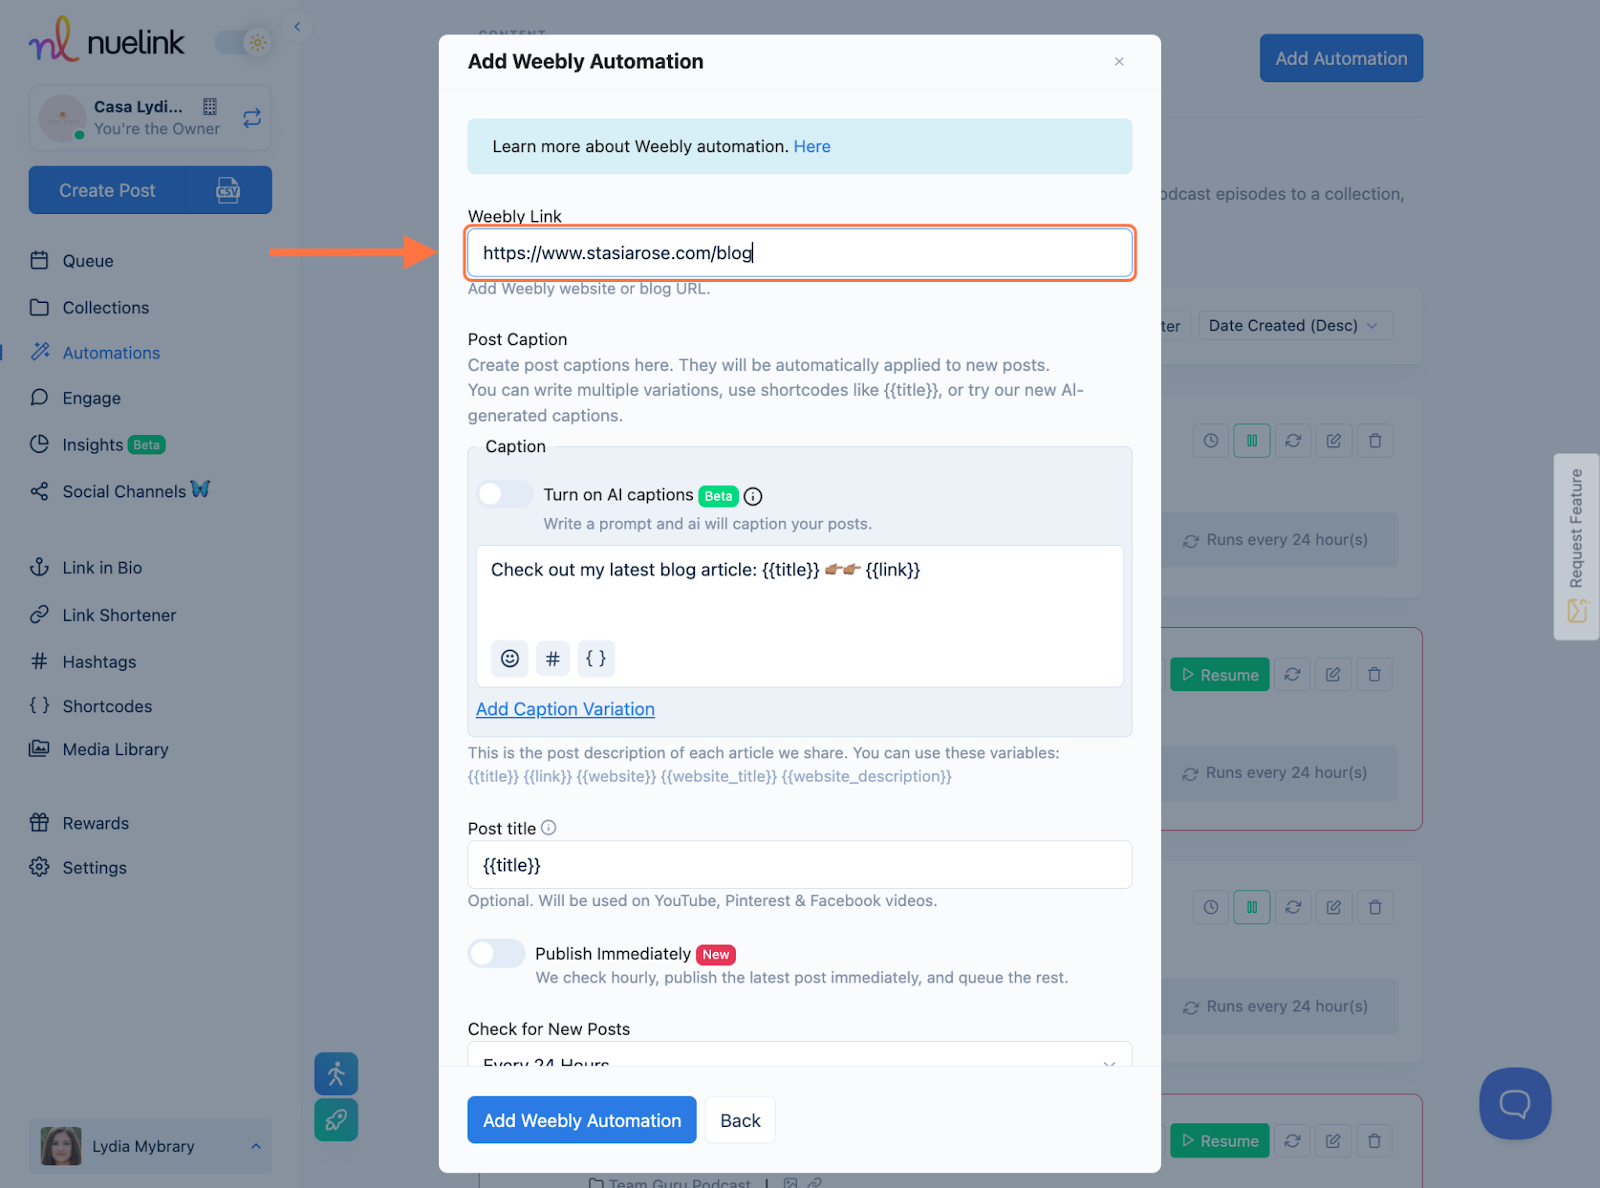
- Paste your Weebly blog link in the designated box:
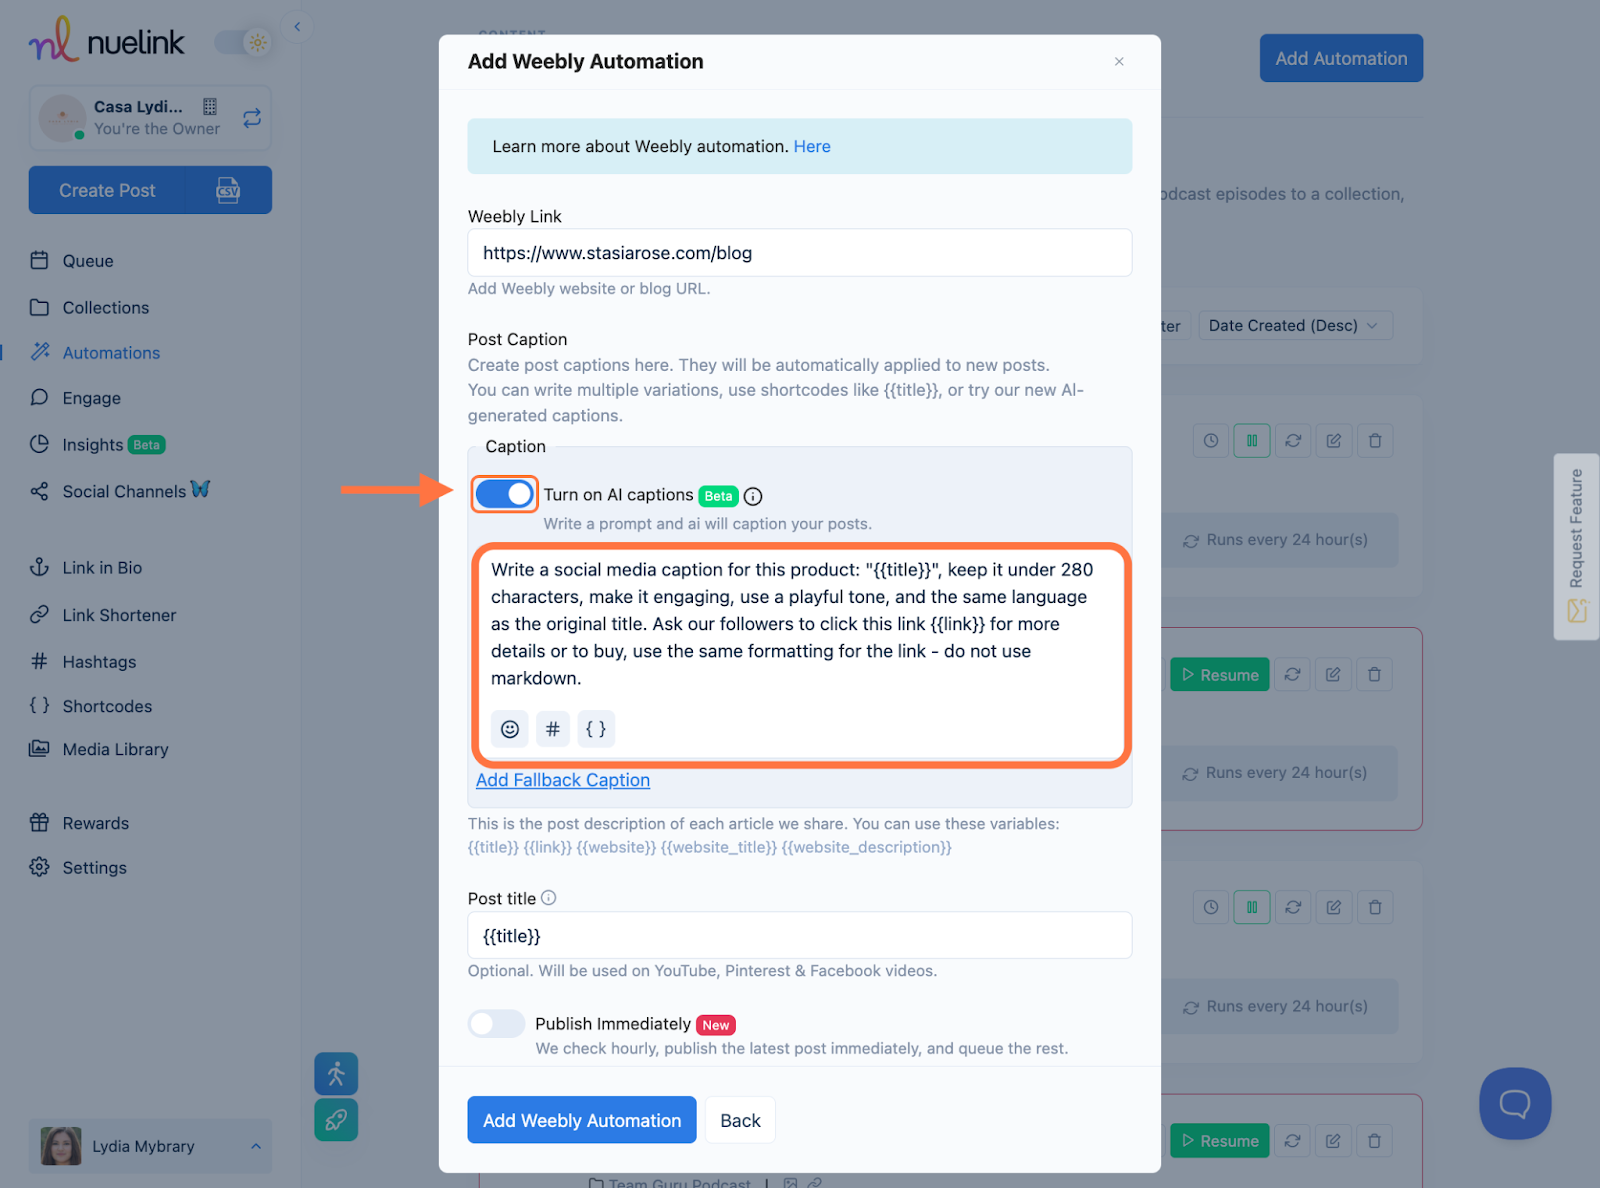
- Turn on AI caption to generate post captions for your Weebly blog posts, and add the link to each one:
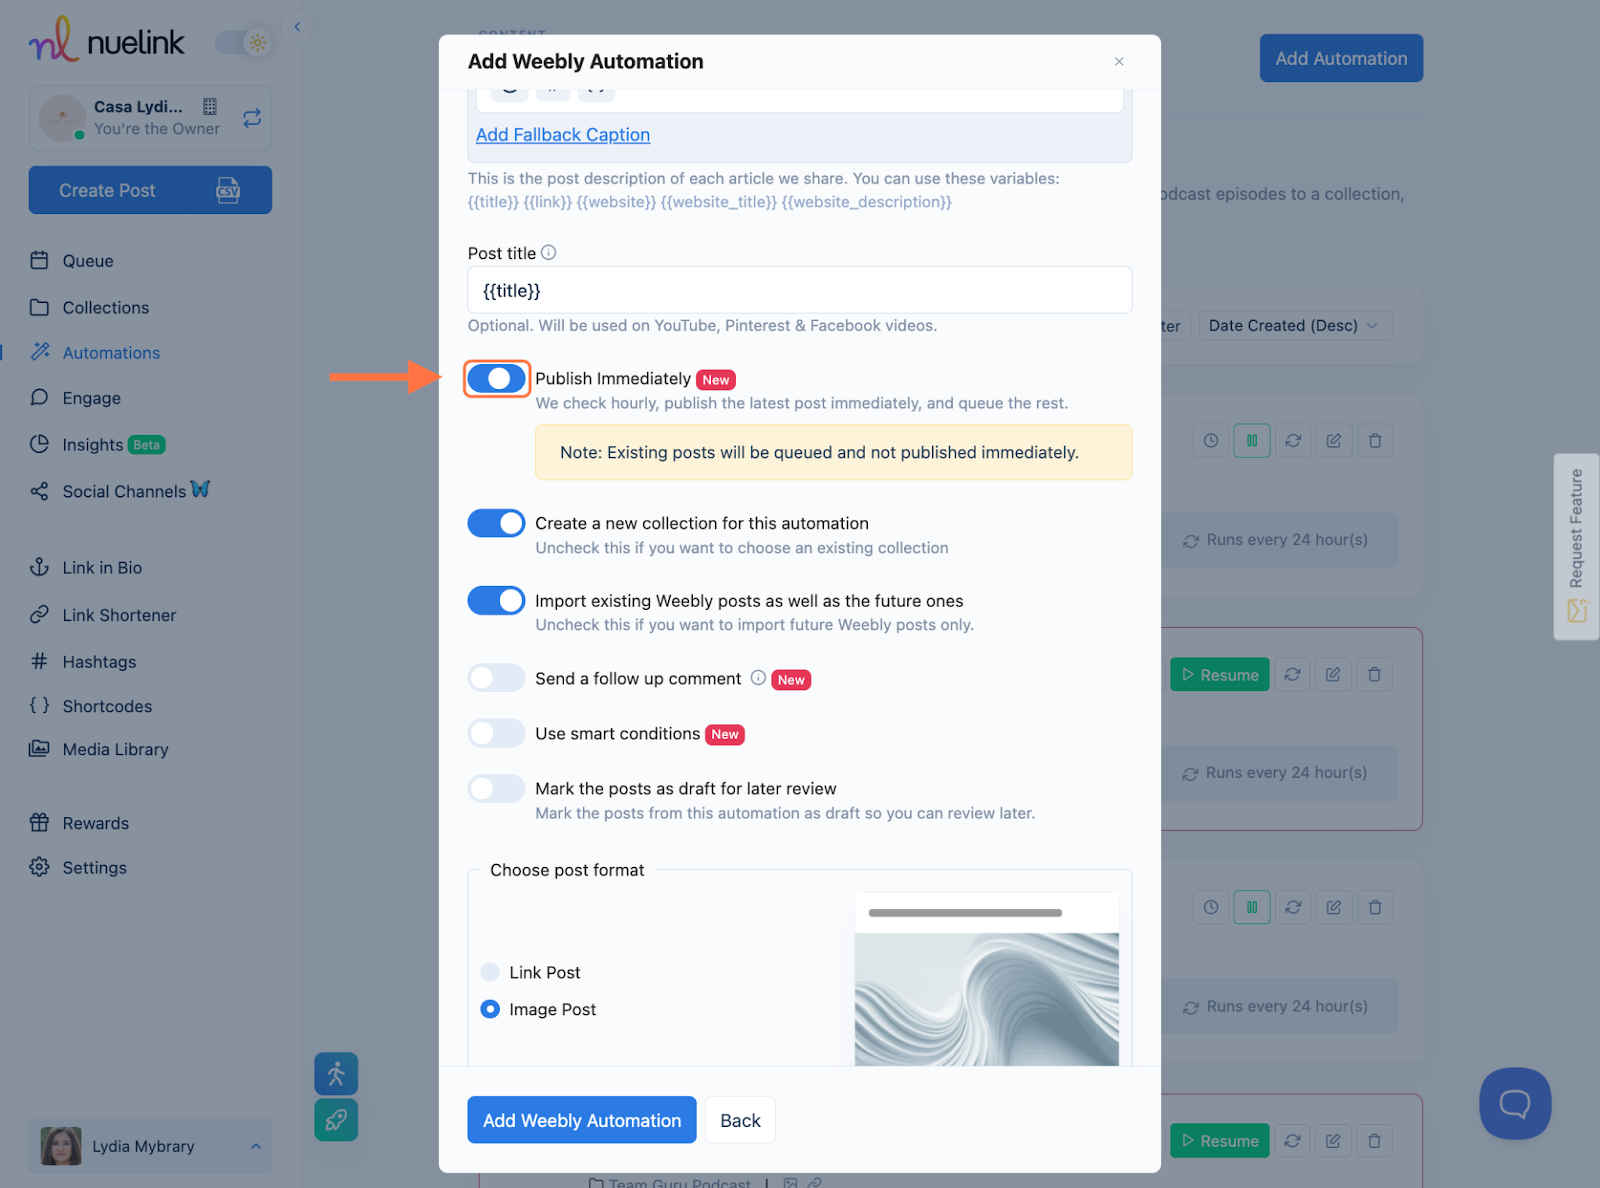
- Turn on “Published Immediately” to always post the latest blogs directly to your socials, turn it off if you would like the posting to start with the oldest blogs:
- Select when can the Nuelink automation check for new blogs to import and schedule for posting, every 1h, 6h, 12h, or 24h:
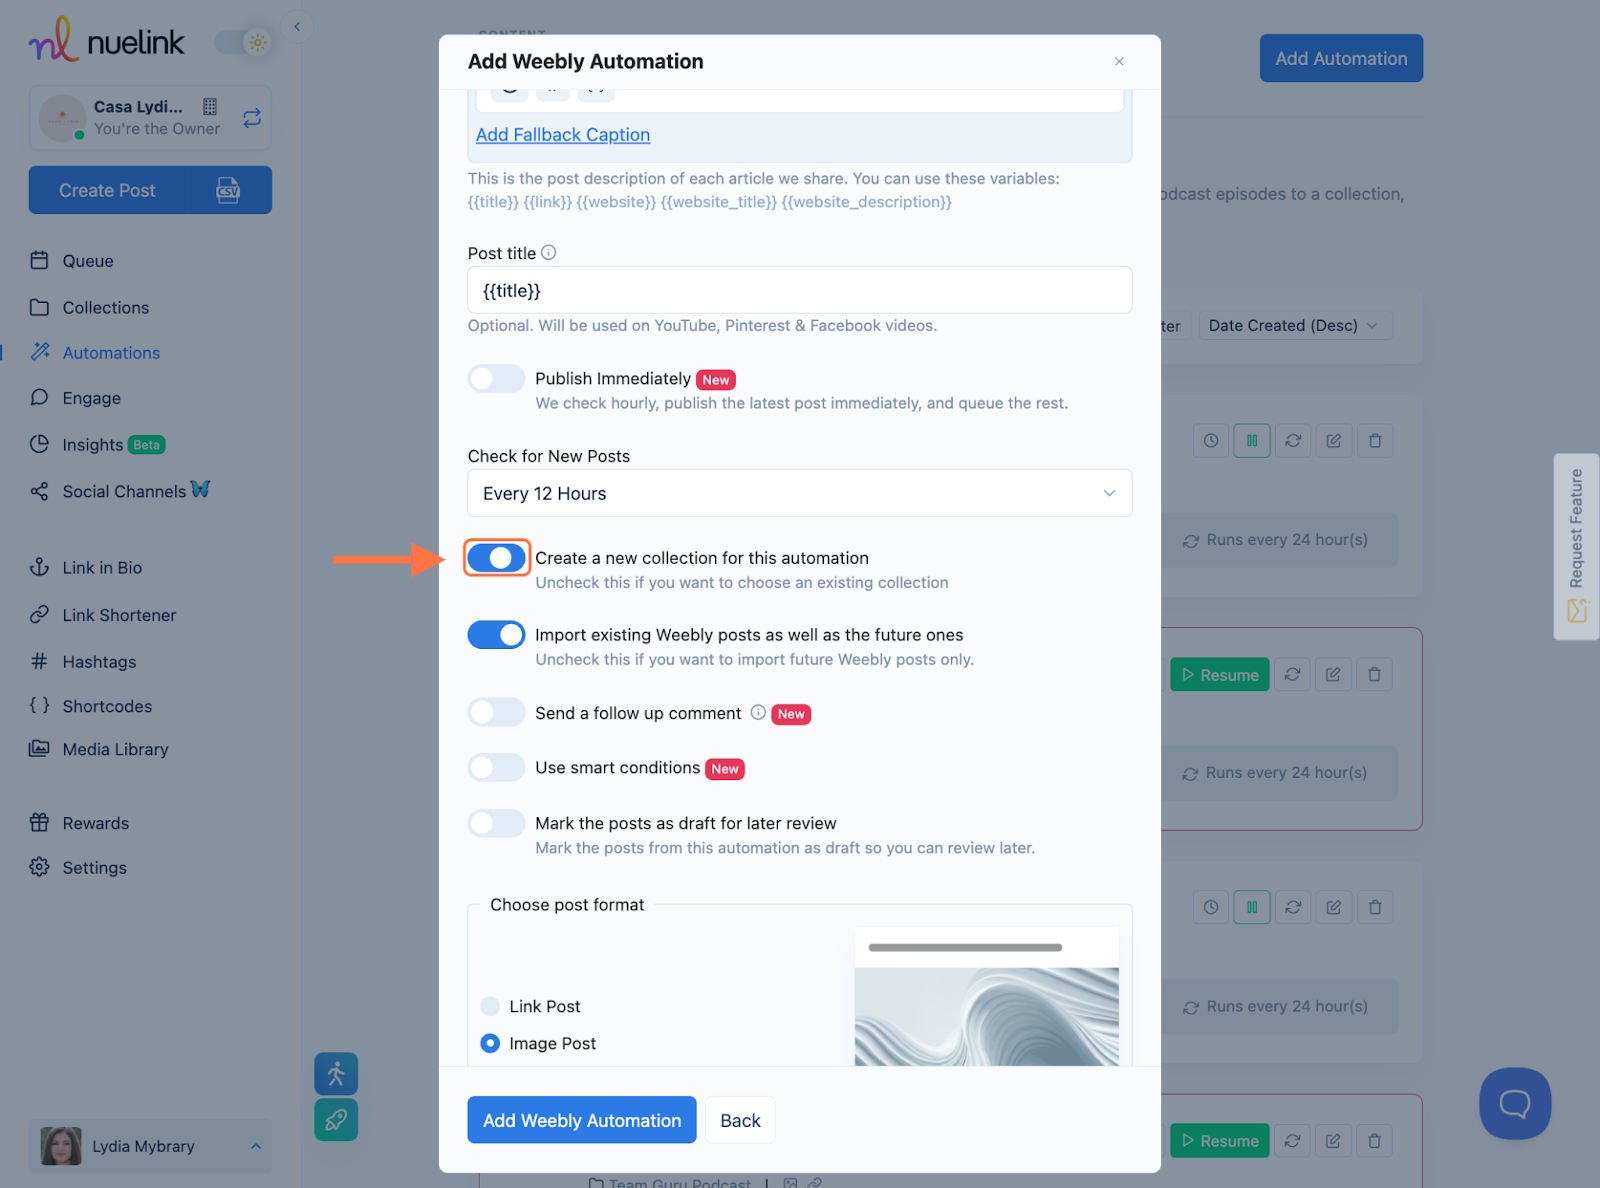
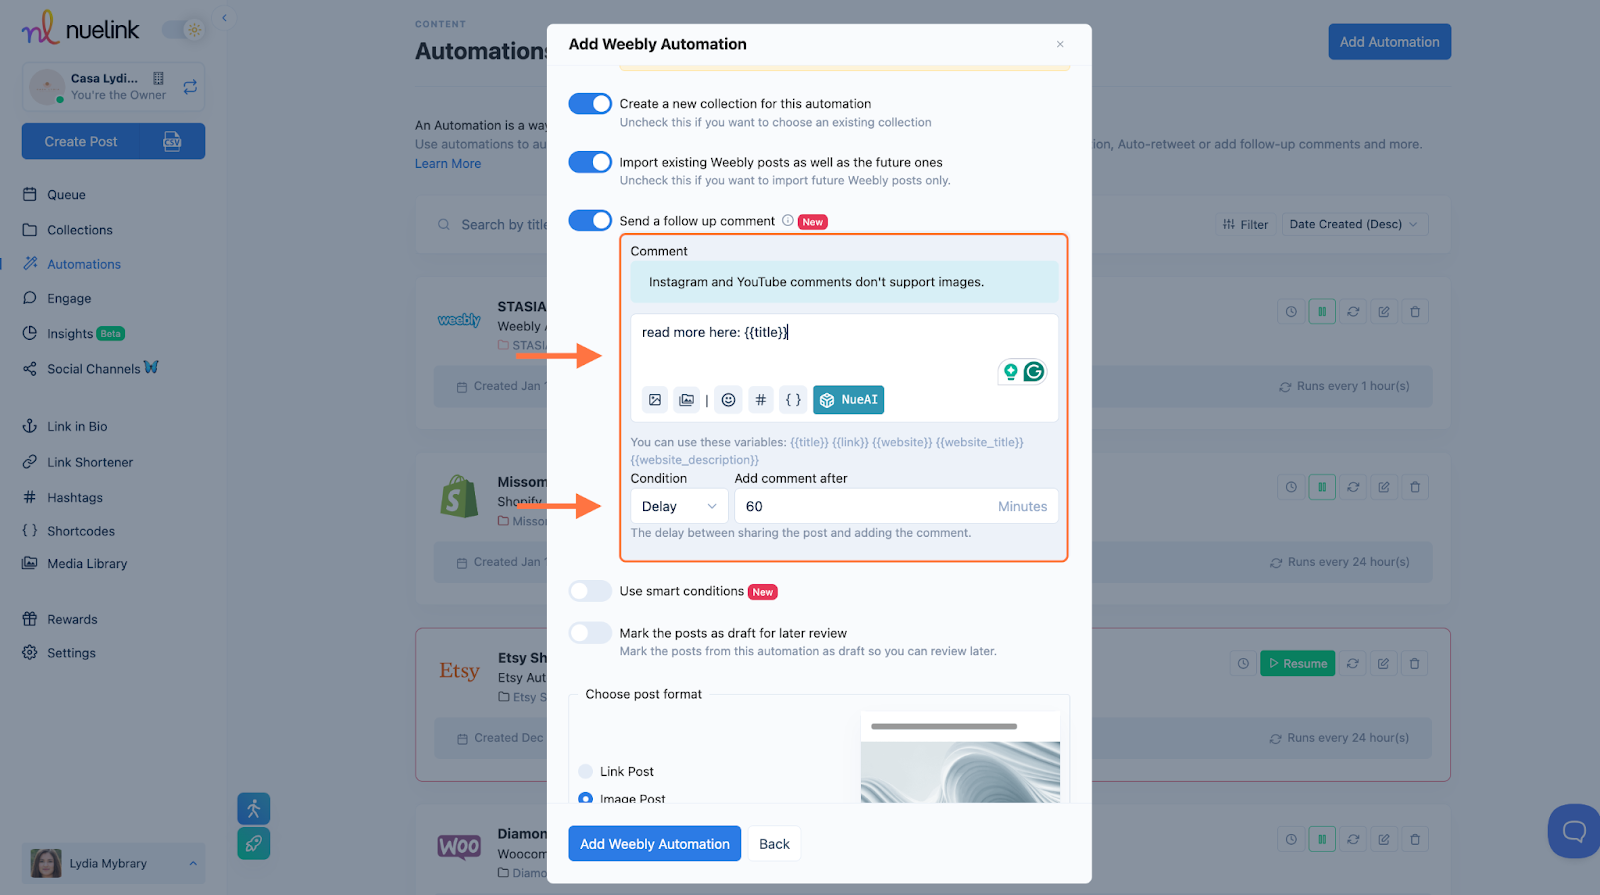
- Toggle on “Create a New Collection for This Automation” to create a new collection to schedule this collection’s posts, or you can turn it off and select a collection that you already have:
- Enable this option to keep importing the existing blogs as well as the future ones as posts:

- Enable “Follow-Up Comment” to add an engaging comment to be added to your post after it’s published, enhance it with the Nue AI assistant to make it better, add images for the platform that support images in the comments, and finally set a delay time to add the comment to the post:
- “Use Smart Conditions” allows you to import specific content by including or excluding a keyword in the title of the blog posts. Type the keyword in the box, and hit Enter:
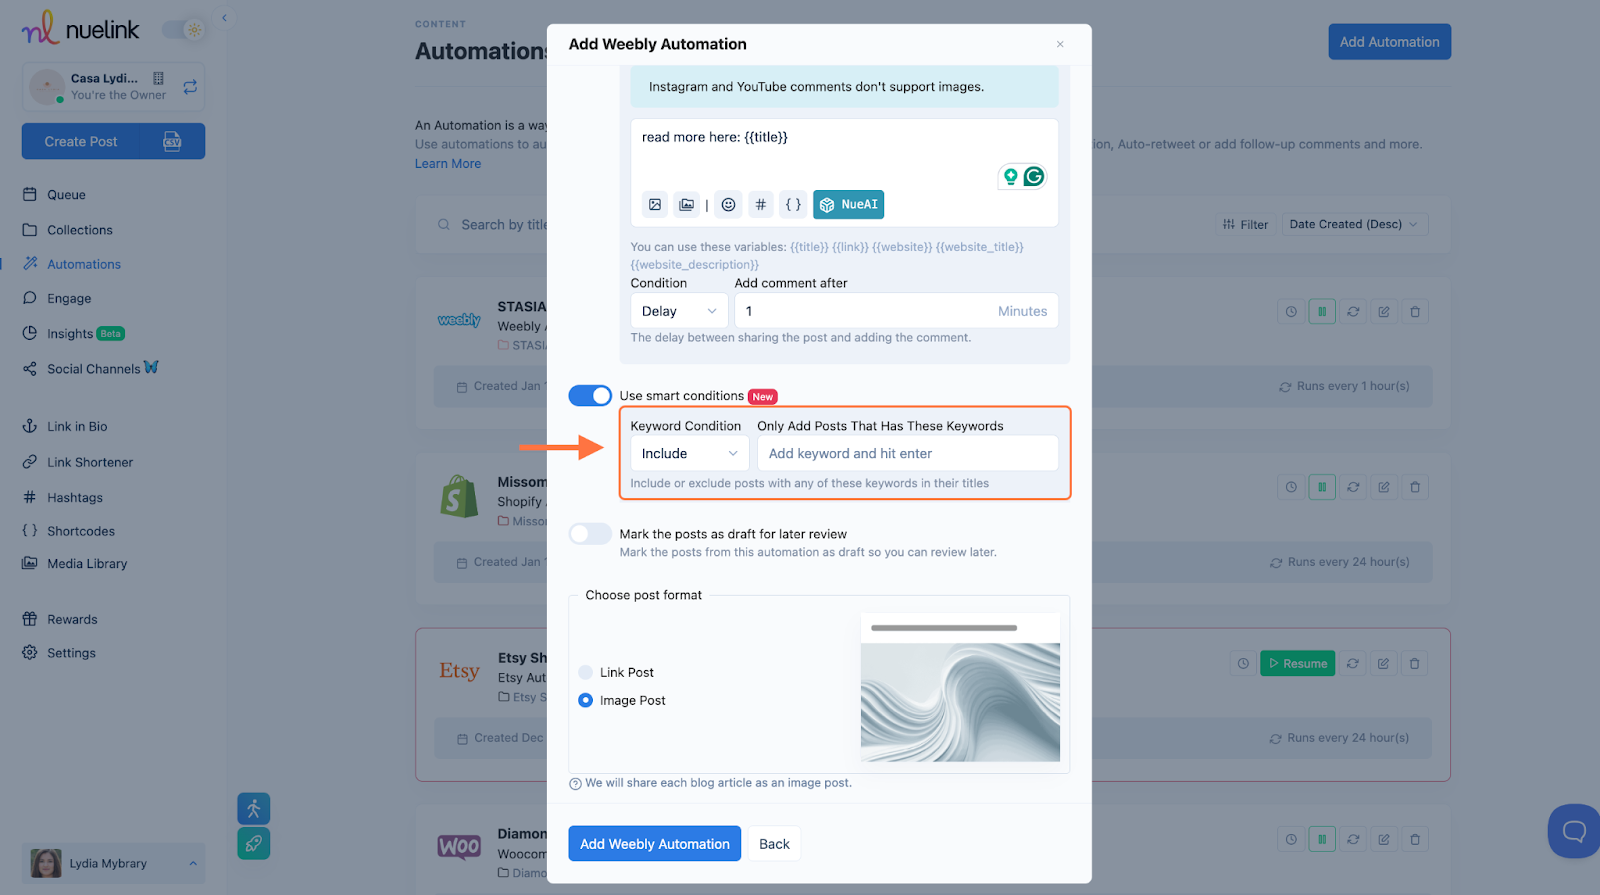
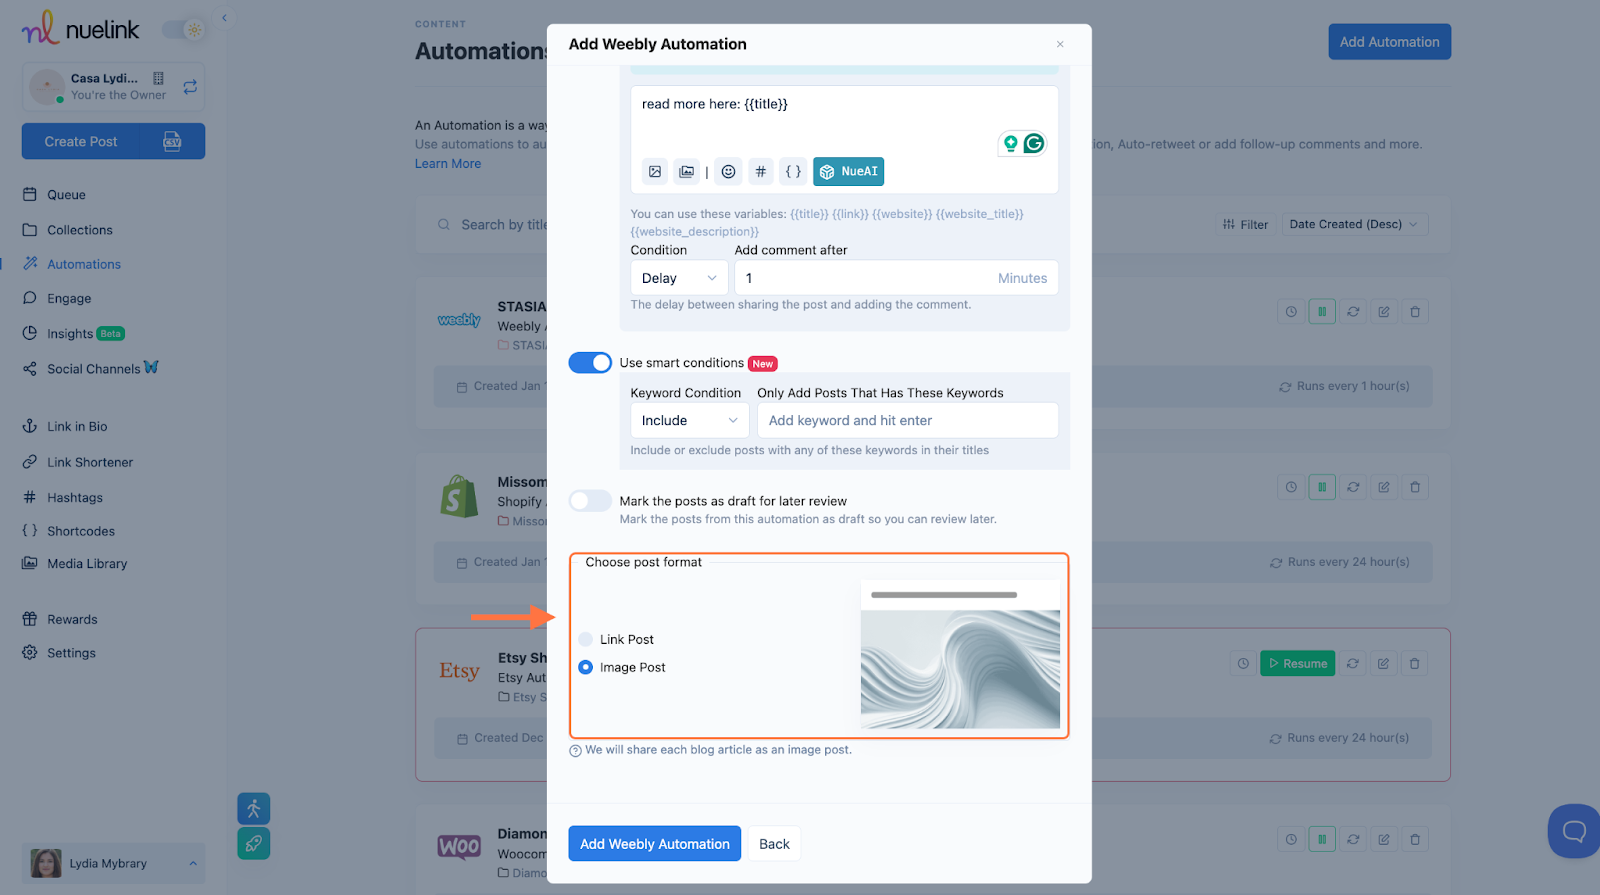
- Lastly, choose your post format, you can have your blog posts to be published as a link or as an image, by using the blog post image itself. We recommend you use the Image post format:
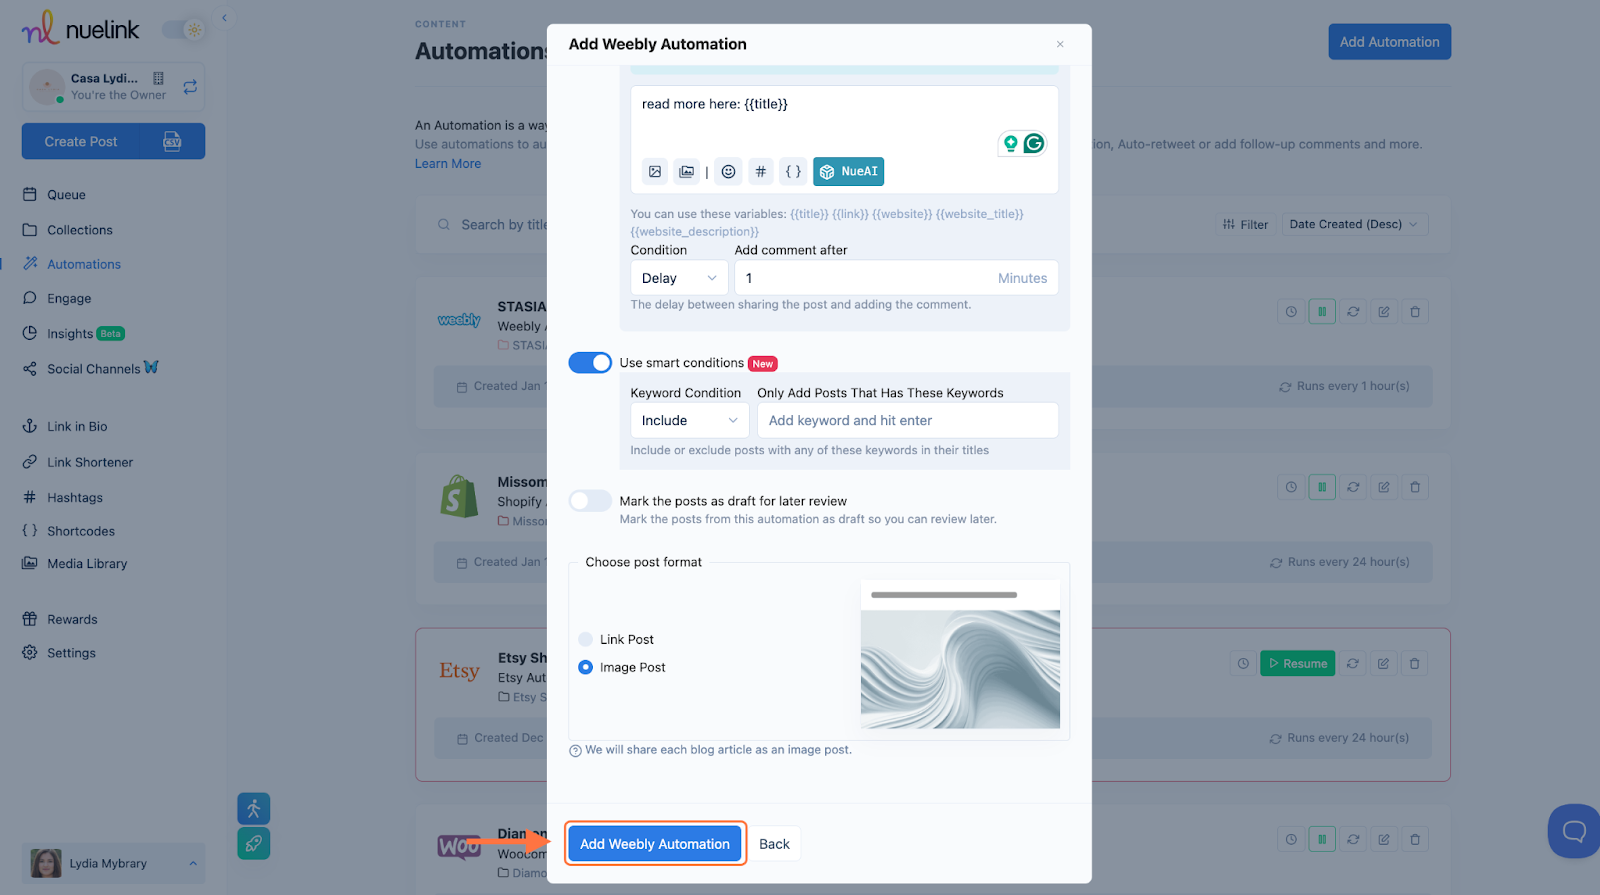
- Finish by clicking on “Add Weebly Automation”:
Schedule Weebly Automation Posts on Nuelink:
- Select the social media accounts to post your automated blogs on:

- Set your Posting schedule, choose a day or every day, set the hour and minute, and hit “Add” to save the date, you can have multiple posting times per day and week:

- Finish customizing all your posts’ scheduling settings:
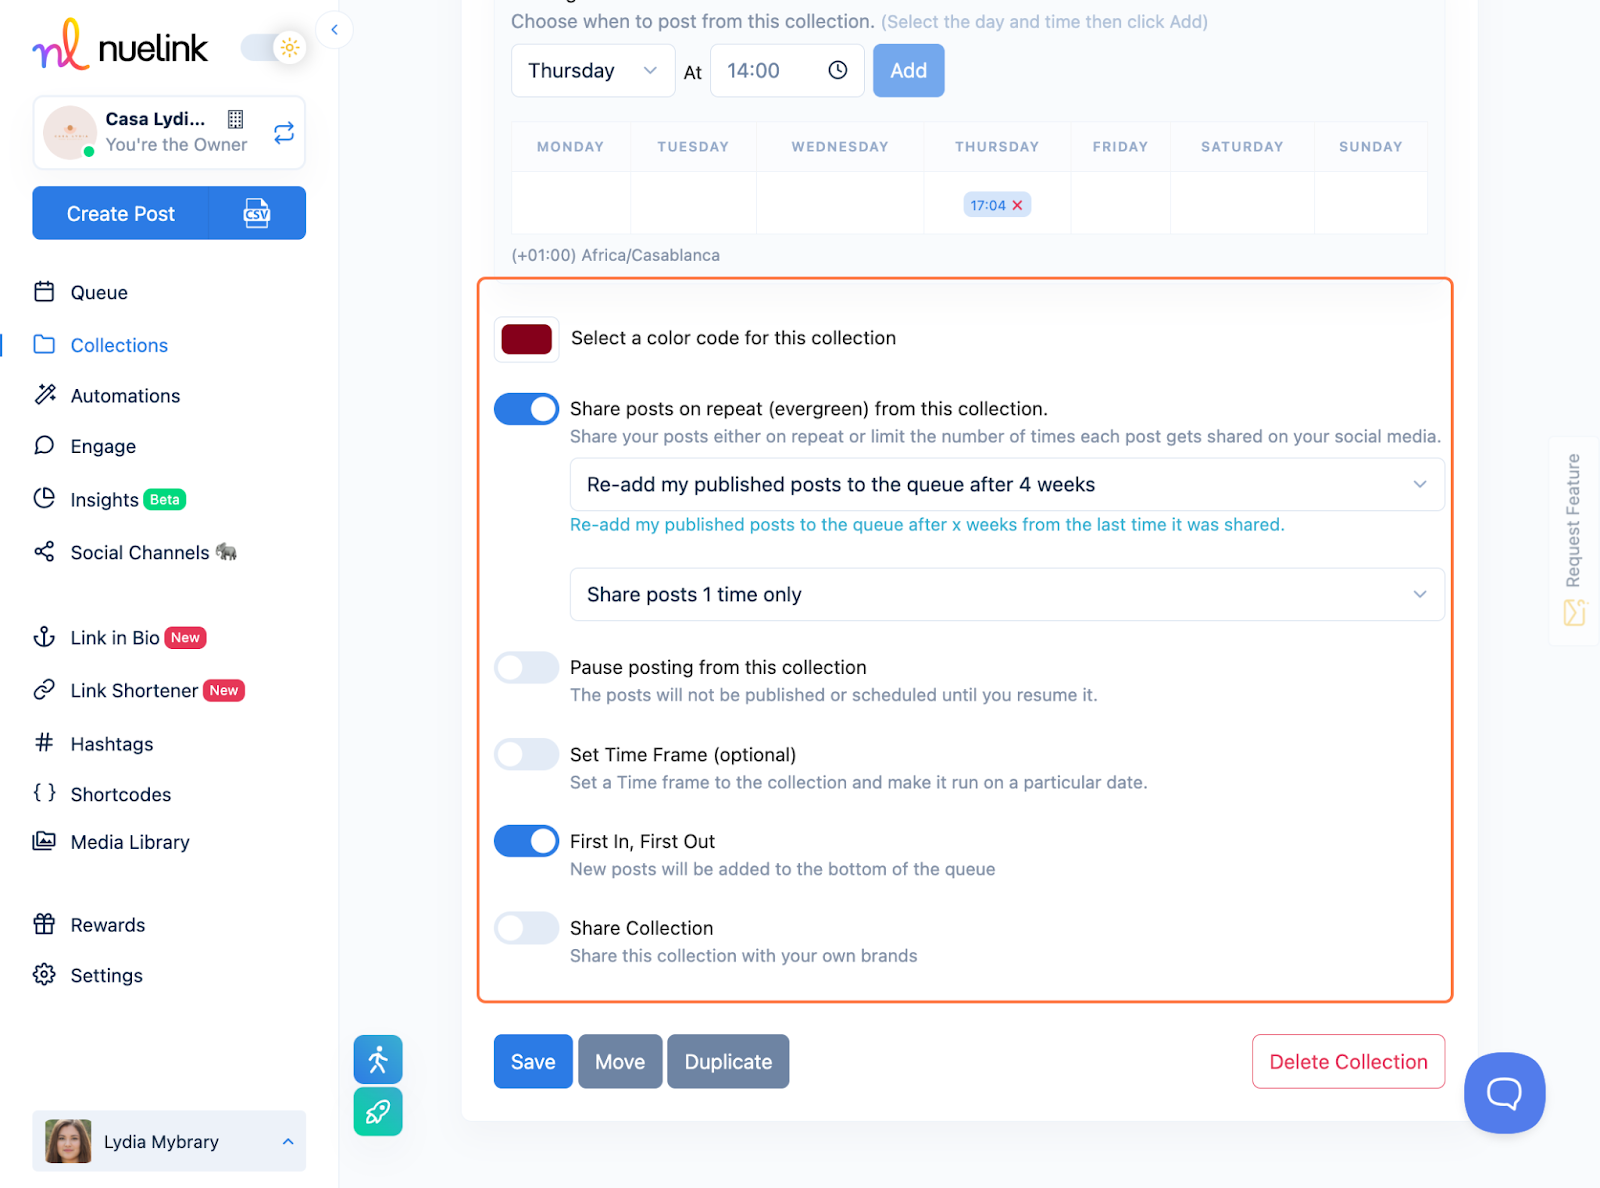
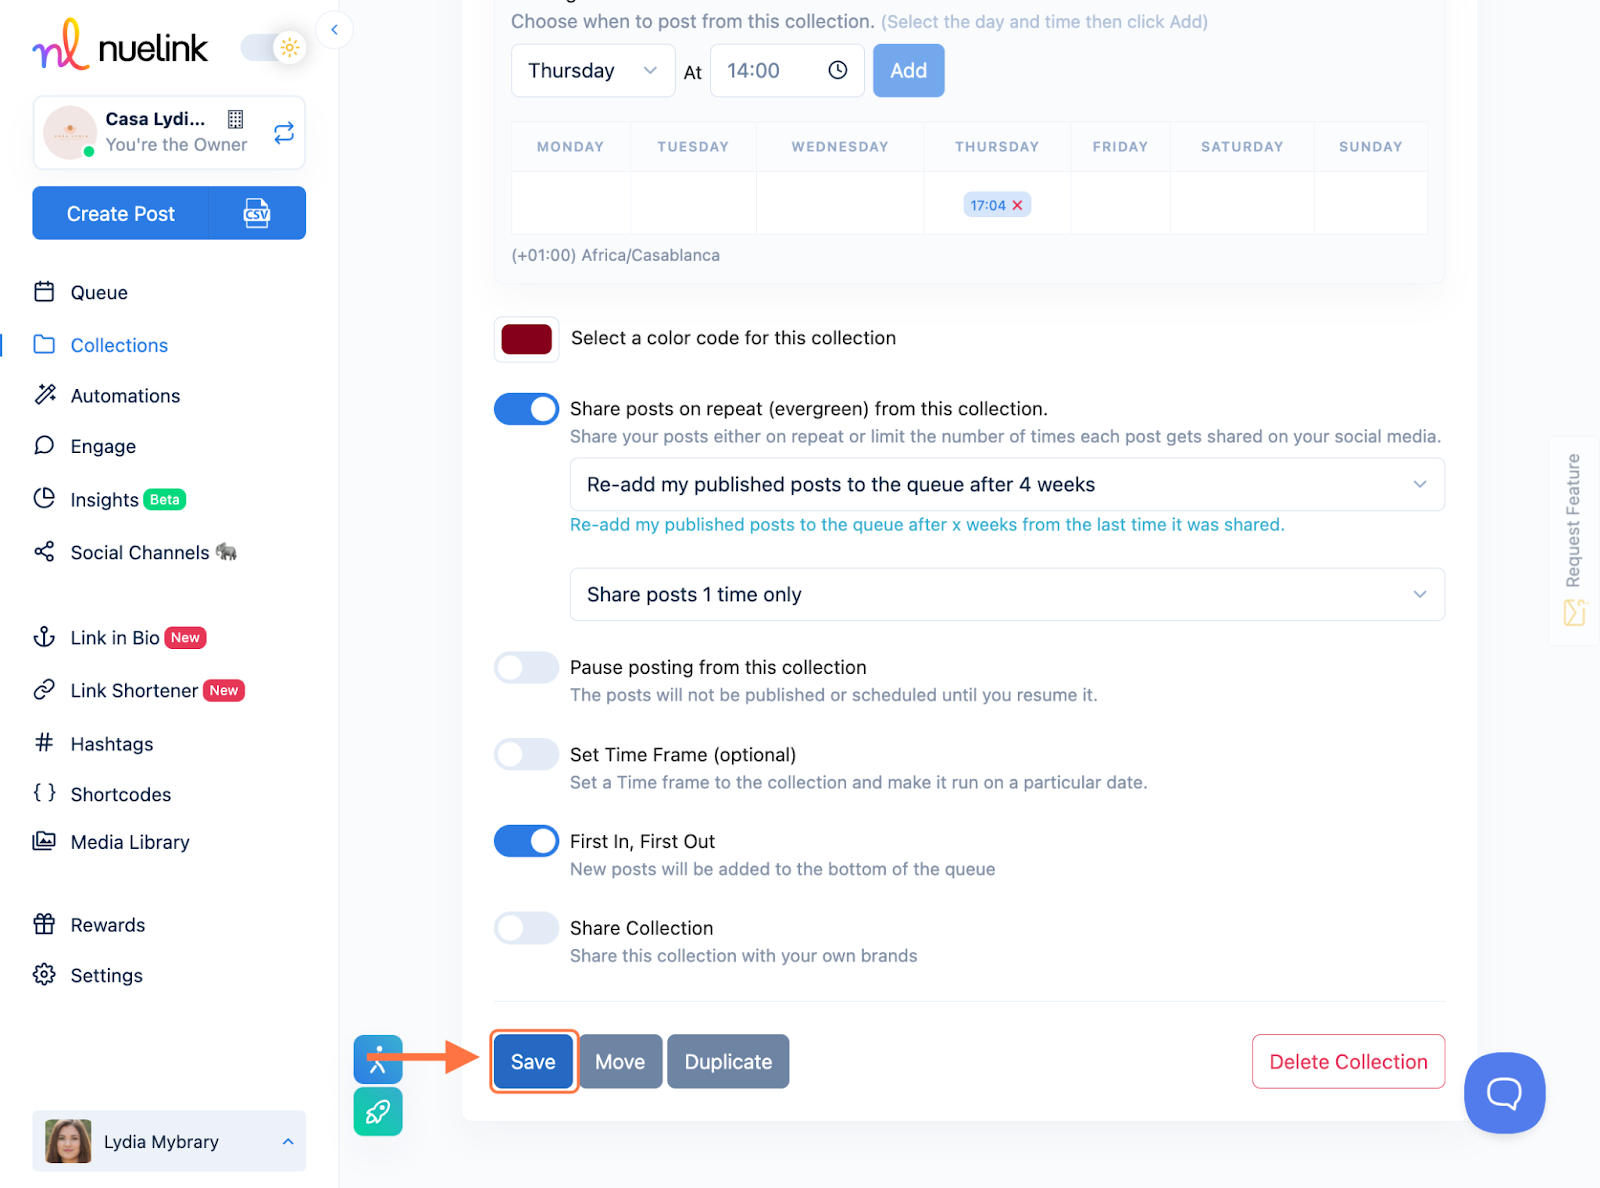
- Click on “Save” to confirm the setting of your collection settings:
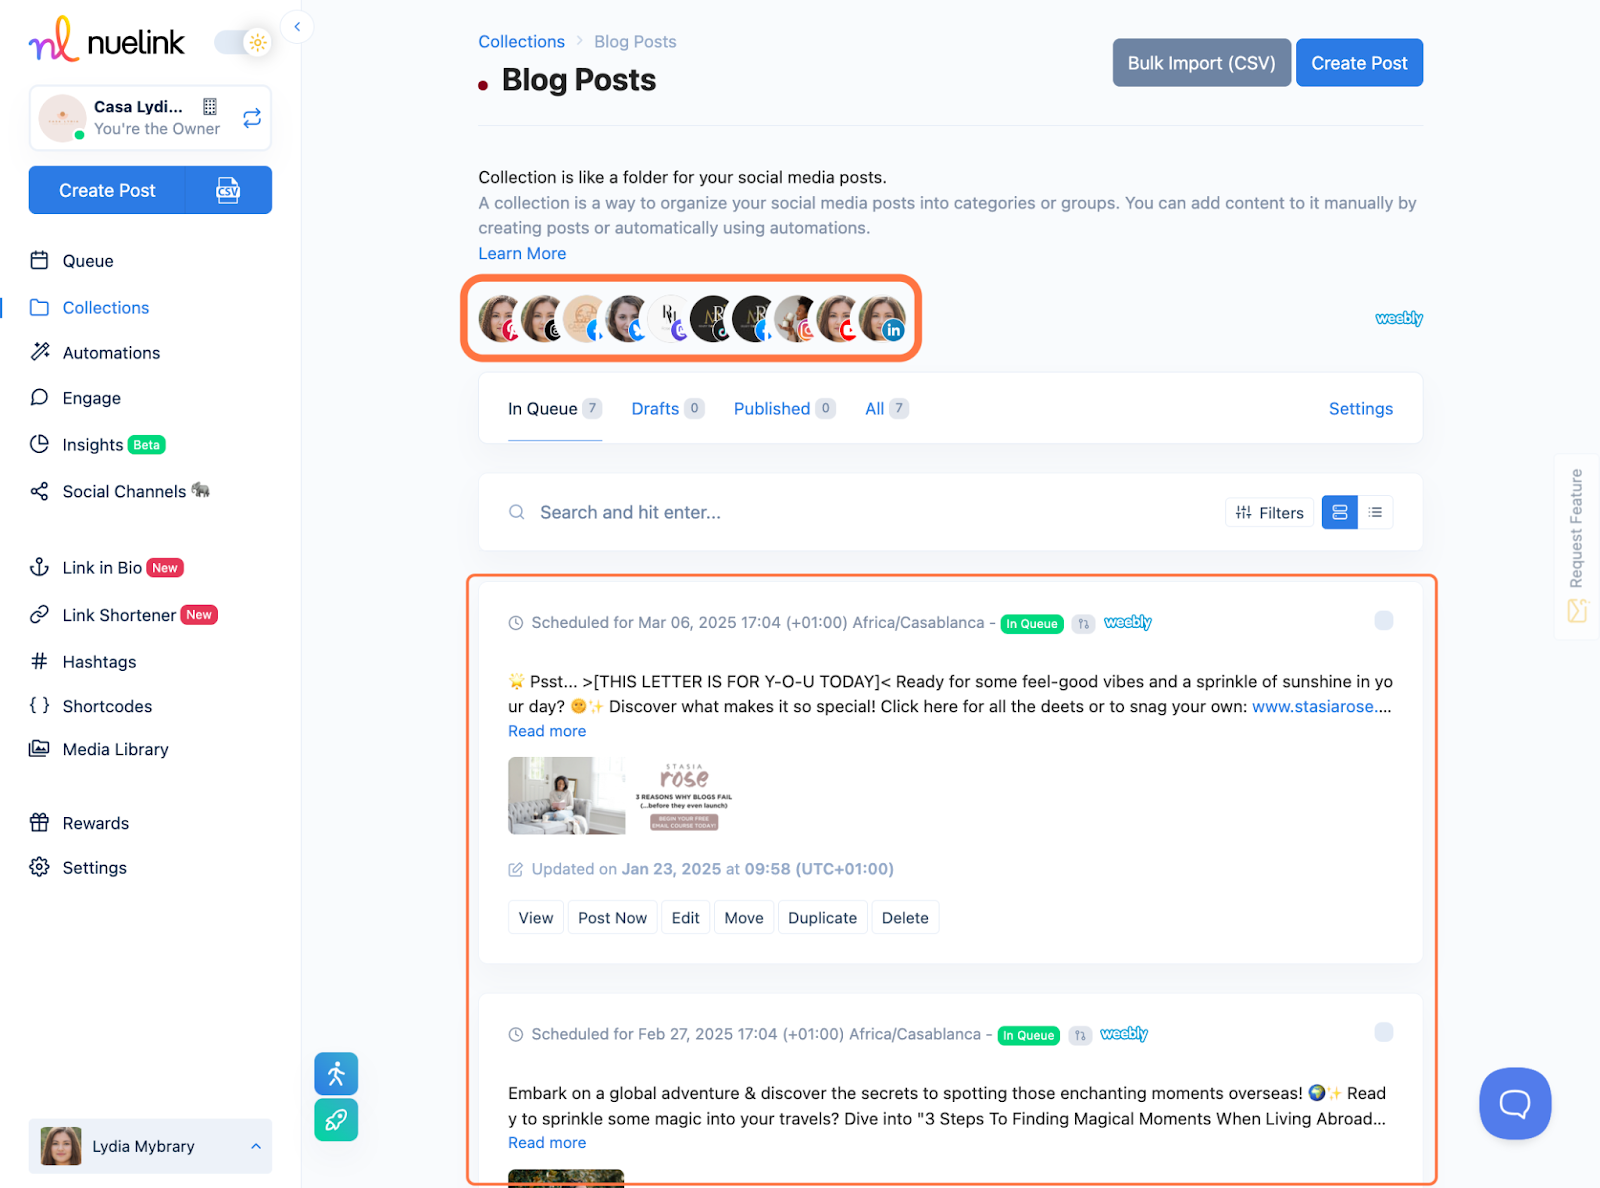
- Click on “Posts” at the top to check all your imported and scheduled Weebly blog posts:
Weebly Automation FAQs & Troubleshooting:
Finally, if you happen to have any additional inquiries, please read through our Frequently Asked Questions section.
Check our Help Center for further tutorials. We offer several videos and articles on effectively getting the maximum benefit out of Nuelink.
Still need help? Contact Us.